The MySQL CREATE DATABASE statement is used to create a new database where data can be stored and managed. It also supports optional settings like character set and collation to control how text data is stored and compared.
- MySQL Command Line Client: Create a database by executing the CREATE DATABASE SQL statement directly in the command-line interface.
- MySQL Workbench Application: Use the graphical interface of MySQL Workbench to create and manage databases visually.
MySQL Command Line Client
The MySQL Command Line Client allows you to create a database using the CREATE DATABASE statement. By entering SQL commands directly, users can efficiently manage databases, tables, and data, making it a powerful tool for database administration.
Syntax:
CREATE DATABASE [IF NOT EXISTS] database_name
[CHARACTER SET charset_name]
[COLLATE collation_name];
- database_name: Name of the database to be created.
- IF NOT EXISTS: Optional clause that prevents an error if a database with the same name already exists.
- charset_name: Optional, defines the character set used to store text.
- collation_name: Optional, specifies how character data is compared and sorted.
Implementation
The MySQL Command Line Client is installed by default when you install MySQL on your system. It allows users to interact directly with the MySQL database server using commands.
- Provides a text-based environment where users can execute SQL queries directly.
- Allows users to create, manage, and manipulate databases through SQL commands.
To create a database through the MYSQL command line client follows the below steps:
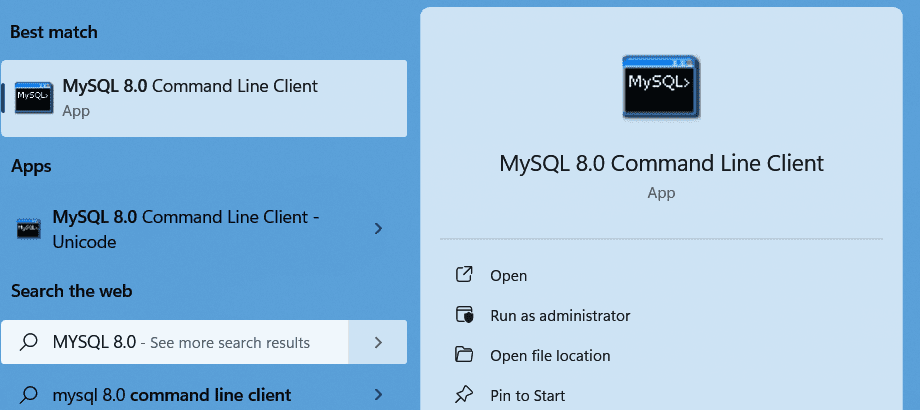
Step 1: Open MySQL Command Line Client
Search for MySQL Command Line Client from the Start menu and open the application.
Step 2: Enter Password
After opening the client, enter the MySQL root password that was set during installation.

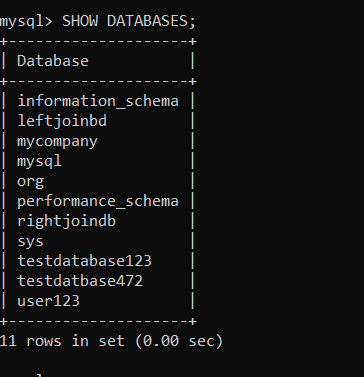
Step 3: View Existing Databases
Run the following command to see all databases currently available in the system.
SHOW DATABASES;Output:
Step 4: Create a New Database
Execute the following command to create a new database.
CREATE DATABASE IF NOT EXISTS DATABASE_NAME;Output:
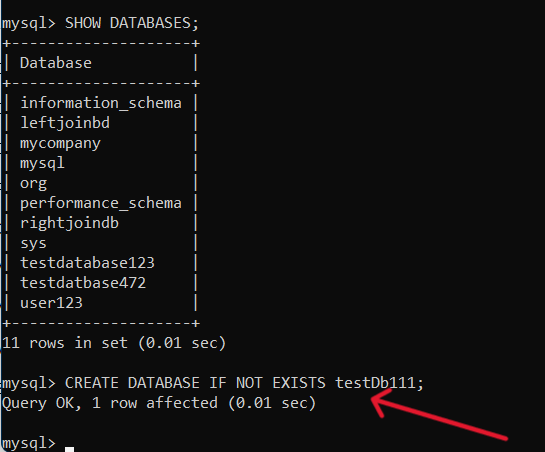
If the command runs successfully, the database will be created.
Step 5: Verify Database Creation
Run the following command again to confirm the database has been created.
SHOW DATABASES;Output:

Step 6: Use the Database
To start working with the database, run the following command:
USE DATABASE_NAME;MySQL Workbench
MySQL Workbench is a graphical tool used to design, manage, and interact with MySQL databases. It provides a Graphical User Interface (GUI) that simplifies database management compared to command-line operations.
- Allows users to visually create and manage databases, tables, and queries.
- Suitable for users who prefer a graphical interface instead of working with command-line tools.
Implementation
MySQL Workbench is a graphical tool used to design, manage, and interact with MySQL databases. You can install MySQL Workbench on your system to manage databases using a graphical interface instead of command-line tools.
To create a database through MySQL Workbench follow the below steps:
Step 1: Open MySQL Workbench
Search for MySQL Workbench in the Start menu and open the application.

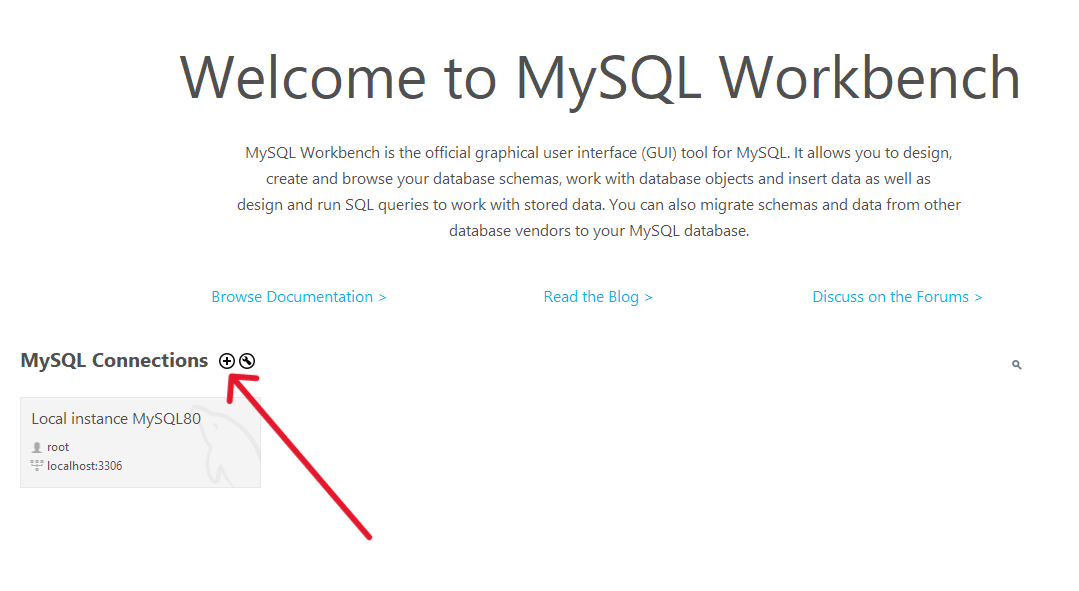
Step 2: Create a Local Connection
Click on the MySQL instance connection icon to create a new local connection.
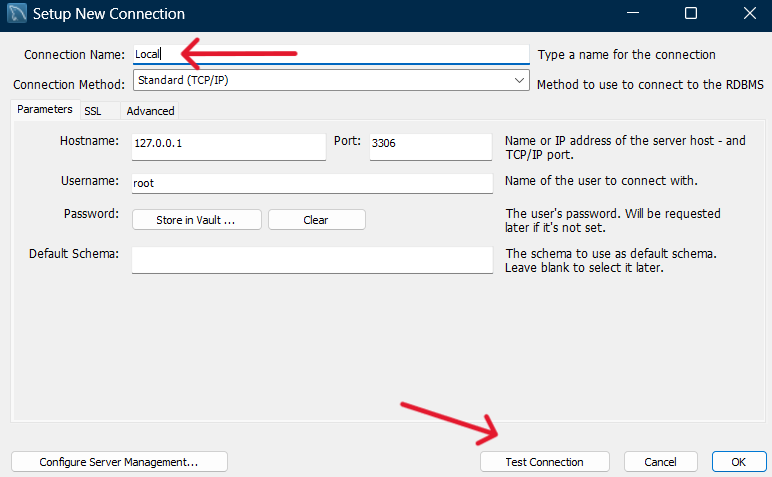
Step 3: Configure Connection
Enter Local as the connection name and click Test Connection.
Step 4: Enter Password
Provide the MySQL password that you set during MySQL installation.

Step 5: Verify Connection
If the connection is successful, a confirmation message will appear.

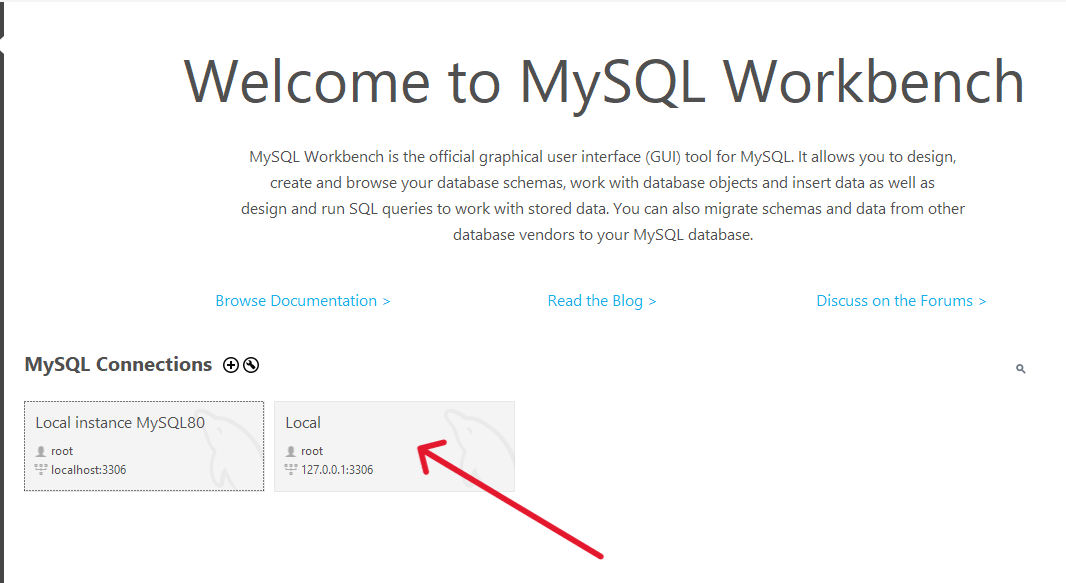
Step 6: Open the Connection
Click on the Local instance connection to open the database dashboard.
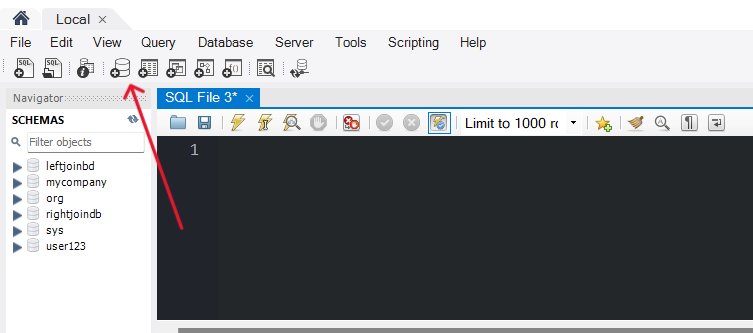
Step 7: Create Database Schema
Click the Create Schema icon in the toolbar.
Step 8: Enter Database Details
Enter the database name and optionally select character set and collation, then click Apply.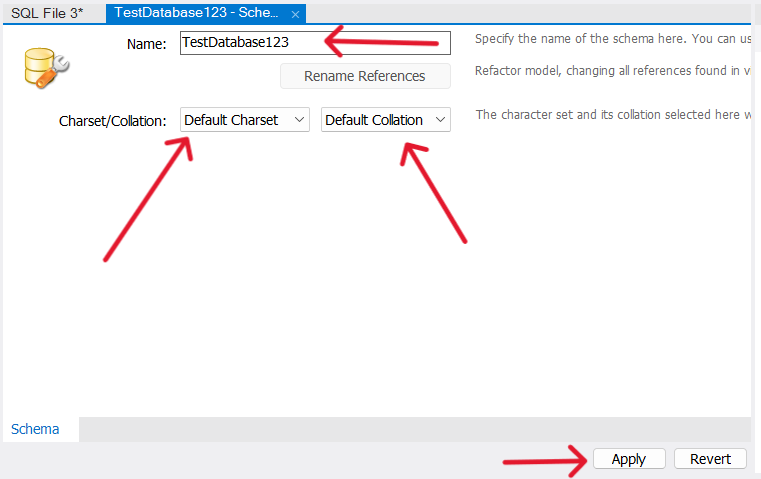
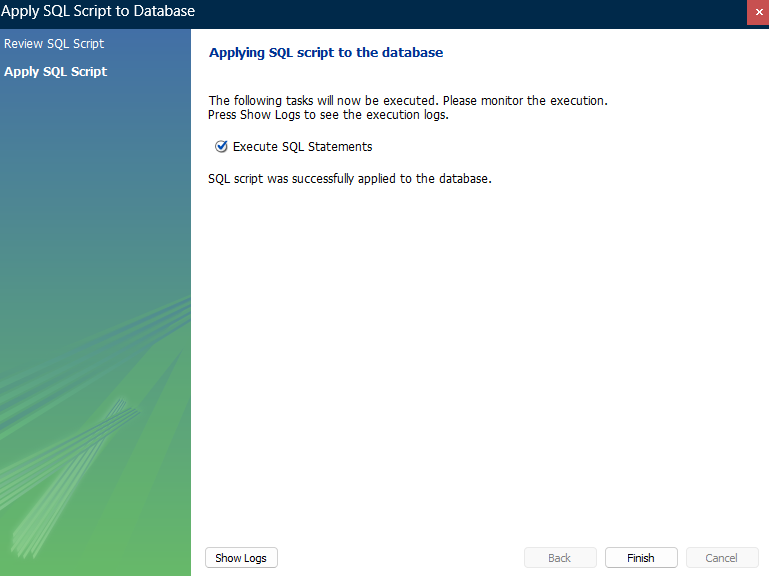
Step 9: Apply Settings
Click Apply again without changing the default settings.

Step 10: Finish Database Creation
Click Finish to complete the database creation process.
Step 11: View Created Database
You will now see the created database listed in the left-side schema panel.
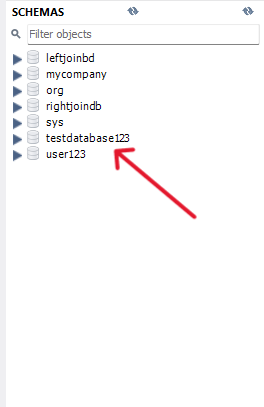
Step 12: Set Default Schema
Right-click on the database you created and click on Set, as Default Schema to use your database. Now your database is ready to use.
