React Native is a popular framework created by Facebook that allows developers to build native mobile applications using JavaScript. It enables a single codebase to power apps on multiple platforms with a native look and feel.
- Used to build native-style apps for both iOS and Android.
- Supports code reusability across platforms using JavaScript.
- Initially built for iOS, later expanded to fully support Android development.
Prerequisites
- Basic knowledge of ReactJS.
- HTML, CSS and JavaScript with ES6 syntax.
- Node.js should be installed in your system (install).
- Jdk and android studio for testing your app on emulator (install).
Approach
Now , we will learn how to create a Snackbar in React Native using a Material Design–based library. Snackbars are lightweight messages that provide brief feedback along with optional user actions.
- We will use react-native-paper, a Material Design library for React Native.
- Snackbar appears at the bottom of the screen and can be dismissed by swiping.
- A simple button click will trigger the snackbar display.
- The implementation will be explained step by step for better understanding.
Implementation
Here are the step by step implementation of Snackbar in React Native:
Step 1: Create a project in react-native using the following command:
npx react-native init DemoProjectStep 2: Install react-native paper using the following command:
npm install react-native-paperStep 3: Create a components folder inside your project. Inside the components folder create a file Snackbar.js
Project Structure: It will look like this.
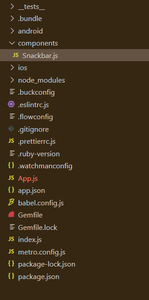
In Snackbar.js, we have imported Snackbar items directly from the react-native-paper library. It uses the following props :
1. visible: It can be true or false to show or hide the Snackbar
2. action: Label and press callback for the action button. It should contain the following properties:
- label: Label of the action button
- onPress: Callback that is called when action button is pressed.
3. onDismiss: It is a Callback function called when Snackbar is dismissed. The visible prop needs to be updated when this is called.
Filename: Snackbar.js
import React, { useState } from "react";
import { Text, View, StyleSheet, Dimensions } from 'react-native';
import { Snackbar, Button } from "react-native-paper";

const screenHeight = Dimensions.get('window').height;
const SnackbarComponent = () => {
    const [snackVisible, setSnackVisible] = useState(false);

    return (
        <View style={styles.container}>
            <View style={styles.btn}>
                <Button mode="contained"
                    onPress={() => setSnackVisible(!snackVisible)}>
                    Press
                </Button>
            </View>

            <Snackbar
                visible={snackVisible}
                onDismiss={() => setSnackVisible(false)}
                action={{ label: 'Proceed' }}>
                Welcome to GeeksForGeeks
            </Snackbar>
        </View>
    )
}
export default SnackbarComponent;

const styles = StyleSheet.create({
    container: {

        flexDirection: "column-reverse",
        justifyContent: "flex-end",
        height: screenHeight,
    },
    btn: {
        marginVertical: 50,
        alignItems: "center"
    }
})
Now, import this file to your App.js
Filename: App.js
import React from 'react';
import type { Node } from 'react';
import { View } from 'react-native';
import SnackbarComponent from './components/Snackbar';

const App: () => Node = () => {
    return (
        <View>
            <SnackbarComponent />
        </View>
    );
};

export default App;
Step to run the application: Run the application using the following command :
npx react-native run-androidOutput: