Maven dependencies are external libraries or components that your Java project requires to function properly. By managing dependencies in Maven, you ensure that the correct versions of these libraries are included and maintained.
- Simplifying Project Setup: No need to look for JAR files or worry about version mismatches.
- Ensuring Compatibility: Maven handles version conflicts and transitive dependencies.
- Streamlining Builds: Dependencies are downloaded once and cached locally for reuse.
Maven categorizes dependencies into two main types:
How Dependencies Work in Maven?
Dependencies are declared in the pom.xml file. This file is essential for Maven projects as it contains information about the project and configuration details used by Maven to build the project.
Here’s how dependencies are declared in pom.xml:
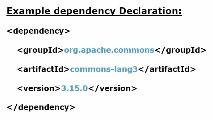
Declaration: Add dependencies in the pom.xml file under <dependencies> with details like groupId, artifactId, version, and scope.
Resolution: Maven downloads libraries from repositories (e.g., Maven Central), stores them locally in the .m2 directory, and adds them to your project.
Scope: Defines where the dependency is used:
compile: Available in all phases (default).provided: Required for compilation but provided at runtime.runtime: Needed during execution only.test: Used for testing phases.
Understanding Maven Dependencies
Once declared, Maven automatically downloads these dependencies from the repository and includes them in your project.
Before Maven, developers manually downloaded JAR files, placed them in a specific folder, and added them to the project classpath. This process was tedious and prone to errors, especially when managing multiple dependencies and their versions.
With Maven, you only need to declare the dependencies in the pom.xml file. Maven automates the process, ensuring the correct versions are downloaded and added to the project.
Adding Dependencies Manually
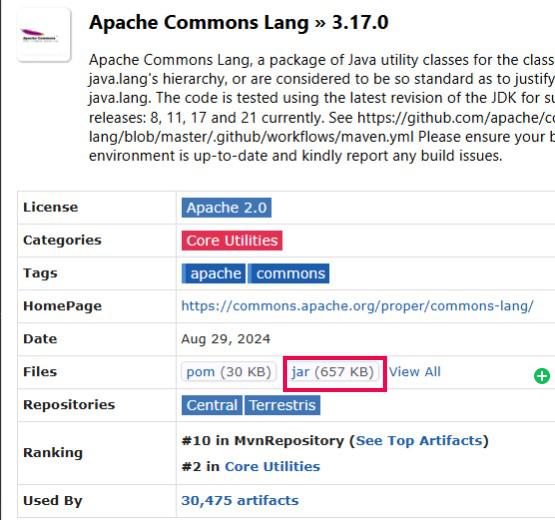
Here’s an example of adding Apache Commons Lang to a Maven project:
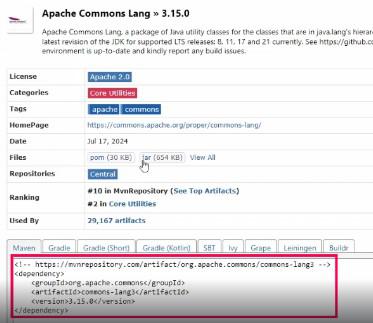
Step 1: Go to the Official website of the Apache Commons Lang maven
Step 2: Manually download the JAR file and add it to your project’s lib folder.
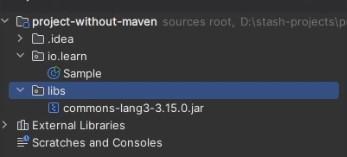
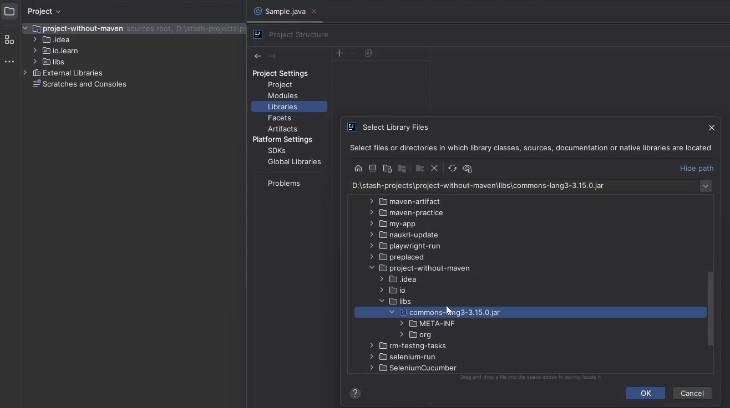
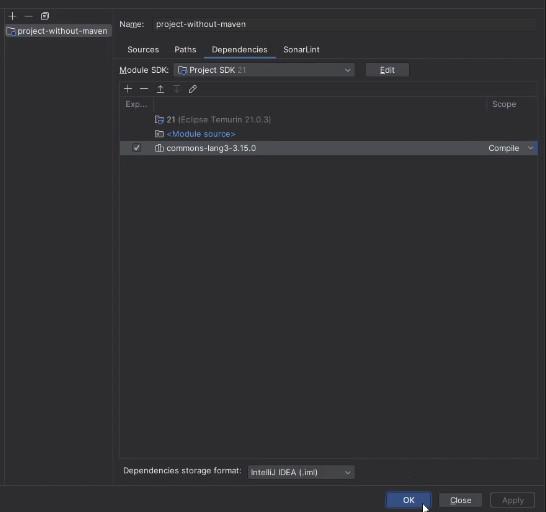
Step 3: Add the JAR to the project classpath.
Using Maven and dependency in pom.xml
Step 1: For these one Go to the Official website of the Apache Commons Lang maven
Step 2: Declare the dependency in the pom.xml file.
<project xmlns="http://maven.apache.org/POM/4.0.0" xmlns:xsi="http://www.w3.org/2001/XMLSchema-instance"
xsi:schemaLocation="http://maven.apache.org/POM/4.0.0 http://maven.apache.org/xsd/maven-4.0.0.xsd">
<modelVersion>4.0.0</modelVersion>
<groupId>com.learn</groupId>
<artifactId>maven-practice</artifactId>
<version>1.0-SNAPSHOT</version>
<packaging>jar</packaging>
<name>selenium-practice</name>
<url>http://maven.apache.org</url>
<properties>
<project.build.sourceEncoding>UTF-8</project.build.sourceEncoding>
</properties>
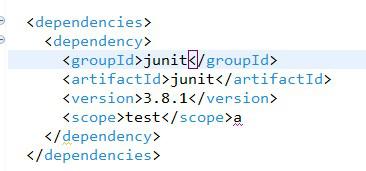
<dependencies>
<dependency>
<groupId>junit</groupId>
<artifactId>junit</artifactId>
<version>3.8.1</version>
<scope>test</scope>a
</dependency>
<!-- https://mvnrepository.com/artifact/org.apache.commons/commons-lang3 -->
<dependency>
<groupId>org.apache.commons</groupId>
<artifactId>commons-lang3</artifactId>
<version>3.17.0</version>
</dependency>
</dependencies>
</project>
Maven downloads and includes the JAR automatically.
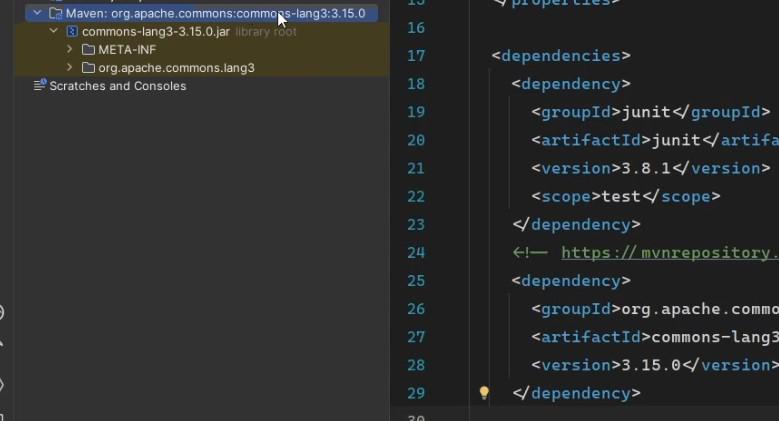
Now you can modify as per your need of version of the same of Dependency in the pom.xml it will automatically download the jar files in the project.
Transitive Dependencies
We can take the TestNG Example
<!-- https://mvnrepository.com/artifact/org.testng/testng -->
<dependency>
<groupId>org.testng</groupId>
<artifactId>testng</artifactId>
<version>7.10.2</version>
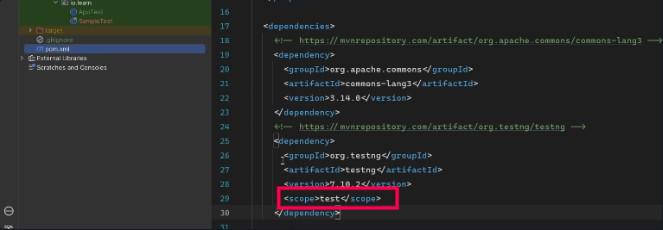
<scope>test</scope>
</dependency>
When we add the testNG Dependency it will automatically Add the Extra Dependency
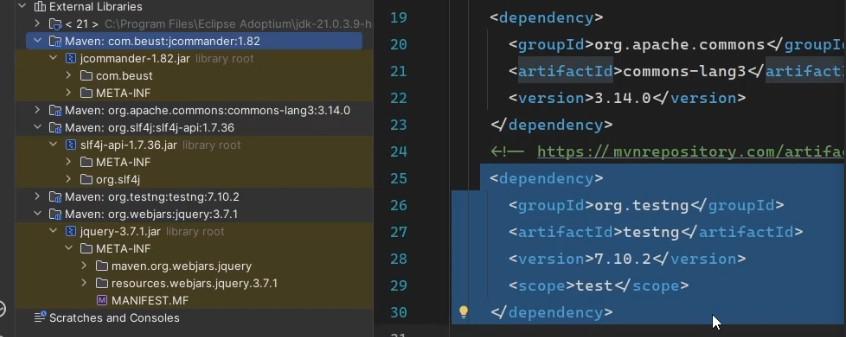
Transitive dependencies are dependencies of dependencies. For example, if your project depends on library A, which in turn depends on library B, Maven will download both A and B.
This feature simplifies dependency management, as you don't need to manually add each nested dependency. However, it can also lead to version conflicts if different dependencies require different versions of the same library.
Dependency Scopes
Dependency scope determines during which phase a dependency is available. Maven supports several scopes:
- Compile: Default scope; available at compile time, runtime, and test time.
- Provided: Required for compilation and testing but provided at runtime.
- Runtime: Available only at runtime and during testing.
- Test: Available only during testing.
- System: Dependencies explicitly provided by the user, not available in repositories.
- Import: Used in dependency management for managing versions of dependencies.
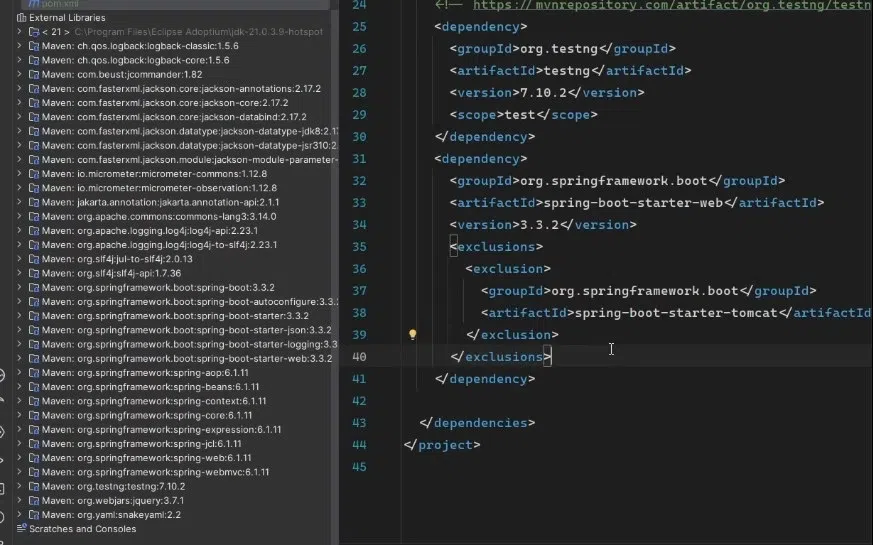
Dependency Exclusion in Maven
Handling Transitive Dependency Conflicts
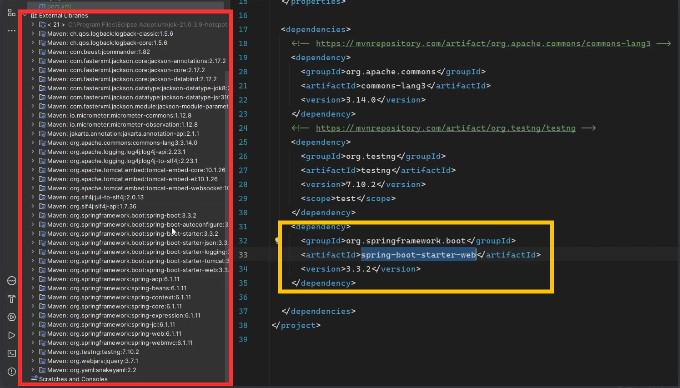
Maven allows excluding specific transitive dependencies to resolve version conflicts.
<dependency>
    <groupId>org.springframework.boot</groupId>
    <artifactId>spring-boot-starter-web</artifactId>
    <version>2.3.2</version>
<dependency>
It will give the dependencies addition of the same in the project
exclusions Tag uses:
For instance, if you want to use Jetty instead of Tomcat in a Spring Boot project, you can exclude Tomcat and add Jetty:
   <exclusion>
            <groupId>org.springframework.boot</groupId>
            <artifactId>spring-boot-starter-tomcat</artifactId>
        </exclusion>
    </exclusions>
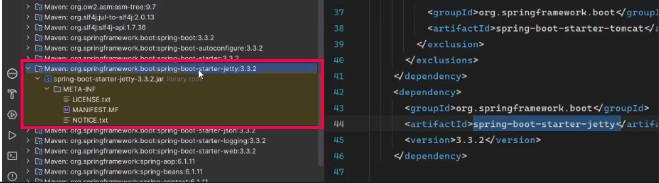
After these there is no Tomcat in a Spring Boot project
And instead of Tomcat server we are using Jetty
<dependency>
    <groupId>org.springframework.boot</groupId>
    <artifactId>spring-boot-starter-jetty</artifactId>
    <version>3.3.2</version>
</dependency>
This will add the Jetty Dependencies in the project:
Dependency Management of Maven with Selenium
Managing Maven dependencies for Selenium in your project is essential for ensuring smooth integration and functionality. To begin, you need to add the required Selenium and TestNG dependencies in the pom.xml file under the <dependencies> section.
<dependencies>
        <!-- Direct Dependency: Selenium Java -->
        <dependency>
            <groupId>org.seleniumhq.selenium</groupId>
            <artifactId>selenium-java</artifactId>
            <version>4.26.0</version>
        </dependency>
        <!-- Direct Dependency: TestNG for Testing -->
        <dependency>
            <groupId>org.testng</groupId>
            <artifactId>testng</artifactId>
            <version>7.10.2</version>
            <scope>test</scope>
        </dependency>
</dependencies>
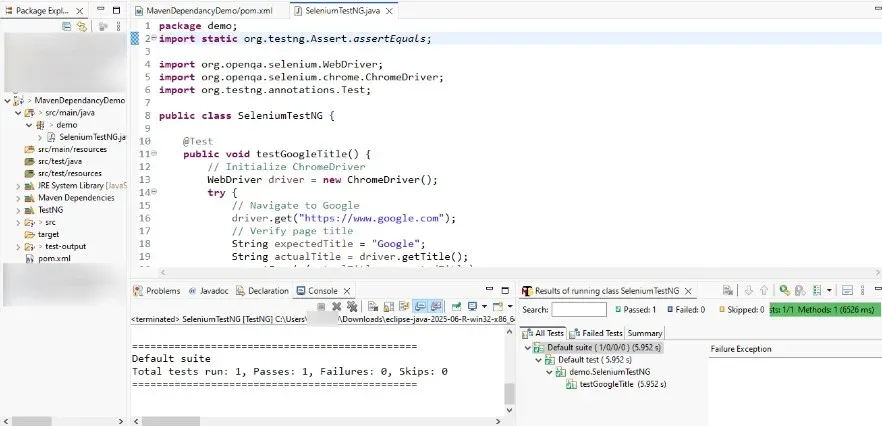
Save with ctrl+s or Run mvn clean install to download and link dependencies to your project. Create a class in the project and update the code of the selenium test with testNG.
SeleniumTestNG.java
package demo;


import static org.testng.Assert.assertEquals;

import org.openqa.selenium.WebDriver;
import org.openqa.selenium.chrome.ChromeDriver;
import org.testng.annotations.Test;

public class SeleniumTestNG {

    @Test
    public void testGoogleTitle() {
        // Initialize ChromeDriver
        WebDriver driver = new ChromeDriver();
        try {
            // Navigate to Google
            driver.get("https://www.google.com");
            // Verify page title
            String expectedTitle = "Google";
            String actualTitle = driver.getTitle();
            assertEquals(actualTitle, expectedTitle);
            System.out.println("Test passed: Title is " + actualTitle);
        } finally {
            // Close the browser
            driver.quit();
        }
    }
}
Output: