Filters in Microsoft Power BI help refine data in reports by displaying only the information that meets specific conditions. They allow users to focus on relevant data subsets, making visualizations clearer and analysis more effective. Filters can be applied at the visual, page, or report level to control how data appears across a report.

Types of Power BI Filters
Power BI provides different types of filters to control how data is displayed at various levels in a report:
- Visual-level Filters: Apply only to a specific visual. They allow you to control the data shown in that particular chart or table without affecting others.
- Page-level Filters: Apply to all visuals on a single report page. Any filter applied here updates every visual on that page, ensuring consistent analysis.
- Report-level Filters: Apply across all pages in the report. These filters maintain uniform data conditions throughout the entire report.
- Drill-through Filters: Allow navigation to another page with filtered context. They help in analyzing detailed data related to a selected data point.
Add a Filter to a Report in Power BI
There are three main filter modes in Power BI that help us control which data is displayed:
1. Basic Filtering
Basic filtering is the simplest and most intuitive filter mode. It provides a scrollable and searchable list of values for a specific field in our data. We can quickly search for a value and select it or use checkboxes to select multiple values.
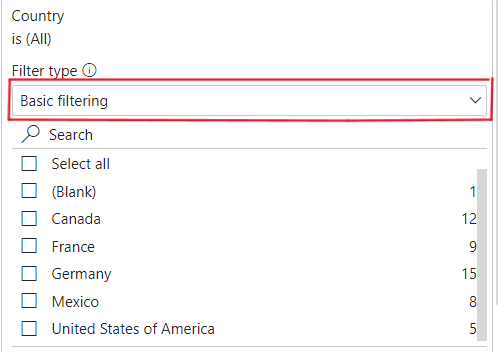
This mode is ideal for situations where we simply want to focus on one or more data points without needing to apply complex conditions. For example, we can filter by specific countries or product categories with ease.
2. Advance Filtering
Advanced filtering gives us greater control over how data is filtered by allowing us to define more specific criteria. Instead of just selecting from a list, we can apply rules such as greater than, less than, between a range of values or even exclude certain values.

This mode is useful when we need to filter data based on numerical ranges or specific conditions. For example, we might want to exclude certain countries from the report or filter products with sales above a specific threshold.
3. Top-N Filtering
Top-N filtering is used when we want to focus on the highest or lowest N values in a dataset. This filter type allows us to quickly identify top performers or outliers. We can specify how many top or bottom items we want to display such as the top 5 countries by sales or the bottom 3 products by revenue.

Top-N filters are useful in identifying trends or analyzing the extremes within our data. For example, we might filter for the top 10 products in terms of sales or the lowest 5 regions in terms of performance.
How to add Power BI Filter to a Visual?
We can add Power BI filters to a Visual using the following steps:
Step 1: Select the Visual
First, we select the visual we want to apply the filter to. This could be any chart, table or card.
- Once we select the visual the "Filters on this visual" option will appear in the Filters panel on the right side of the screen.
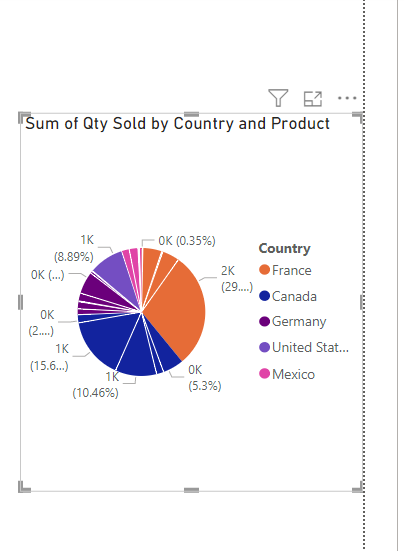
- For example, after selecting a pie chart, we will see the "Filters on this visual" section appear showing that we can now apply filters specific to that visual.

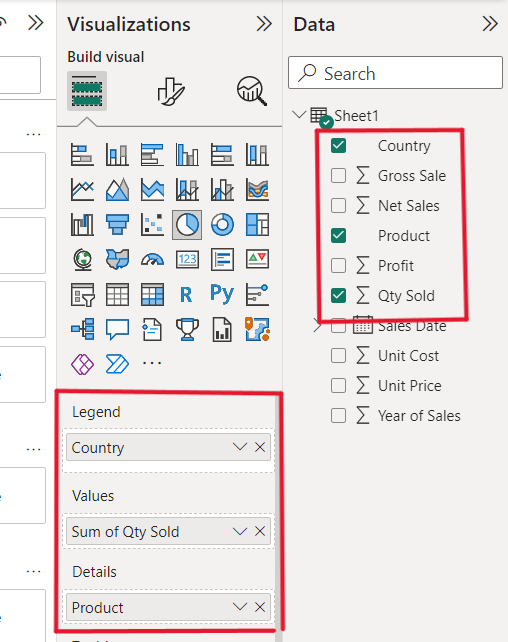
Step 2: Drag and Drop Fields
- Next, we drag and drop the desired fields from the Fields pane into the appropriate filter areas in the Filters panel.
- For example, we can drag the Country, Product and Quantity Sold fields from the data panel and drop them into the relevant filter sections.
- This action will populate the visual with data based on these fields.
Step 3: Apply the Filter
- After adding the fields, the visual will automatically update to reflect the applied filter.
- In the case of a pie chart, as seen in the screenshot, the visual will display the filtered data accordingly.
- Filters are typically applied automatically when we add fields but we can fine-tune the filter options to control which data is displayed more precisely.

How to add a Power BI Filter to a Page
We can add a Power BI filter to a Page using the following steps:
Step 1: Create Multiple Visuals
First, create at least two visuals on the page like a pie chart and a table. This helps us see the effect of page-level filters on multiple visuals.

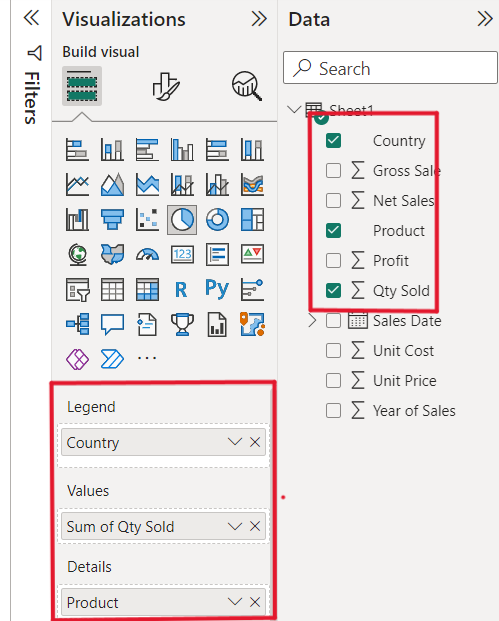
Step 2: Use Visual-Level Filters
Initially, we apply visual-level filters to populate each visual individually. As we can see in the screenshot we populate the visuals (pie chart and table) by selecting the relevant fields like Product, Sales, Quantity, etc from the data panel.
This helps us set up the initial view of the dashboard as shown below:

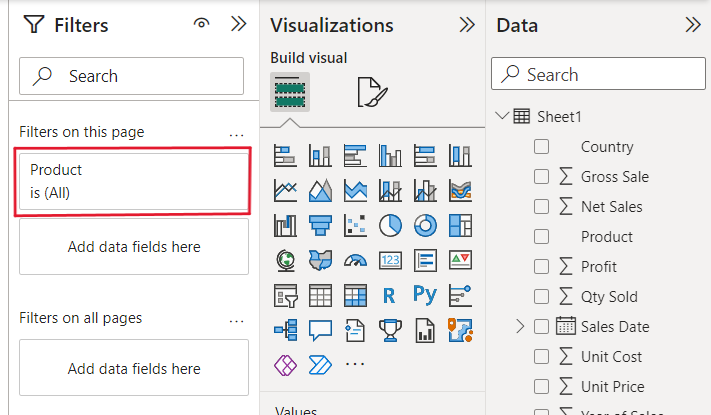
Step 3: Apply Page-Level Filters
To apply a page-level filter, we drag and drop the desired data fields into the "Filters on this page" section. For example, we drop the Product field into this section. This will allow us to filter the entire page based on the selected field.
Step 4: Select Filter Values
Next, we select the specific values we want to filter across all visuals on the page. For example, we select CPU, Hard Disk and Pad from the Product field and these values will update across all the visuals on the page.

As us can see in the below screenshot, the pie chart and table two visuals get updated by in its product field.

Note: Creating multiple visuals helps demonstrate the effect of page-level filters.
How to add Power BI Filter to a Report
We can add Power BI Filters to a report with the help of the following steps:
Step 1: Create a Visual
To use the report level filter create a visual on the page. As us can see in the below screenshot we created the visual that is a pie chart.

Step 2: Populate the Visual
Drag the relevant data fields from the Fields panel and drop them into the appropriate areas in the visual. Once this is done, the pie chart will display the data accordingly.
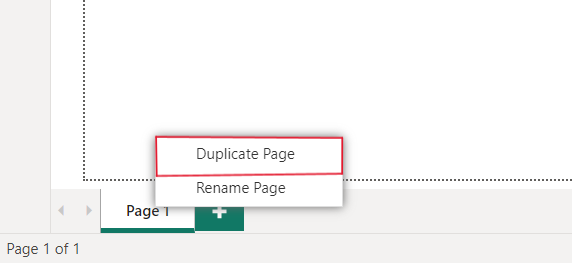
Step 3: Duplicate the Page
Since we need at least two pages to apply a report-level filter, right-click on Page 1 and select Duplicate Page. This creates a duplicate page with the same visual setup.
Step 4: Apply the Report-Level Filter
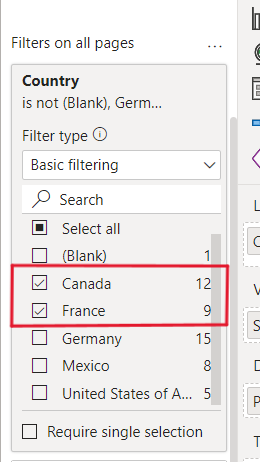
Drag the desired data field like Country into the "Filters on all Pages" section. This applies the filter to all visuals across the report.

Step 5: Applying selected filter values across the entire report
Choose the specific values from the data field such as Canada and France. These values will apply the filter across the entire report.
Step 6: View the Filtered Report
After selecting the filter values, the filter will be applied to the entire report including all pages. The same filter criteria will automatically apply to Page 1 from the duplicate page.


Note: To fully understand and use report-level filters, ensure we have at least two pages in our Power BI report.
How to Determine What Gets Filtered in Power BI
In Power BI, we can easily find which fields and values are being filtered by checking the "Filters" panel. This panel shows the fields that have filters applied and we can hover over any filtered field to view the specific values that are included or excluded.

For example, if we’ve applied a filter to the Country field, we can see it listed in the Filters panel. By hovering over the filtered field, we'll see which specific values like Canada and France have been filtered. This helps us track what data is being displayed and ensures we’re analyzing the correct subset of data.
Power BI Slicer vs. Filter
| Power BI Slicer | Power BI Filter |
|---|---|
| Affects all connected visuals based on the data context. | Can update data across visual, page or report level. |
| Simple and user-friendly for interactive filtering in visuals. | More complex and systematic for controlling data at various levels. |
| Provides basic filtering for visuals. | Provides extensive control for filtering data at visual, page and report levels. |
| Best suited for simple, quick filtering within a single visual. | Best for refining and filtering data at broader levels in the Power BI dashboard or report. |
