Manually entering data in Excel can be time-consuming and repetitive especially when you're working with large datasets. Fortunately, Excel offers built-in tools that can help you automate data entry, saving time and reducing errors. In this guide, we’ll walk you through two simple yet effective methods to automate data entry in Excel:
- Using Data Validation (with dropdown lists)
- Using Excel Tables (to auto-update totals and extend data)
Method 1: Automate Data Entry in Excel Using Data Validation
Data Validation in Excel helps control what users can enter in a cell. You can use it to create dropdown lists from which users can select pre-defined options this minimizes typing and errors.
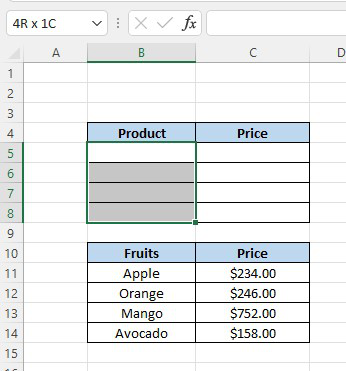
Let’s walk through the steps with an example where we enter fruit names and automatically fetch their prices.
Step-by-Step Instructions:
- Select the cells where you want the dropdown (e.g.,
B11:B15).

How about we see the moves toward playing out this technique.

- Then, select the cell range (B5:B8).
- Then, at that point, go to the Data tab.

- A short time later, from the lace, click on the Data Validation drop-down. Starting from the drop menu, select the choice Data Validation.

- Another exchange box named Data Validation will show up.

- Besides, go to the Settings tab in that discourse box. Select the choice List from the Allow drop-down menu.

- Select range from B11:B14.

- Presently, click on OK.
- In this way, we will get a drop-down symbol like the accompanying picture. It will allow us to pick information from another information range.

- From that point forward, select the cell range (C5:C8). Embed The accompanying equation in the recipe bar:
=VLOOKUP(B5,B10:C14,2,0)
- Press Ctrl + Enter to apply the recipe in every one of them chosen cells.

- Ultimately, select any natural product name starting from the drop list in cell B5.

- Thus, we will get its cost consequently in comparing cell C5.

Method 2: Automate Data Entry Using Excel Tables
Using an Excel Table is another great way to simplify data entry. Tables come with features like auto-expansion and automatic formula propagation.
Suppose you have a dataset with product names and their prices, and you want Excel to automatically calculate the total whenever a new item is added.
Steps to Create an Excel Table:
- Select your entire dataset (e.g.,
B4:C9).

How about we see the moves toward using Excel tables.

- Furthermore, Go to the Insert tab → click on Table.

- Another discourse box named Create Table will show up.

- Thirdly, remember to check the choice 'My table has headers'. Click on OK.
- Accordingly, we get our information range in the table arrangement.

- Presently, add another record in the table in line 8. At long last, we can see that the passage to the all-out cost in cell C10 refreshes consequently.

Automating data entry in Excel not only speeds up your workflow but also reduces the risk of errors caused by manual typing. Whether you're using Data Validation dropdowns or Excel Tables, these simple tools can save you a lot of time especially when working with large or frequently updated datasets.