Ready to try Windows 11 but not sure how to install it for free? Whether you're upgrading from Windows 10 or performing a clean installation, this guide walks you through every method in simple, beginner-friendly steps. From checking system compatibility to downloading the latest Windows 11 build, you’ll learn how to install Windows 11 safely and easily without paying anything.
System Requirements to Install Windows 11
Before installing Windows 11, make sure your PC meets the minimum requirements:
- Processor: 1 GHz or faster with 2 or more cores (64-bit)
- RAM: 4 GB or more
- Storage: 64 GB or more
- TPM: Trusted Platform Module (TPM) version 2.0
- Graphics: DirectX 12 compatible
- Display: 720p or higher, at least 9" diagonal
Note: Use Microsoft’s PC Health Check Tool to confirm compatibility before you begin.
How to Download and Install Windows 11 for Free
Below are the three best and official ways to install Windows 11. Choose the one that suits your setup, upgrade from Windows 10 or perform a clean installation.
Method 1: Recommended Settings
For Windows 10 users, upgrading to Windows 11 is the easiest method to migrate as it does not require any additional methods to perform. Simply follow these steps to install Windows 11 for free.
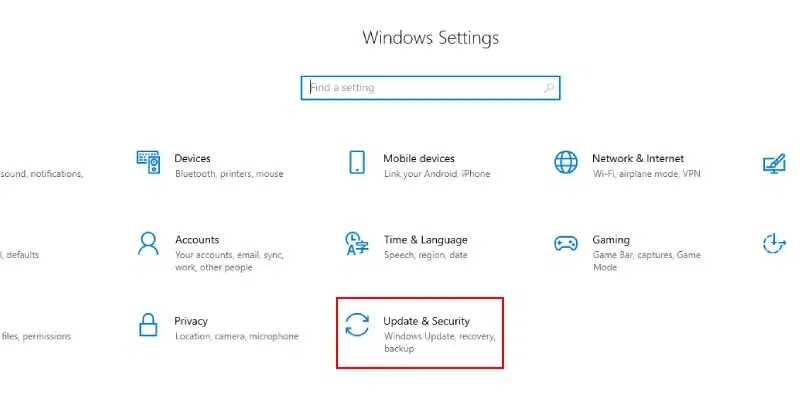
Step 1: Open Windows Update
- Go to Settings → Update & Security
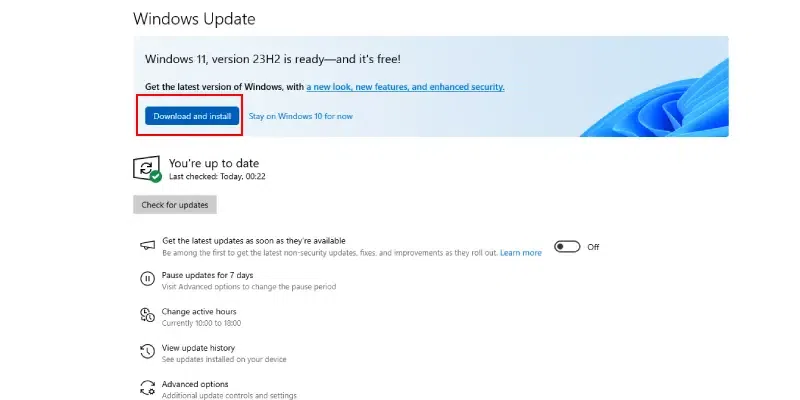
Step 2: Check for the Windows 11 upgrade
- If eligible, you’ll see a banner inviting you to upgrade.
Click Download & Install.
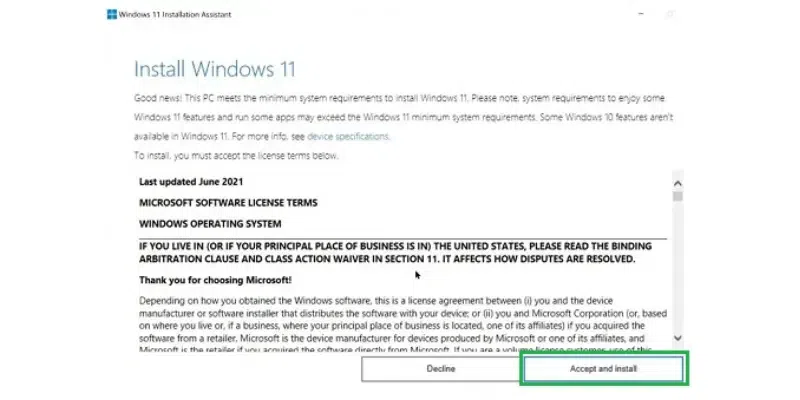
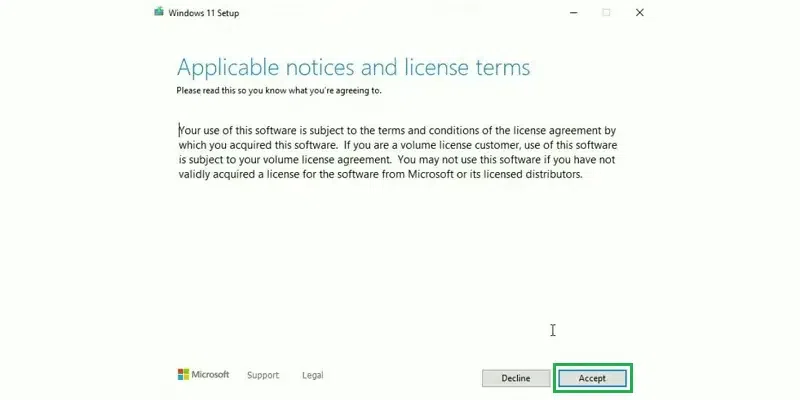
Step 3: Accept the Terms
- Click Accept & Install when the setup window appears.
Step 4: Downloading Begins
- Windows will now download the required files. This may take time depending on your internet speed.
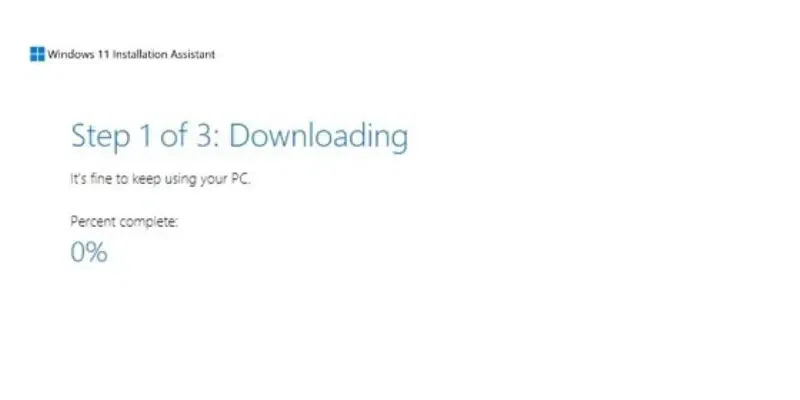
Note: Once the download completes, your PC will reboot and Windows 11 will finish installing automatically.
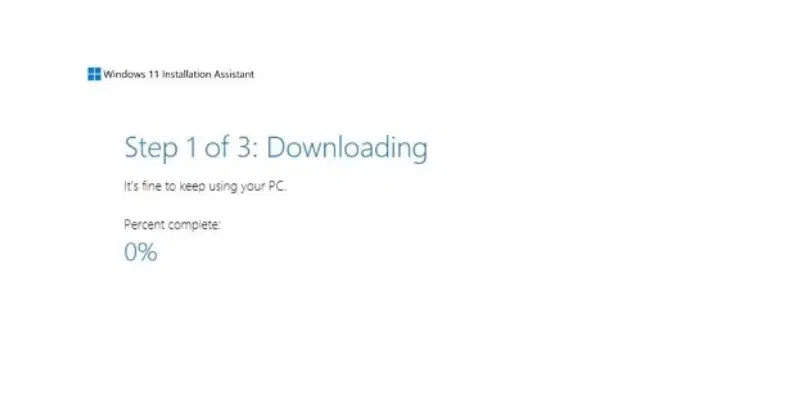
Method 2: Install Windows 11 Using Installation Assistant
If Windows Update doesn’t show the upgrade option, use Microsoft’s Installation Assistant.
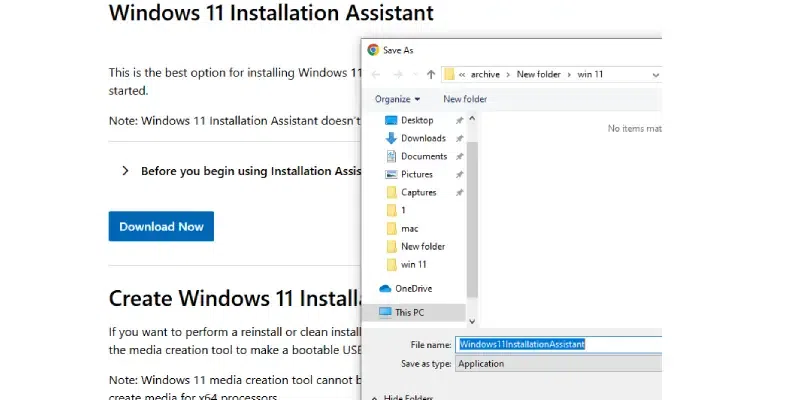
Step 1: Visit the Microsoft Download Page
- Go to the official Microsoft website → Select Windows 11 → click Download Now under Installation Assistant.
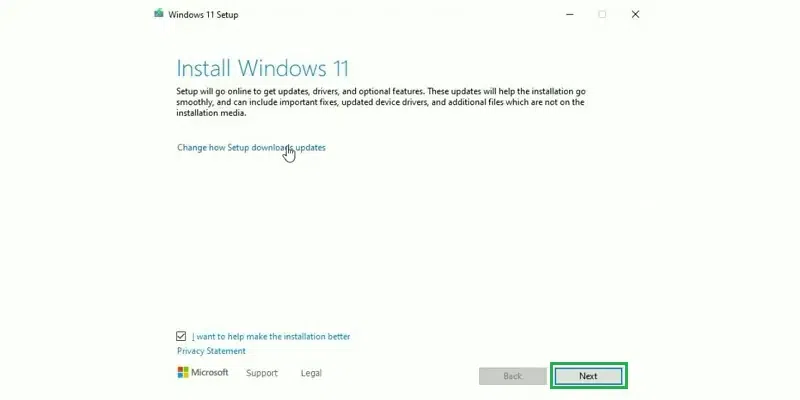
Step 2: Run the Installer
- Open the downloaded
.exefile and click Next.
Step 3: Accept the License Terms
- Review the agreement and click Accept to continue.
Step 4: Begin Installation
- Click Install to start downloading Windows 11.
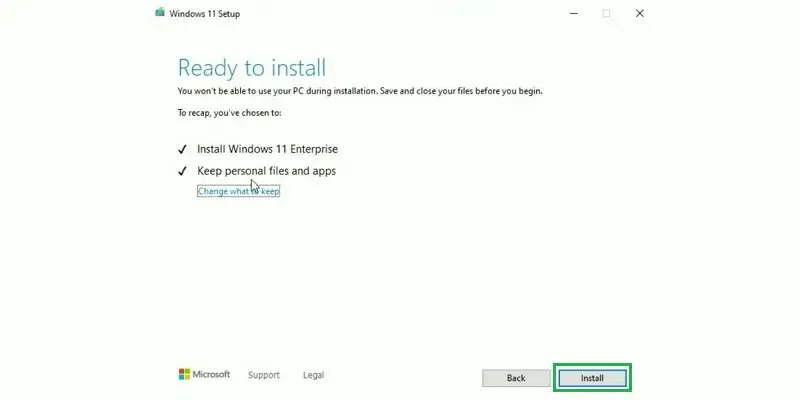
Step 5: Restart to Complete Installation
- After download, the tool will reboot your PC and install Windows 11.
Method 3: Perform a Windows 11 Clean Installation
Ideal for installing on a new PC or if you want a fresh start.
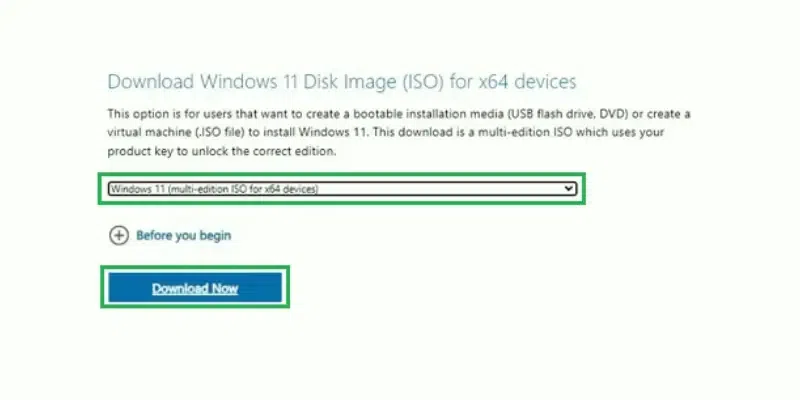
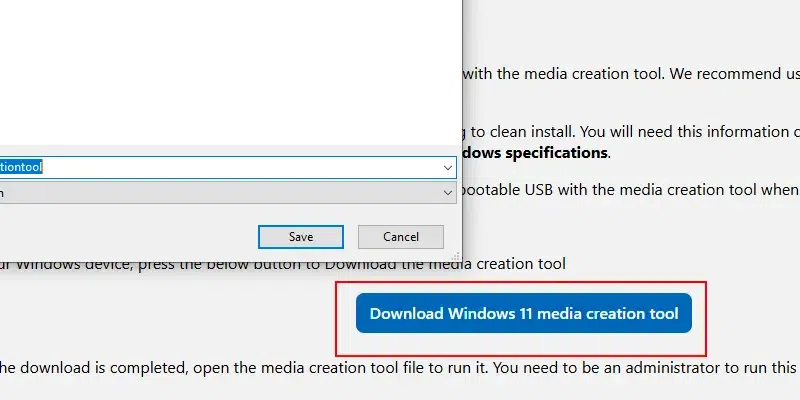
Step 1: Download Media Creation Tool
- Visit Microsoft’s website and click Create Windows 11 Installation Media.
Step 2: Save the Tool
- Select a directory and download the Media Creation Tool.
Step 3: Run the Tool
- Open the tool once downloaded.
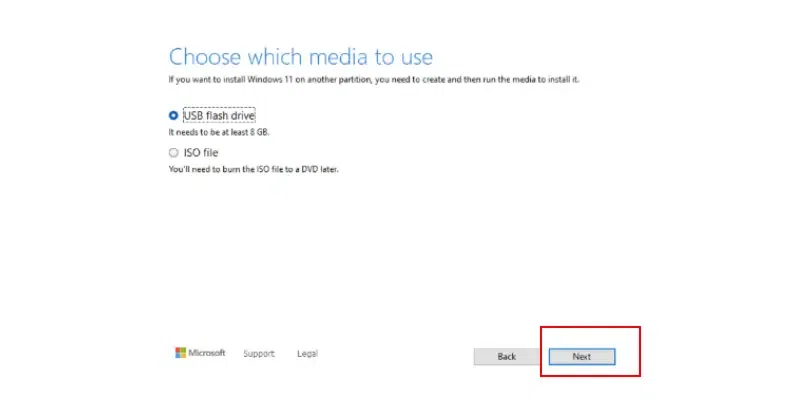
Step 4: Create Installation Media
Choose Create installation media (USB, DVD, or ISO) and follow on-screen instructions.
You can choose:
- USB drive for bootable installation
- ISO file for manual setup
After installation, set up Windows 11, restore your files (if needed), and you’re ready to use the OS.
Benefits of Installing Windows 11
- Modern User Interface: Centered Start Menu, redesigned taskbar, rounded corners, and a cleaner overall look.
- Improved Performance: Better resource management for faster loading, multitasking, and responsiveness.
- Enhanced Gaming Features
- Support for:
- Auto HDR
- DirectX 12 Ultimate
- DirectStorage
These features significantly boost gaming performance.
- Support for:
- Stronger Security: Built-in TPM 2.0 support and advanced security protocols help protect your PC from cyber threats.
- Helpful Widgets: Access News, Weather, Calendar, Notes, and more with one click using the Windows 11 Widgets panel.
Also Read: