Django is a Python web framework used for building web applications quickly and efficiently. It provides a structured way to handle backend development with built-in support for common web features. It follows "batteries-included" approach, meaning most tools needed for web development are already available.
- Provides features like authentication, admin panel and database management, reducing development effort.
- Supports rapid development with clean and scalable architecture.
- Used in production by major platforms like Instagram, Spotify and Dropbox, proving its reliability and scalability.
Django Architecture
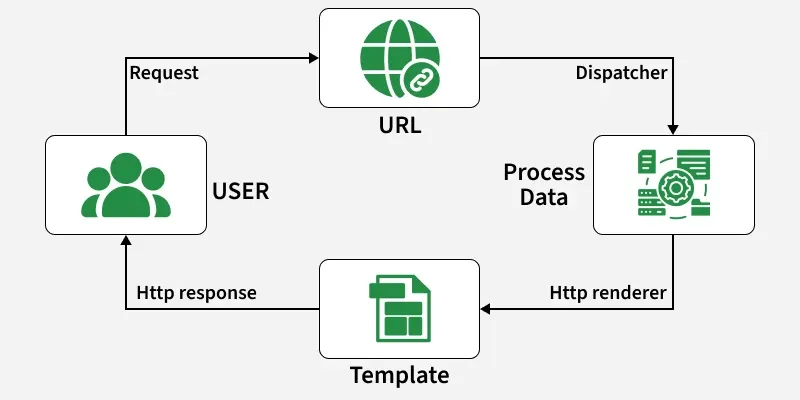
Django is based on MVT (Model-View-Template) architecture which has the following three parts:
- Model: act as the interface of the data. It is the logical data structure behind the entire application and is represented by a database (generally relational databases such as MySql, Postgres).
- View: user interface that you see in your browser when you render a website. It is represented by HTML/CSS/Javascript and Jinja files.
- Template: consists of static parts of the desired HTML output as well as some special syntax describing how dynamic content will be inserted.

For more information, refer to MVT Structure
Setting Virtual Environment
A virtual environment is used to create an isolated workspace for a project. It allows each Django project to use its own dependencies and versions without affecting other projects or the system installation.
Step 1: Creating a Virtual Environment
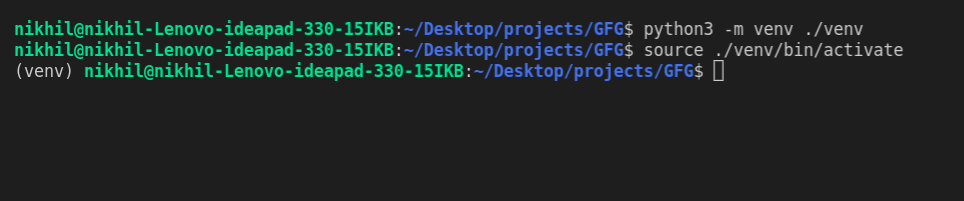
To create a virtual environment, the following command is used:
python3 -m venv venv
This creates a folder named venv that contains all the required files for the isolated Python environment.
Step 2: Activating the Virtual Environment
To activate the environment, use the following command:
source venv/bin/activate
After you run the above command you should see (venv) at the starting of every line of your terminal as shown in the below image:
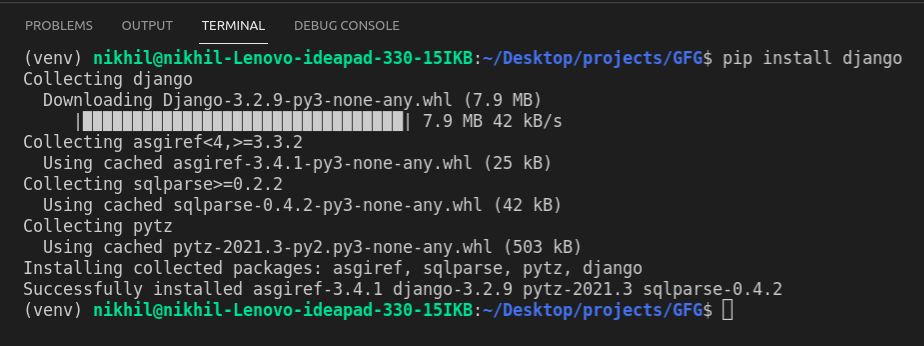
Installing Django
To install Django, run the following command:
pip install django
For more information, refer to Django Introduction and Installation
Starting the project
A Django project is created using the built-in django-admin command. This generates the basic project structure required to start development.
Step 1: Creating a Project
This command creates a new folder named projectName containing all necessary Django configuration files.
django-admin startproject projectName
Step 2: Navigating into the Project
This moves into the project directory so that further commands can be executed.
cd projectName
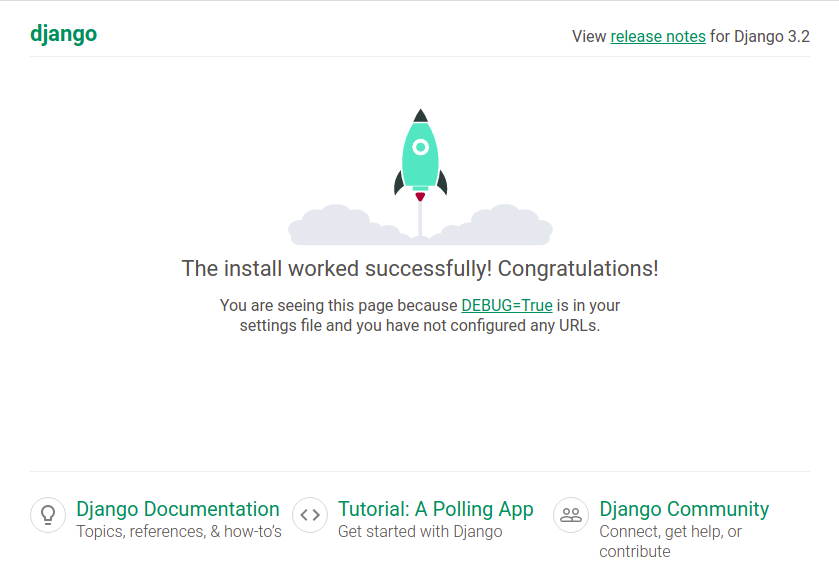
Step 3: Running the Development Server
python manage.py runserver
After running the server, the application becomes accessible at: http://127.0.0.1:8000/
For more information, refer to Create a Project using MVT
Project Structure
Django project is automatically created with a standard folder structure that contains configuration and control files required to run the application. These files handle everything from server management to routing, settings and deployment.
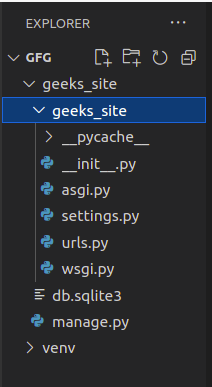
Major Files in a Project
1. manage.py: used to interact with the Django project through the command line. It allows running the server, applying migrations and other administrative tasks.
python manage.py help
2. _init_.py: marks the directory as a Python package. It is executed when the package is imported and can be used for package initialization.
3. settings.py: contains all project configurations such as installed apps, database settings, middleware, static files, and more.
4. urls.py: defines URL routes for the project and maps URLs to their corresponding views.
5. wsgi.py: used for deploying the Django project. It acts as an entry point for web servers to communicate with the application using the WSGI standard.
Creating an app
An app is a self-contained module that handles a specific feature or functionality of a project. A single project can contain multiple apps, where each app works independently and focuses on one part of the system such as blog posts, authentication, or comments.
Pre-installed Apps
Django includes several default apps inside INSTALLED_APPS in settings.py:
INSTALLED_APPS = [
    'django.contrib.admin',
    'django.contrib.auth',
    'django.contrib.contenttypes',
    'django.contrib.sessions',
    'django.contrib.messages',
    'django.contrib.staticfiles',
]
These apps provide core functionalities such as authentication, sessions and admin interface.
Creating a Custom App
To create a new app, the command is executed from the directory containing manage.py.
python manage.py startapp app_name
Now let's create an app called gfg_site_app, so the command to create the app would be:
python manage.py startapp gfg_site_app
Now you can see your directory structure as under :

Registering the App
After creating the app, it must be added to INSTALLED_APPS in settings.py so that Django recognizes it.
INSTALLED_APPS = [
    'django.contrib.admin',
    'django.contrib.auth',
    'django.contrib.contenttypes',
    'django.contrib.sessions',
    'django.contrib.messages',
    'django.contrib.staticfiles',
    'gfg_site_app.apps.GfgSiteAppConfig',
]
For more information, refer to Create an App
Django Views
A view is a function or class that handles a web request and returns a web response. It acts as a bridge between the user request and the application logic, producing output such as HTML pages, redirects, error pages or any data that can be displayed in a browser.
Example: Creating View Function
from django.http import HttpResponse

def geeks_view(request):
    return HttpResponse("<h1>Welcome to GeeksforGeeks</h1>")
Explanation:
- HttpResponse is imported to send a response back to the browser.
- geeks_view(request) is a view function that receives the HTTP request.
- HttpResponse() returns HTML content that is displayed in the browser.
Types of Views
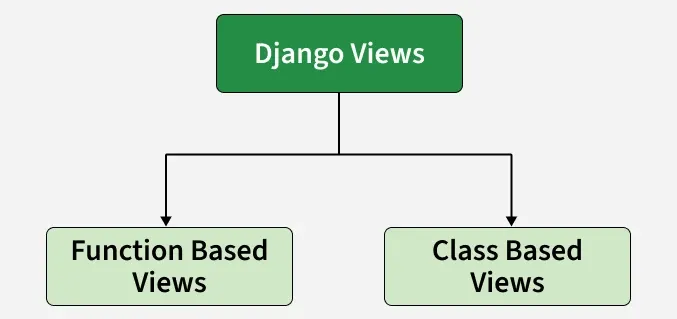
1. Function-Based Views (FBVs): are created using Python functions. They take an HttpRequest object as input and return an HttpResponse object. These views are commonly used for simple logic and CRUD operations. They are often used for:
- Creating data (Create)
- Reading data (Retrieve)
- Updating data (Update)
- Deleting data (Delete)
2. Class-Based Views: are created using Python classes instead of functions. Each HTTP method (GET, POST, etc.) can be handled in separate class methods, making the code more structured and reusable. They are useful when:
- Code needs to be organized based on HTTP methods
- Reusable components are required using inheritance or mixins
- Complex views need better structure and scalability
Django URL Patterns
URL patterns are used to map URLs to their corresponding view functions. This mapping is handled by a module called URLConf (URL configuration). Each request URL is matched against a list of patterns and when a match is found, the related view is executed to generate the response.
Example: Basic URL Configuration
Here’s a sample code for gfg_site/urls.py:
from django.urls import path
from . import views

urlpatterns = [
    path('', views.geeks_view, name='geeks_view'),
]
Explanation:
- path() defines a URL pattern.
- '' represents the root URL (home page).
- views.geeks_view is the view function that will be called when this URL is accessed.
- name='geeks_view' is used to uniquely identify the route.
Including App URLs in Project
Each app can have its own urls.py file. These app-level URLs are included in the main project’s URL configuration using include().
Example: Root URL Configuration
from django.contrib import admin
from django.urls import path, include

urlpatterns = [
    path('admin/', admin.site.urls),
    path('', include('gfg_site_app.urls')),
]
Explanation:
- admin.site.urls handles the Django admin panel routes.
- include('gfg_site_app.urls') connects the app’s URL file to the main project.
- Django checks patterns inside the included file to find the correct view.
Now if head towards http://127.0.0.1:8000/ then our site will be:
In the above example, include statement will look into the URLpatterns list in the gfg_site_app/urls.py And then it will look into all the paths defined in the url.py file and will call the respective views function.
Django Models
Django Models are used to define and manage the structure of database tables in a Django application. Each model represents a table and each attribute of the model represents a column in that table.
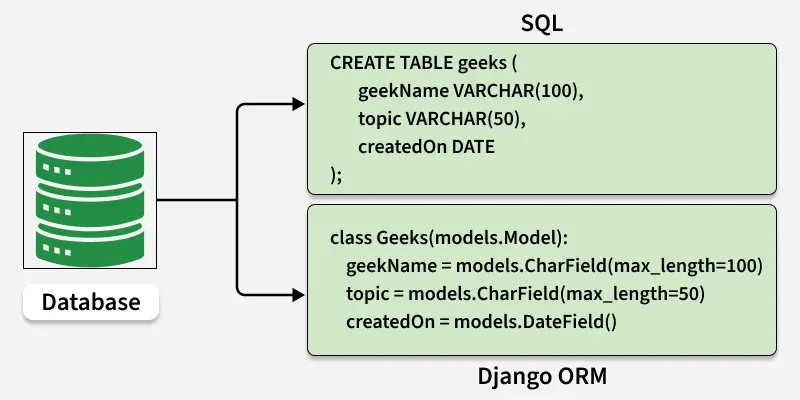
Models also provide a built-in ORM (Object Relational Mapper) that allows developers to create, read, update, and delete database records using Python code.
Syntax
from django.db import models
class ModelName(models.Model):
field_name = models.Field()
Explanation:
- models.Model is the base class for all Django models.
- Each attribute defines a database field such as text, number, or date.
Example: Creating a Model
from django.db import models
from datetime import datetime

class GeeksModel(models.Model):
    title = models.CharField(max_length=200)
    description = models.TextField()
    created_on = models.DateTimeField(default=datetime.now)
    image = models.ImageField(upload_to="images/%Y/%m/%d")

    def __str__(self):
        return self.title
Explanation:
- Each field defines a column in the database table.
- __str__() method returns a readable representation of the object.
- This model automatically creates a database table when migrations are applied.
Migrations
Whenever a model is created or modified, Django needs to update the database structure using migrations.
python manage.py makemigrations
python manage.py migrate
Explanation:
- makemigrations creates migration files based on model changes.
- migrate applies those changes to the database.
Django ORM Operations
Django provides an ORM to interact with database data without writing SQL queries.
1. Creating Objects: To create an object of model Album and save it into the database, we need to write the following command:
from gfg_site_app.models import GeeksModel

obj = GeeksModel(title="GeeksforGeeks", description="GFG portal")
obj.save()
Explanation:
- GeeksModel() creates a new record.
- save() stores it in the database.
2. Retrieving objects: To retrieve all the objects of a model, we write the following command:
GeeksModel.objects.all()
Explanation: objects.all() returns all records from the table.
3. Modifying existing objects: We can modify an existing object as follows:
obj = GeeksModel.objects.get(id=1)
obj.title = "GFG"
obj.save()
Explanation: get() fetches a specific record.
4. Deleting objects: To delete a single object, we need to write the following commands:
obj = GeeksModel.objects.get(id=1)
obj.delete()
Explanation: delete() removes the record from the database.
Uploading Images
Django allows image uploading using the ImageField in models. The upload_to parameter defines the folder structure where uploaded images are stored. A structured path such as images/%Y/%m/%d organizes files by year, month and date, making file management easier.
Configuring Media Files
Before uploading images, Django must be configured to handle media files in settings.py.
MEDIA_ROOT = BASE_DIR / 'media'
MEDIA_URL = '/media/'
Explanation:
- MEDIA_ROOT defines the physical location on the server where uploaded files are stored.
- MEDIA_URL defines the URL path used to access those files in the browser.
Serving Media Files in Development
To access uploaded files during development, Django must be configured in urls.py.
from django.conf import settings
from django.conf.urls.static import static

if settings.DEBUG:
    urlpatterns += static(settings.MEDIA_URL, document_root=settings.MEDIA_ROOT)
Explanation:
- static() connects media URL paths to the local media folder.
- This setup is used only in development mode (DEBUG=True).
Render a Model
To render a model in Django admin, we need to modify app/admin.py. Go to admin.py in geeks_site_app and enter the following code. Import the corresponding model from models.py and register it to the admin interface.
from django.contrib import admin
from .models import GeeksModel

# Register your models here.
admin.site.register(GeeksModel,)
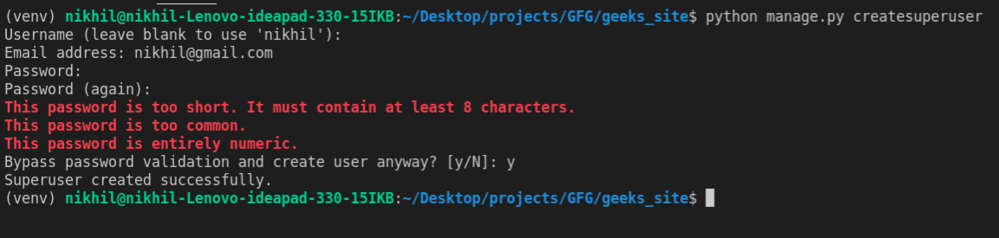
Now let's create a superuser for our project that can have access to the admin area of our site. To create a super user type the below command:
python manage.py createsuperuser
Now go to http://127.0.0.1:8000/admin on the browser to access the admin interface panel.
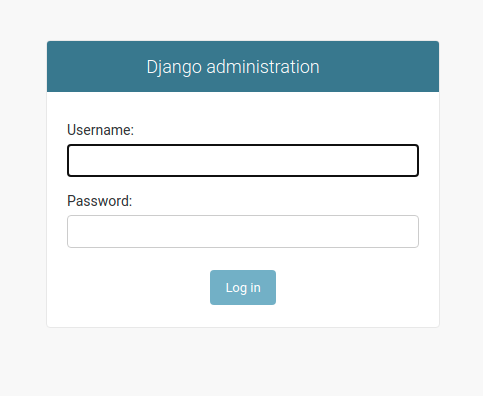
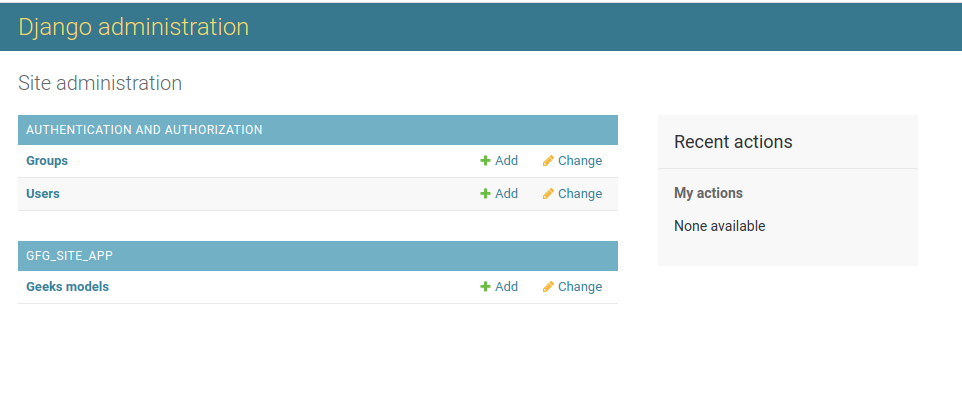
Give the username and password created for superuser and then the admin dashboard will open and there we will be able to see our Geeks models that we just created.
Note: For more information refer to Render Model in Admin Interface.
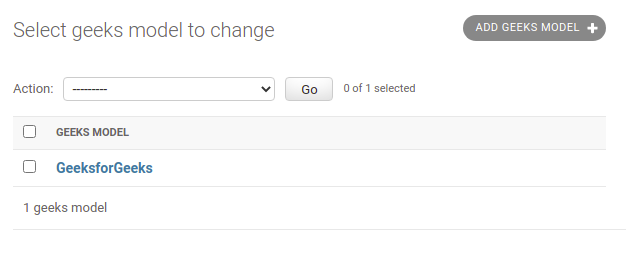
Now let's see how to enter data using the admin dashboard. Now clicking on the Geeks Model we will see something like this:
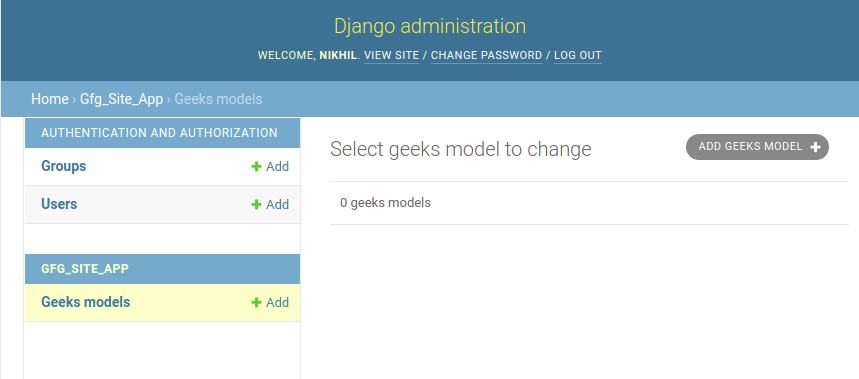
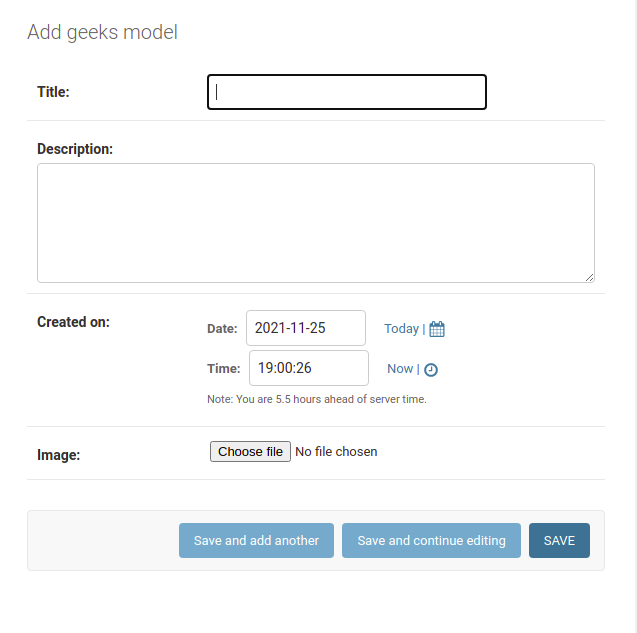
We can click on the Add Geeks Model button on the right top corner and then we will be able to see the fields for adding data:
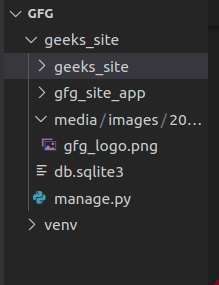
After adding the required data and the image field we will see something like this on our admin dashboard:
You can also see the media folder in your code editor:
Connecting Django to different Database
Django comes built-in with the SQLite database. We can also see this in the DATABASES dictionary in our settings.py file.
DATABASES = {
    'default': {
        'ENGINE': 'django.db.backends.sqlite3',
        'NAME': BASE_DIR / 'db.sqlite3',
    }
}
If you want to change this to another database you can change the above dictionary. Suppose we want to change this database to PostgreSQL. Assuming the required dependencies are installed and the PostgreSQL is set up then the DATABASES dictionary will look like:
DATABASES = {
   'default': {
       'ENGINE': 'django.db.backends.postgresql',
       'NAME': ‘<database_name>’,
       'USER': '<database_username>',
       'PASSWORD': '<password>',
       'HOST': '<database_hostname_or_ip>',
       'PORT': '<database_port>',
   }
}
Django Templates
Template is basically written in HTML, CSS and Javascript in a .html file. Django framework efficiently handles and generates dynamically HTML web pages that are visible to the end-user. Django mainly functions with a backend so, in order to provide a frontend and provide a layout to our website, we use templates.

Configuration
Django Templates can be configured in app_name/settings.py,
TEMPLATES = [
    {
        # Template backend to be used, For example Jinja
        'BACKEND': 'django.template.backends.django.DjangoTemplates',

        # directories for templates
        'DIRS': [],
        'APP_DIRS': True,

        # options to configure
        'OPTIONS': {
            'context_processors': [
                'django.template.context_processors.debug',
                'django.template.context_processors.request',
                'django.contrib.auth.context_processors.auth',
                'django.contrib.messages.context_processors.messages',
            ],
        },
    },
]
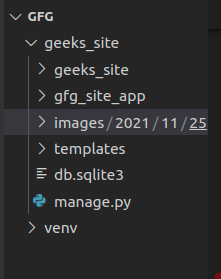
Now let's create a template directory and add that directory in the above configuration. After creating the templates folder our directory should look like this:
Let's add the location of this directory in our templates dictionary.
TEMPLATES = [
    {
        'BACKEND': 'django.template.backends.django.DjangoTemplates',

        # adding the location of our templates directory
        'DIRS': [BASE_DIR/"templates"],
        'APP_DIRS': True,
        'OPTIONS': {
            'context_processors': [
                'django.template.context_processors.debug',
                'django.template.context_processors.request',
                'django.contrib.auth.context_processors.auth',
                'django.contrib.messages.context_processors.messages',
            ],
        },
    },
]
After adding the location of the template directory we will create a simple HTML file and name it as index.html and then we will render this file from our view function.
HTML file
<!DOCTYPE html>
<html lang="en">
<head>
    <meta charset="UTF-8">
    <meta name="viewport" content="width=device-width, initial-scale=1.0">
    <meta http-equiv="X-UA-Compatible" content="ie=edge">
    <title>Homepage</title>
</head>
<body>
    <h1>Welcome to Geeksforgeeks</h1>
</body>
</html>
To render this HTML on our site we need to use the render function from the django.shortcuts. Below is the updated view function.
views.py
from django.shortcuts import render

# create a function
def geeks_view(request):

    return render(request, "noindex.html")
If we head to our website we will see the HTML data on our site as:
Let's see this with an example, where we will try to render the content of our database dynamically to our website. First, let's update our views.py file. In this file we will get our data from our database and then pass this database as a dictionary to our HTML file.
views.py
from django.shortcuts import render
from .models import GeeksModel

# create a function
def geeks_view(request):

    content = GeeksModel.objects.all()
    context = {
        'content': content
    }
    return render(request, "noindex.html", context=context)
index.html
<!DOCTYPE html>
<html lang="en">
<head>
    <meta charset="UTF-8">
    <meta name="viewport" content="width=device-width, initial-scale=1.0">
    <meta http-equiv="X-UA-Compatible" content="ie=edge">
    <title>Homepage</title>
</head>
<body>
    {% for data in content %}
    <h2>{{data.title}}</h2>
    <img src="{{ data.image.url }}" alt="">
<p><strong>Description:</strong>{{data.description}}</p>
<p><strong>Created On:</strong>{{data.created_on}}</p>
    {% endfor %}
</body>
</html>
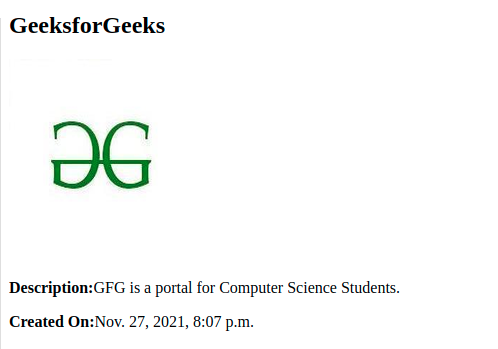
Our website now looks like this:
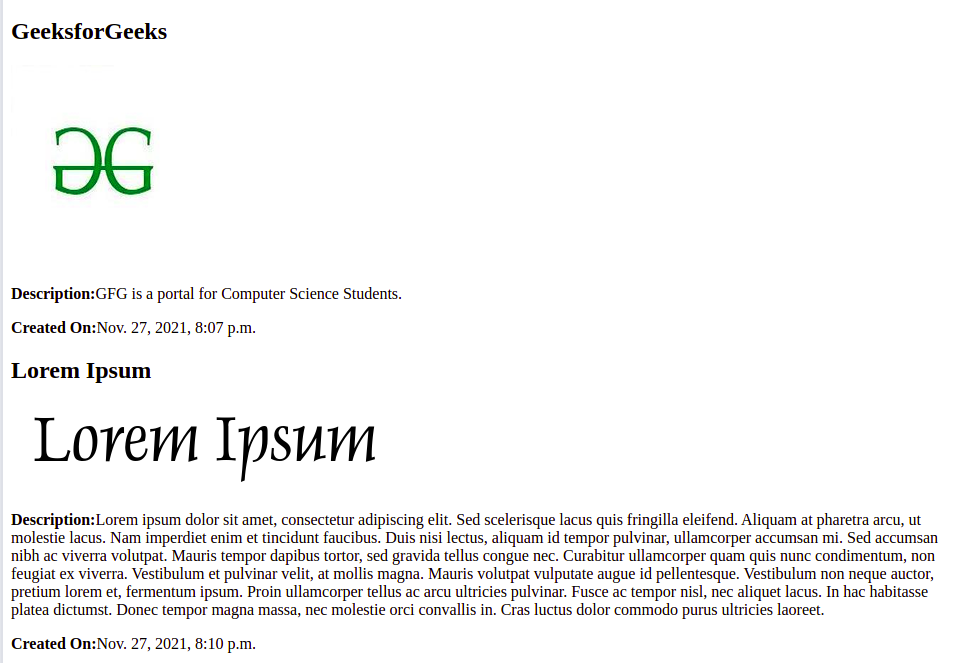
Now if we add more data to our site then that data will also be shown to our site without making any changes to our HTML or views.py. Let's add some data and then see if it works or not.
Template language
Django Template Language (DTL) is used to generate dynamic HTML pages in Django. It allows embedding Python-like logic inside HTML using variables, tags, filters, and comments. These elements help display data from views and control how content is rendered in templates.
1. Variables used to display dynamic data passed from the view into the template. Below is the syntax:
{{ variable_name }}
2. Tags: used to add logic inside templates such as loops, conditions, or content control. Below is the syntax:
{% tag_name %}
3. Filters: used to modify or transform variable values before displaying them. Below is the syntax:
{{ variable_name | filter_name }}
4. Comments: allow adding notes inside templates that are ignored during rendering. Below is the syntax:
{% comment %}
content
{% endcomment %}
Template Inheritance
Template inheritance allows one template to reuse the structure of another template using the extends tag. This helps avoid repeating common layout code. Below is the syntax:
{% extends 'template_name.html' %}
Child templates can override specific blocks defined in the base template.
Example: Paths in Template Inheritance
{% extends "./base2.html" %}
{% extends "../base1.html" %}
{% extends "./my/base3.html" %}
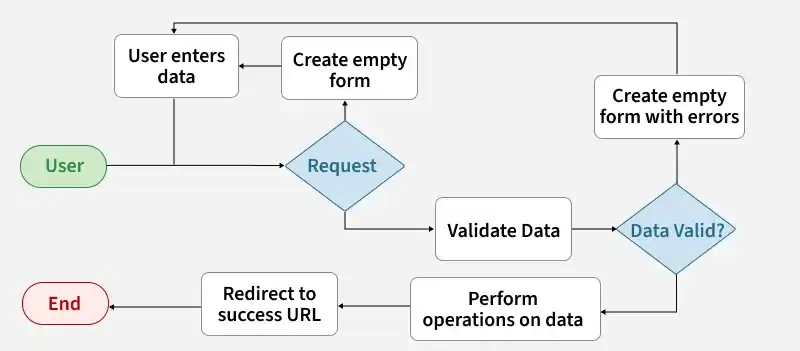
Django Forms
Django Forms are used to take input from users, validate the data, and process it before storing or using it in a database. They automatically map form fields to HTML inputs and provide built-in validation for secure and structured data handling.
Creating Django Forms
Step 1: Create a Form Class
A form is defined in forms.py inside the Django app.
from django import forms

class GeeksForm(forms.Form):
    title = forms.CharField(max_length=200)
    description = forms.CharField(widget=forms.Textarea)
    image = forms.ImageField()
Explanation:
- forms.Form base class for creating forms
- CharField, ImageField define input types
- widget=forms.Textarea renders multi-line input
Step 2: Create View Function
The form is passed to a view using a context dictionary.
from django.shortcuts import render
from .forms import GeeksForm

def geeks_form(request):
    context = {'form': GeeksForm}
    return render(request, "form.html", context)
Explanation:
- GeeksForm is passed to template as form
- render() sends data to HTML page
Step 3: Create URL Pattern
Map the view to a URL.
from django.urls import path
from . import views

urlpatterns = [
    path('add/', views.geeks_form, name='geeks_form'),
]
A form comes with 3 in-built methods that can be used to render Django form fields:
- {{ form.as_table }} will render them as table cells wrapped in <tr> tags
- {{ form.as_p }} will render them wrapped in <p> tags
- {{ form.as_ul }} will render them wrapped in <li> tags
Step 4: Create HTML Template
Now let's make the form.html for rendering our form.
<form action="" method="POST">
    {% csrf_token %}
    {{form.as_p}}
    <input type="submit" value="submit">
</form>
Explanation:
- csrf_token protects against CSRF attacks
- form.as_p renders form fields in paragraph format
After doing this save all the files and go to http://127.0.0.1:8000/add/ to see the form we created. It should look like this:
We can also see that our form is validated automatically. We cannot submit an empty form.
ModelForm (Forms from Models)
Django ModelForm is a class that is used to directly convert a model into a Django form. To create a form directly for our model, dive into forms.py and Enter the following -
from django import forms
from .models import GeeksModel

class GeeksForm(forms.ModelForm):
    class Meta:
        model = GeeksModel
        fields = ['title', 'description', 'image']
Explanation:
- Meta class connects form with model
- fields defines which model fields are used
Step 2: Handle Form Submission in View
views.py
def geeks_form(request):
    if request.method == 'POST':
        form = GeeksForm(request.POST, request.FILES)

        if form.is_valid():
            form.save()
            return redirect("geeks_view")
        else:
            return redirect("geeks_form")
    else:
        context = {}
        context['form'] = GeeksForm
        return render(request, "form.html", context=context)
Note: Add enctype= multipart/form-data to our <form> element in our template tag. If we don't have this then our request.FILES will always be empty and our form will not validate.
Let's add some data with our form and see if its get saved in our database or not.
After hitting submit the form gets saved automatically to database. We can verify it from the above GIF.