PyQt is a Python binding for the Qt framework that enables the development of desktop graphical user interface (GUI) applications. It provides a comprehensive collection of widgets, layouts, and tools for building interactive applications, while Qt Designer offers a visual drag-and-drop environment for designing user interfaces.
Example:
from PyQt5.QtWidgets import QApplication, QLabel
app = QApplication([])
label = QLabel("Hello, PyQt!")
label.show()
app.exec_()
Installation
For Linux:
sudo apt-get install python3-pyqt5
For Windows:
pip install pyqt5
pip install pyqt5-tools
Version Compatibility:
- Use pyuic5 with PyQt5.
- Use pyuic6 with PyQt6.
- Ensure Qt Designer and the installed PyQt version match.
Project Structure
project/
│
├── layout.ui
├── layout.py
└── main.py
QT designer tool
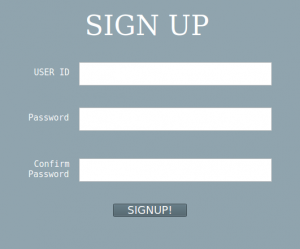
Let's create a signup form using the QT designer tool. No code is required for creating forms, buttons, text boxes, etc! It is a rather drag and drops environment.
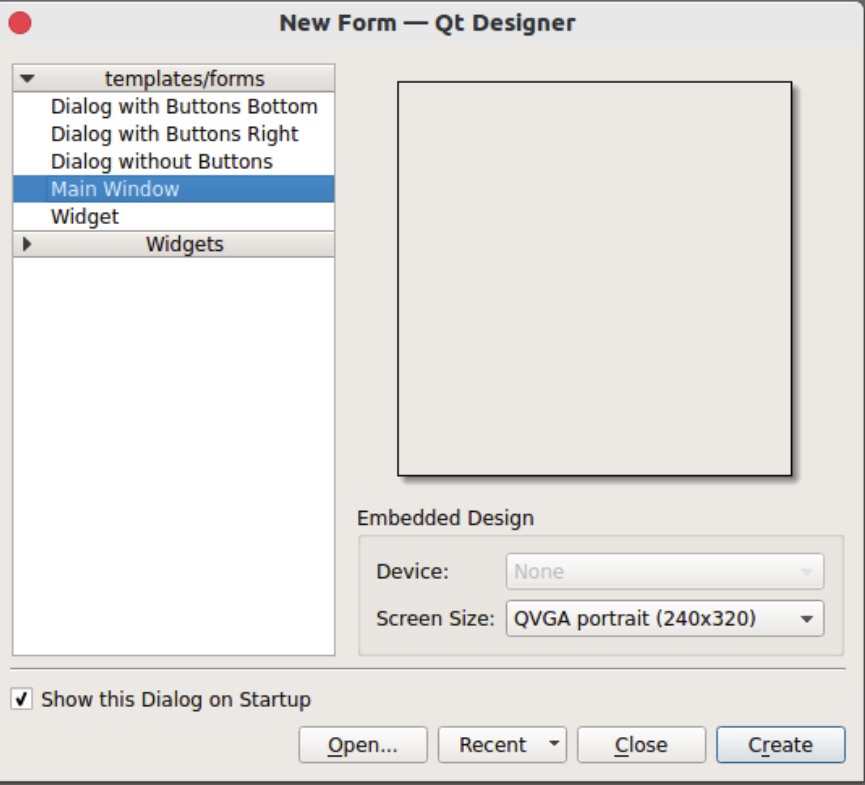
QT Designer will be located at MyPythonInstallationDir\Lib\site-packages\pyqt5-tools and is named designer.exe (on Windows OS). Open Qt Designer, then select Main Window and click Create. Set your preferred size of the window by dragging the edges of the window.
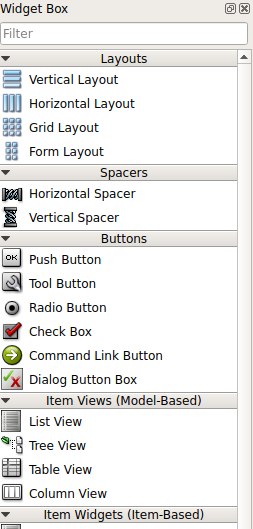
Widgets
Widgets are the graphical components of a GUI application. They allow users to interact with the application and include elements such as buttons, labels, text boxes, checkboxes, tables, and sliders..
To create the layout of the Signup form:
- Three text edit boxes.
- One button.
- Four Text Labels (SignId Banner, UserName label, Password and Confirm Password label).
One has to find those widgets in Widget Tool Box. Just drag and drop the required widgets onto the Main Window or the window working on.
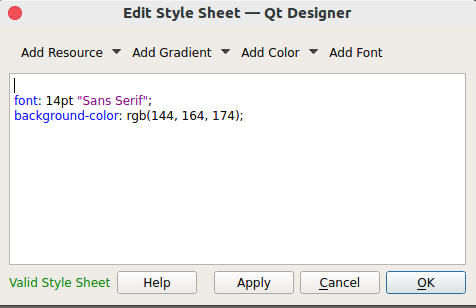
To change the appearance of the window or the widget, just right click on the widget and click Change StyleSheet.
To get a preview of the window, press Ctrl + R.
Save the file
The file will be saved with the .ui extension. To convert this file (.ui extension) to a Python file (.py extension), follow these steps :
- Open the terminal and navigate to the folder where the layout.UI file is present.
- To convert into a Python file, type pyuic5 -x layout.ui -o layout.py on a terminal.
- Run layout.py using python.
Signals and Slots
Signals and Slots in PyQt are used to communicate between various objects. After creating the GUI in Qt Designer and convert it to Python, users need to connect signals(like button clicks) to slots (functions that handles those clicks). For example , If you have a submit button and when it is clicked to validate user input or save data.
import sys
from PyQt5.QtWidgets import QApplication, QMainWindow
from layout import Ui_MainWindow


class MyApp(QMainWindow, Ui_MainWindow):
    def __init__(self):
        super().__init__()

        # Set up the UI generated by Qt Designer
        self.setupUi(self)

        # Connect button click signal to slot
        self.submitButton.clicked.connect(self.submit_clicked)

    def submit_clicked(self):
        # Retrieve text entered by the user
        username = self.usernameLineEdit.text()
        password = self.passwordLineEdit.text()

        print("Button clicked!")
        print("Username:", username)
        print("Password:", password)


if __name__ == "__main__":
    app = QApplication(sys.argv)

    window = MyApp()
    window.show()

    sys.exit(app.exec_())
Output:
Button clicked!
Username: admin
Password: secret123
Explanation:
- Ui_MainWindow is imported from the Python file generated by Qt Designer.
- setupUi(self) creates all widgets defined in the .ui file.
- clicked.connect() links the button's clicked signal to the submit_clicked() method.
- text() retrieves the contents of the input fields.
- show() displays the main application window.
- app.exec_() starts the PyQt event loop and keeps the application running.
Common Widgets
| Widget | Purpose |
|---|---|
| QLabel | Display text or images |
| QPushButton | Trigger actions |
| QLineEdit | Single-line text input |
| QTextEdit | Multi-line text input |
| QCheckBox | Boolean input |
| QComboBox | Dropdown list |
| QTableWidget | Display tabular data |
Enhancing PyQt GUI Applications
After designing the interface, additional features can be added to improve functionality and user experience.
- Add Functionality: Implement application logic such as input validation, database operations, and user interactions.
- Use Layouts: Organize widgets with layouts to create responsive and scalable interfaces.
- Handle Events: Respond to user actions such as button clicks, mouse events, and keyboard input.
- Customize Styles: Apply stylesheets to modify widget appearance, including colors, fonts, and spacing.
- Debug Applications: Use print statements, breakpoints, or IDE debugging tools to identify and fix issues.
- Ensure Version Compatibility: Use matching versions of PyQt and Qt Designer to avoid compatibility problems.