Ajax (Asynchronous JavaScript and XML) enables web applications to send and receive data asynchronously. This allows parts of a web page to update without a full reload, creating dynamic and responsive interactions in Django applications.
Key aspects of Ajax include:
- JavaScript: Handles asynchronous requests to the server.
- XMLHttpRequest (XHR) / Fetch API: Sends and receives server data without reloading the page.
- JSON or XML: Formats data for transfer (JSON is more commonly used).
Using Ajax improves responsiveness and enhances user experience by updating only the necessary parts of a web page.
Example: Integrate Ajax with Django Application
Step 1: Setting Up a Django Project and app
django-admin startproject myproject
cd myproject
python manage.py startapp myapp
Add the app to settings.py in the project folder:
# Inside myproject/settings.py
INSTALLED_APPS = [
    # Django default apps...
    'myapp',
]
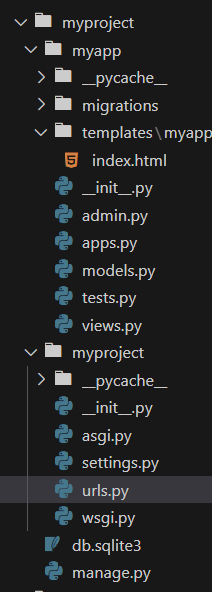
Run initial migrations:
python manage.py migrate
Step 2: Creating Views and Templates
Create a basic template and view to demonstrate Ajax functionality.
1. Create a View in views.py:
from django.http import JsonResponse
from django.shortcuts import render

# Standard view to render the page with the form
def index(request):
    return render(request, 'myapp/index.html')

# View to handle the Ajax request
def ajax_view(request):
    if request.method == 'POST':
        name = request.POST.get('name')
        message = f'Hello, {name}!'
        return JsonResponse({'message': message})
    return JsonResponse({'message': 'Invalid request'})
2. Create a Template in templates/myapp/index.html:
<!DOCTYPE html>
<html lang="en">
<head>
    <meta charset="UTF-8">
    <meta name="viewport" content="width=device-width, initial-scale=1.0">
    <title>Ajax with Django</title>
    <script src="https://code.jquery.com/jquery-3.6.0.min.js"></script>
    <style>
        /* General body styling */
        body {
            font-family: 'Arial', sans-serif;
            background-color: #f0f4f8;
            margin: 0;
            padding: 0;
            display: flex;
            justify-content: center;
            align-items: center;
            height: 100vh;
        }

        /* Center the main container and set its width */
        .container {
            background-color: #ffffff;
            padding: 2rem;
            border-radius: 8px;
            box-shadow: 0 4px 12px rgba(0, 0, 0, 0.1);
            width: 350px;
            text-align: center;
        }

        h1 {
            color: #333;
            margin-bottom: 1.5rem;
            font-size: 1.8rem;
            font-family: Verdana, Geneva, Tahoma, sans-serif
        }

        /* Style for form input */
        input[type="text"] {
            width: 100%;
            padding: 0.75rem;
            font-size: 1rem;
            border: 1px solid #ddd;
            border-radius: 4px;
            margin-bottom: 1rem;
            font-family: Verdana, Geneva, Tahoma, sans-serif;
            outline: none;
            transition: border-color 0.3s ease;
        }

        input[type="text"]:focus {
            border-color: #007bff;
        }

        /* Styling for submit button */
        button[type="submit"] {
            width: 100%;
            background-color: rgb(10, 130, 10);
            color: #fff;
            padding: 0.75rem;
            font-size: 1rem;
            font-weight: bold;
            font-family: Verdana, Geneva, Tahoma, sans-serif;
            border: none;
            border-radius: 4px;
            cursor: pointer;
            transition: background-color 0.3s ease;
        }


        /* Style for displaying the response message */
        #responseMessage {
            margin-top: 1.5rem;
            font-size: 1.2rem;
            color: black;
            font-weight: bold;
            font-family: Verdana, Geneva, Tahoma, sans-serif;
        }

        /* Subtle animations */
        input[type="text"], button[type="submit"] {
            transition: all 0.3s ease;
        }

        /* Responsiveness */
        @media (max-width: 768px) {
            .container {
                width: 90%;
            }
        }
    </style>
</head>
<body>

    <div class="container">
        <h1>Ajax with Django</h1>

        <form id="myForm">
            <input type="text" id="nameInput" name="name" placeholder="Enter your name">
            <button type="submit">Submit</button>
        </form>

        <div id="responseMessage"></div>
    </div>

    <script>
        // Ajax setup for form submission
        $(document).ready(function() {
            $('#myForm').on('submit', function(event) {
                event.preventDefault();

                $.ajax({
                    url: '/ajax/',  // The URL of the Django view that handles the request
                    type: 'POST',
                    data: {
                        'name': $('#nameInput').val(),
                        'csrfmiddlewaretoken': '{{ csrf_token }}' // CSRF token for security
                    },
                    success: function(response) {
                        $('#responseMessage').text(response.message);  // Update the page dynamically
                    }
                });
            });
        });
    </script>

</body>
</html>
3. Add URL Patterns in urls.py:
from django.contrib import admin
from django.urls import path
from myapp import views

urlpatterns = [
    path('admin/', admin.site.urls),
    path('', views.index, name='index'),
    path('ajax/', views.ajax_view, name='ajax_view'),
]
Step 3: Run and Test the Application
python manage.py runserver
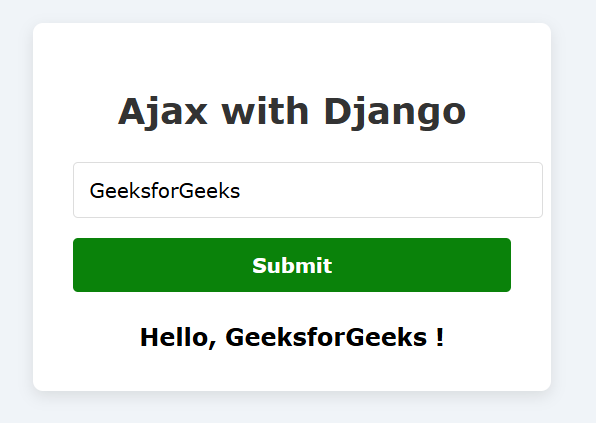
Visit http://127.0.0.1:8000/ in the browser to see a simple form. Enter a name and click Submit. The form sends data to the server and displays the response below the form in real time, without reloading the page.
Advantages of Integrating Ajax with Django
- Improved User Experience: Updates parts of a webpage without full reloads, making the interface faster and more interactive.
- Reduced Bandwidth Usage: Only small sections of the page are updated, minimizing data transfer between client and server.
- Real-time Updates: Fetches data from the server in real time, suitable for live content like chat or notifications.
- Improved Performance: Reduces load on both server and client by updating only necessary parts of the page, resulting in faster performance.