Render is a cloud-based Platform as a Service (PaaS) that enables seamless deployment, management and scaling of machine learning models and applications. With built-in support for web services and APIs, Render provides an efficient way to host and run ML models online.
- Render provides free plans for deploying small projects and prototypes.
- Deployment is simple and requires minimal setup.
- It supports integrations with databases, APIs and other services for fully functional applications.
How to Deploy Your Machine Learning Model on Render
Here we deploying a machine learning model on Render, moving it from local development to a live web application accessible online.
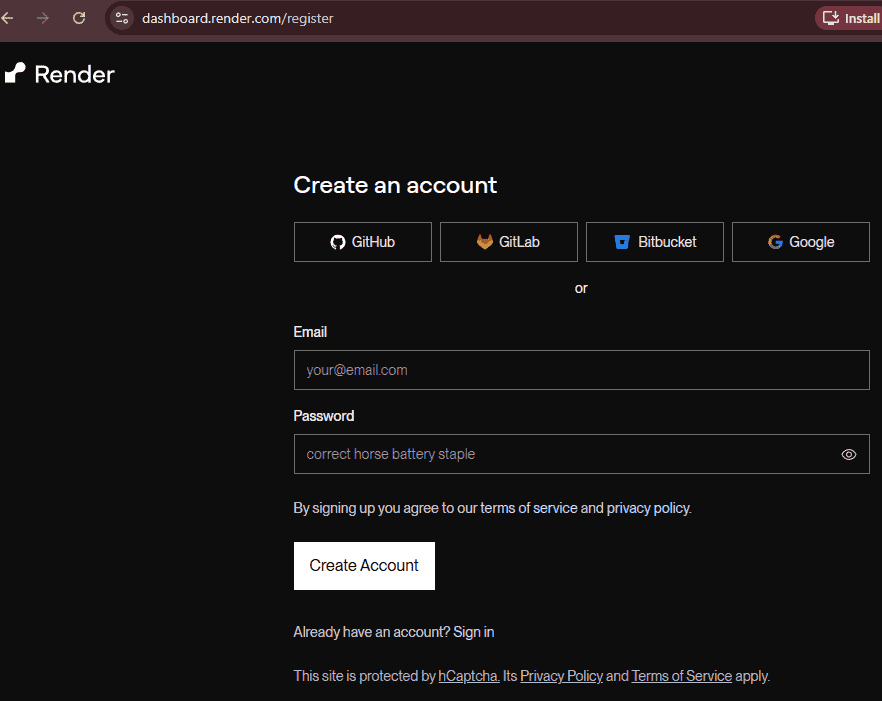
Step 1: Create a Render Account
Creating a Render account is the first step to deploying your machine learning model. A free account is enough to start small projects and prototypes.
- Sign up on Render and verify your email to activate your account.
- Free and paid plans are available the free plan is ideal for beginners and testing.
Step 2: Prepare Your ML Code and Save the Model
Before deployment, the machine learning code should be organized and the trained model should be saved so it can be loaded in your web app. This ensures that Render can run your app without retraining the model every time.
- Save the trained model using libraries like pickle, joblib or torch.save depending on your framework.
- Organize your code so the app can easily load the model, handle inputs and return predictions.
Download dataset from here
import pandas as pd
import numpy as np
from sklearn.model_selection import train_test_split
from sklearn.preprocessing import OneHotEncoder
from sklearn.compose import ColumnTransformer
from sklearn.pipeline import Pipeline
from xgboost import XGBRegressor
import joblib

data = pd.read_csv("Housing.csv")

numeric_features = ['area', 'bedrooms', 'bathrooms', 'stories']
categorical_features = ['mainroad', 'guestroom', 'basement', 'hotwaterheating',
                        'airconditioning', 'parking', 'prefarea', 'furnishingstatus']

X = data[numeric_features + categorical_features]
y = np.log1p(data['price'])


preprocessor = ColumnTransformer(
    transformers=[
        ('num', 'passthrough', numeric_features),
        ('cat', OneHotEncoder(handle_unknown='ignore'), categorical_features)
    ])

model = Pipeline([
    ('preprocessor', preprocessor),
    ('regressor', XGBRegressor(
        n_estimators=500,
        learning_rate=0.05,
        max_depth=4,
        subsample=0.8,
        colsample_bytree=0.8,
        random_state=42
    ))
])

X_train, X_test, y_train, y_test = train_test_split(X, y, test_size=0.2, random_state=42)

model.fit(X_train, y_train)

joblib.dump(model, "house_price_xgb_model.pkl")
Step 3: Create a Flask App
A Flask app serves as the interface between your saved machine learning model and the web. It handles user inputs, loads the trained model, and returns predictions to the client or browser.
- Create a Python script (e.g., app.py) and import Flask along with your ML libraries.
- Load the saved model (pickle, joblib, or torch) at the start of the app.
- Define routes (e.g., /predict) that accept input data, pass it to the model, and return the prediction.
- Add a HTML form with CSS styling or a JSON API endpoint to allow users to interact with the model through a web interface.
- Run the application using python app.py to test it locally.
from flask import Flask, render_template, request
import pandas as pd
import numpy as np
import joblib
app = Flask(__name__)
model = joblib.load("house_price_xgb_model.pkl")
@app.route("/", methods=["GET", "POST"])
def home():
    predicted_price = None
    if request.method == "POST":
        try:
            input_data = {
                'area': [float(request.form['area'])],
                'bedrooms': [int(request.form['bedrooms'])],
                'bathrooms': [int(request.form['bathrooms'])],
                'stories': [int(request.form['stories'])],
                'mainroad': [request.form['mainroad']],
                'guestroom': [request.form['guestroom']],
                'basement': [request.form['basement']],
                'hotwaterheating': [request.form['hotwaterheating']],
                'airconditioning': [request.form['airconditioning']],
                'parking': [int(request.form['parking'])],
                'prefarea': [request.form['prefarea']],
                'furnishingstatus': [request.form['furnishingstatus']]
            }

            df = pd.DataFrame(input_data)
            pred_log = model.predict(df)
            predicted_price = np.expm1(pred_log)[0]  # convert log back to price
        except Exception as e:
            predicted_price = f"Error: {str(e)}"

    return render_template("noindex.html", price=predicted_price)

if __name__ == "__main__":
    app.run(debug=True)
Output:
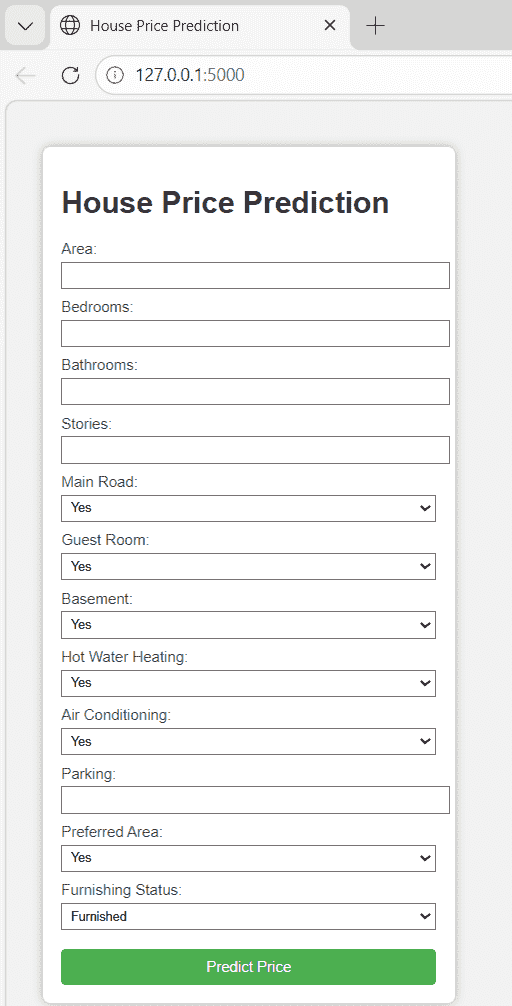
We build a Flask application that loads the trained model, processes user input and returns predictions. It shows how the model is integrated with a web interface for real-time interaction.
Step 4: Create requirements.txt File
A requirements.txt file is needed to list all the dependencies used in the project so that Render can install them during deployment. This ensures the application runs correctly in the cloud environment. Generate the file using the command:
pip freeze > requirements.txt
After generating the file, add this line as well in requirements.txt file:
gunicorn==21.2.0
Make sure all required libraries are included and unnecessary packages are removed if needed.
Step 5: Push Code to GitHub
Your project needs to be uploaded to a GitHub repository so Render can access and deploy it. This also helps in version control and managing updates easily. Initialize Git and push your code using:
git init
git add .
git commit -m "initial commit"
git branch -M main
git remote add origin <your-repo-url>
git push -u origin main
Output:
Step 6: Connect GitHub and Deploy on Render
Here we connect GitHub repository to Render and configuring the service for deployment. Once the setup is complete, Render builds and hosts the application, making it ready to go live.
- In Render, click on “New +” and select “Web Service” to start the deployment process. This allows you to connect your GitHub repository and configure your application for deployment.
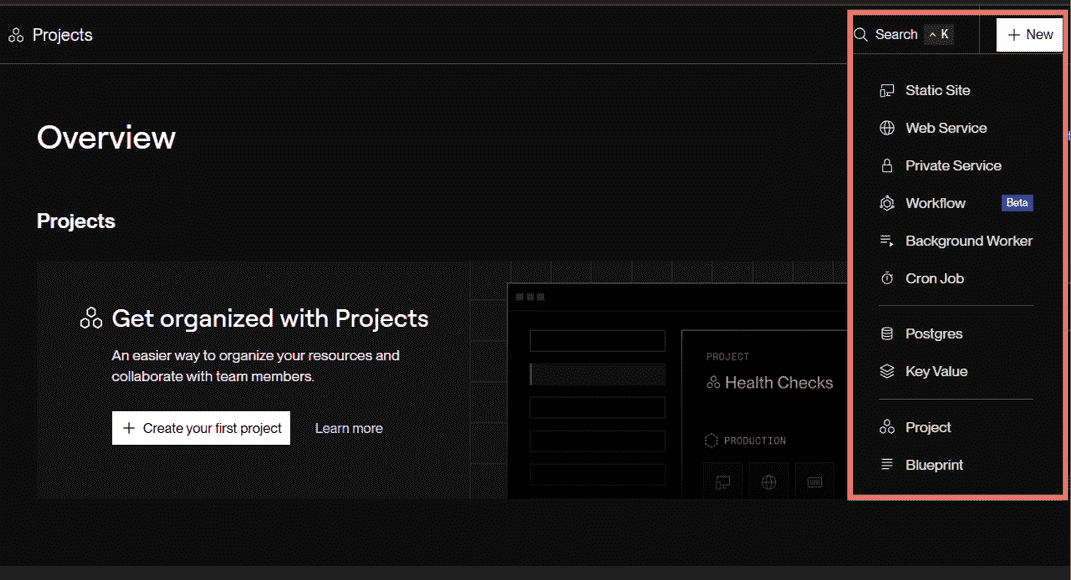
- After selecting Web Service, connect your GitHub repository to Render. This allows Render to access your project files and prepare them for deployment.
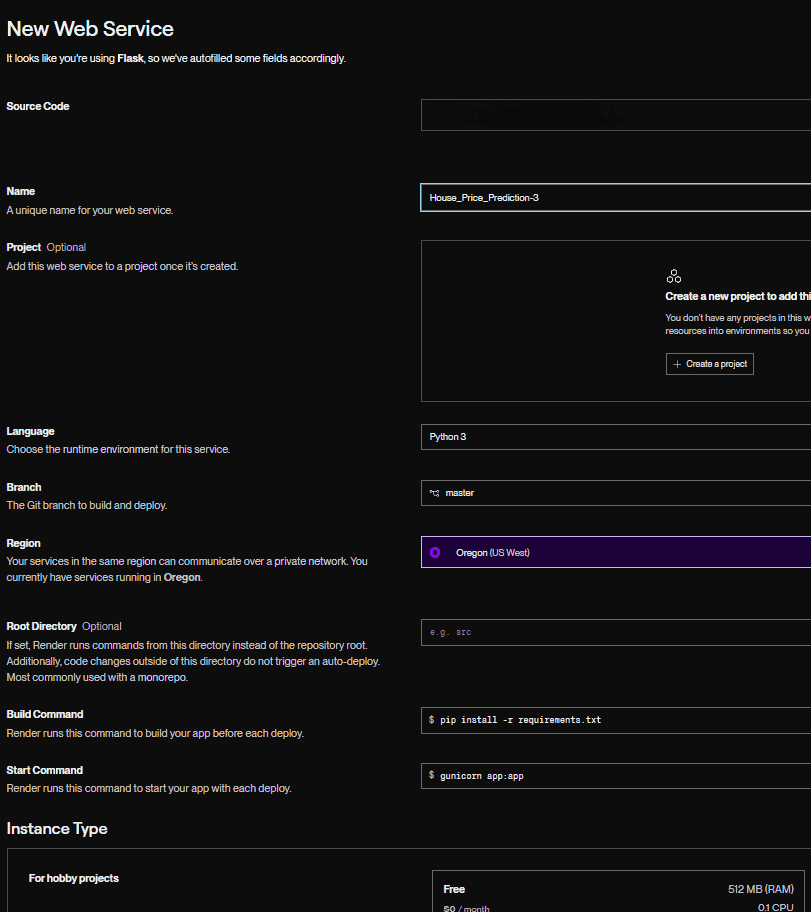
Step 7: Configure New Web Service
After connecting the repository, configure the settings in the “New Web Service” section. These options define how your application will be built and run on Render.
- Name: Enter a unique name for your web service.
- Environment: Select the runtime (e.g., Python).
- Region: Choose the server location for deployment.
- Branch: Select the branch to deploy (e.g., main).
- Build Command: pip install -r requirements.txt to install dependencies.
- Start Command: gunicorn app:app to run the Flask app.
- Instance Type: Choose free or paid plan based on your needs.
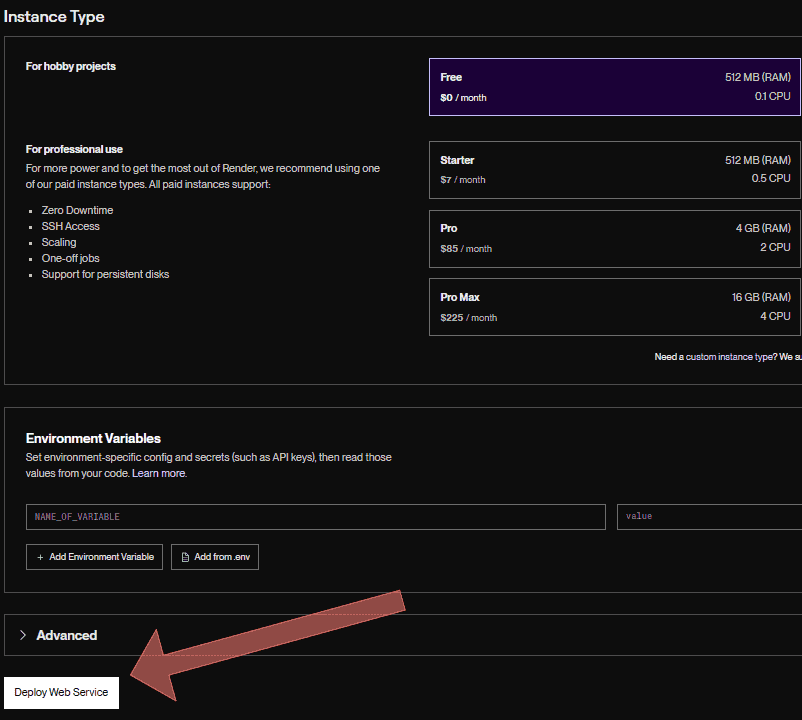
Step 8: Select Instance and Deploy
After configuring all settings, choose the instance type and deploy your application. This step starts the build process and makes your app live on Render.
- Select the Free instance for basic projects or a paid plan for better performance.
- Click on Deploy Web Service to start the deployment process.
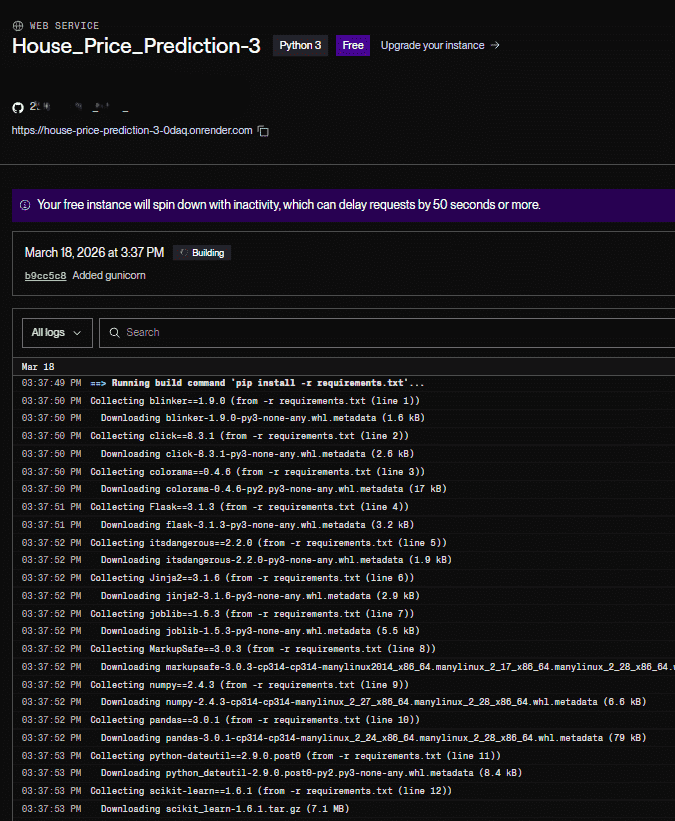
Step 9: Build and Setup on Render
After clicking deploy, Render automatically installs all dependencies and sets up the environment for your project. This process prepares your application to run smoothly in the cloud.
- Render runs the build command to install all libraries from requirements.txt.
- The platform sets up the runtime environment and initializes your application.
- Deployment logs can be checked to ensure all dependencies are installed correctly.
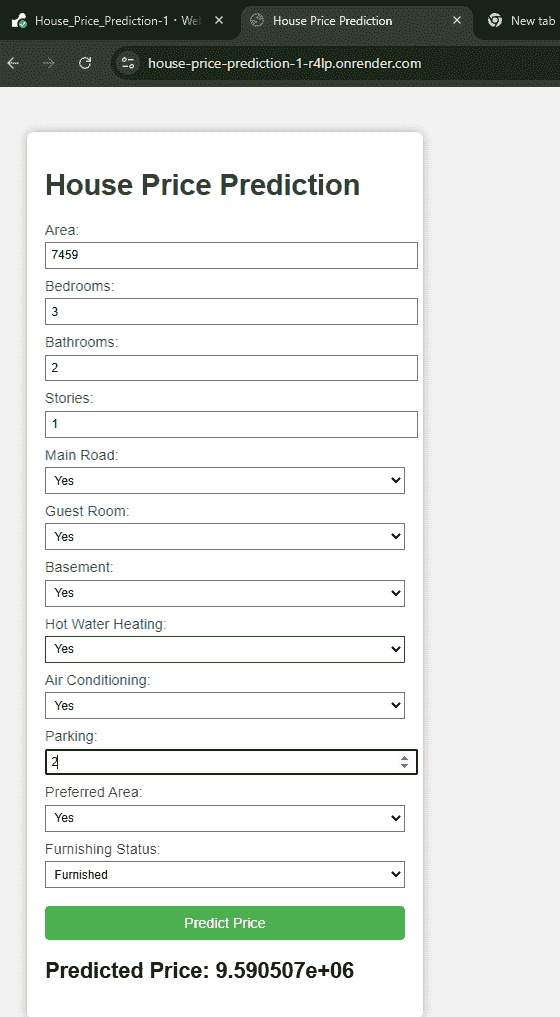
Step 10: Access Your Live Application
Once the deployment process is complete, your application is successfully hosted on Render. It can now be accessed from anywhere using the generated URL.
- Open the provided URL from the Render dashboard to view your application.
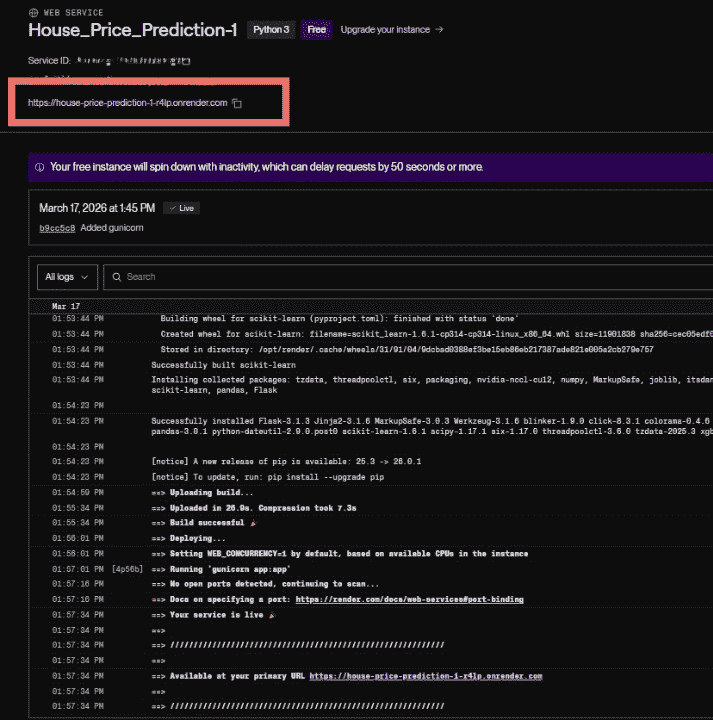
- Test the app by giving inputs and verifying the model predictions.
Download full code from here