AWS Auto Scaling automatically scales EC2 instances up or down based on incoming traffic demand. It helps reduce application latency and can be integrated with AWS services like Amazon DynamoDB and Amazon Aurora.
Benefits of Auto Scaling
- Dynamic Scaling: Automatically scales applications up or down based on traffic demand.
- Pay for What You Use: Optimizes resource usage and reduces unnecessary cost.
- Automatic Performance Maintenance: Maintains application performance during workload changes.
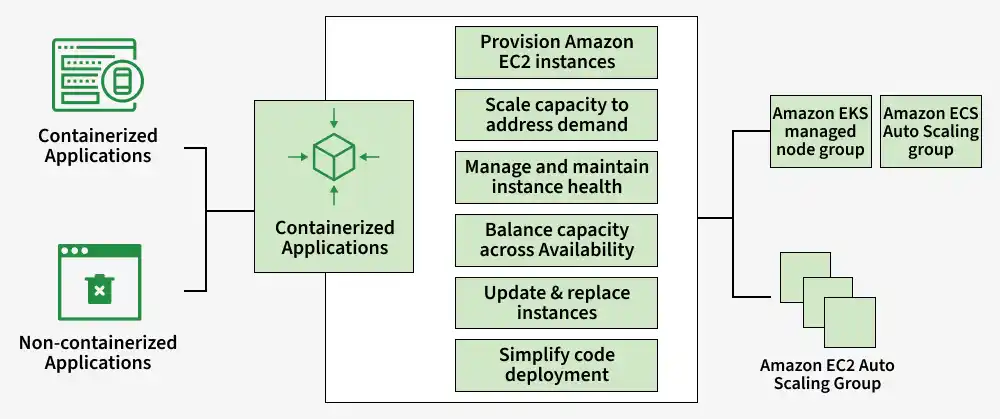
How AWS Auto Scaling Working
AWS autoscaling will scale the application based on the load of application. Instead of scaling manually AWS auto scaling will scale the application automatically when the incoming traffic is high it will scale up the application and when the traffic is low it will scale down the application.

First you should choose which service or an application you want to scale then select the optimization way like cost and performance and then keep track how the scaling is working.
Steps To create Auto Scaling Launch Template
Step 1: Click on the All Services on AWS Dashboard
Step 2: Click on the EC2(Elastic Cloud Computing).

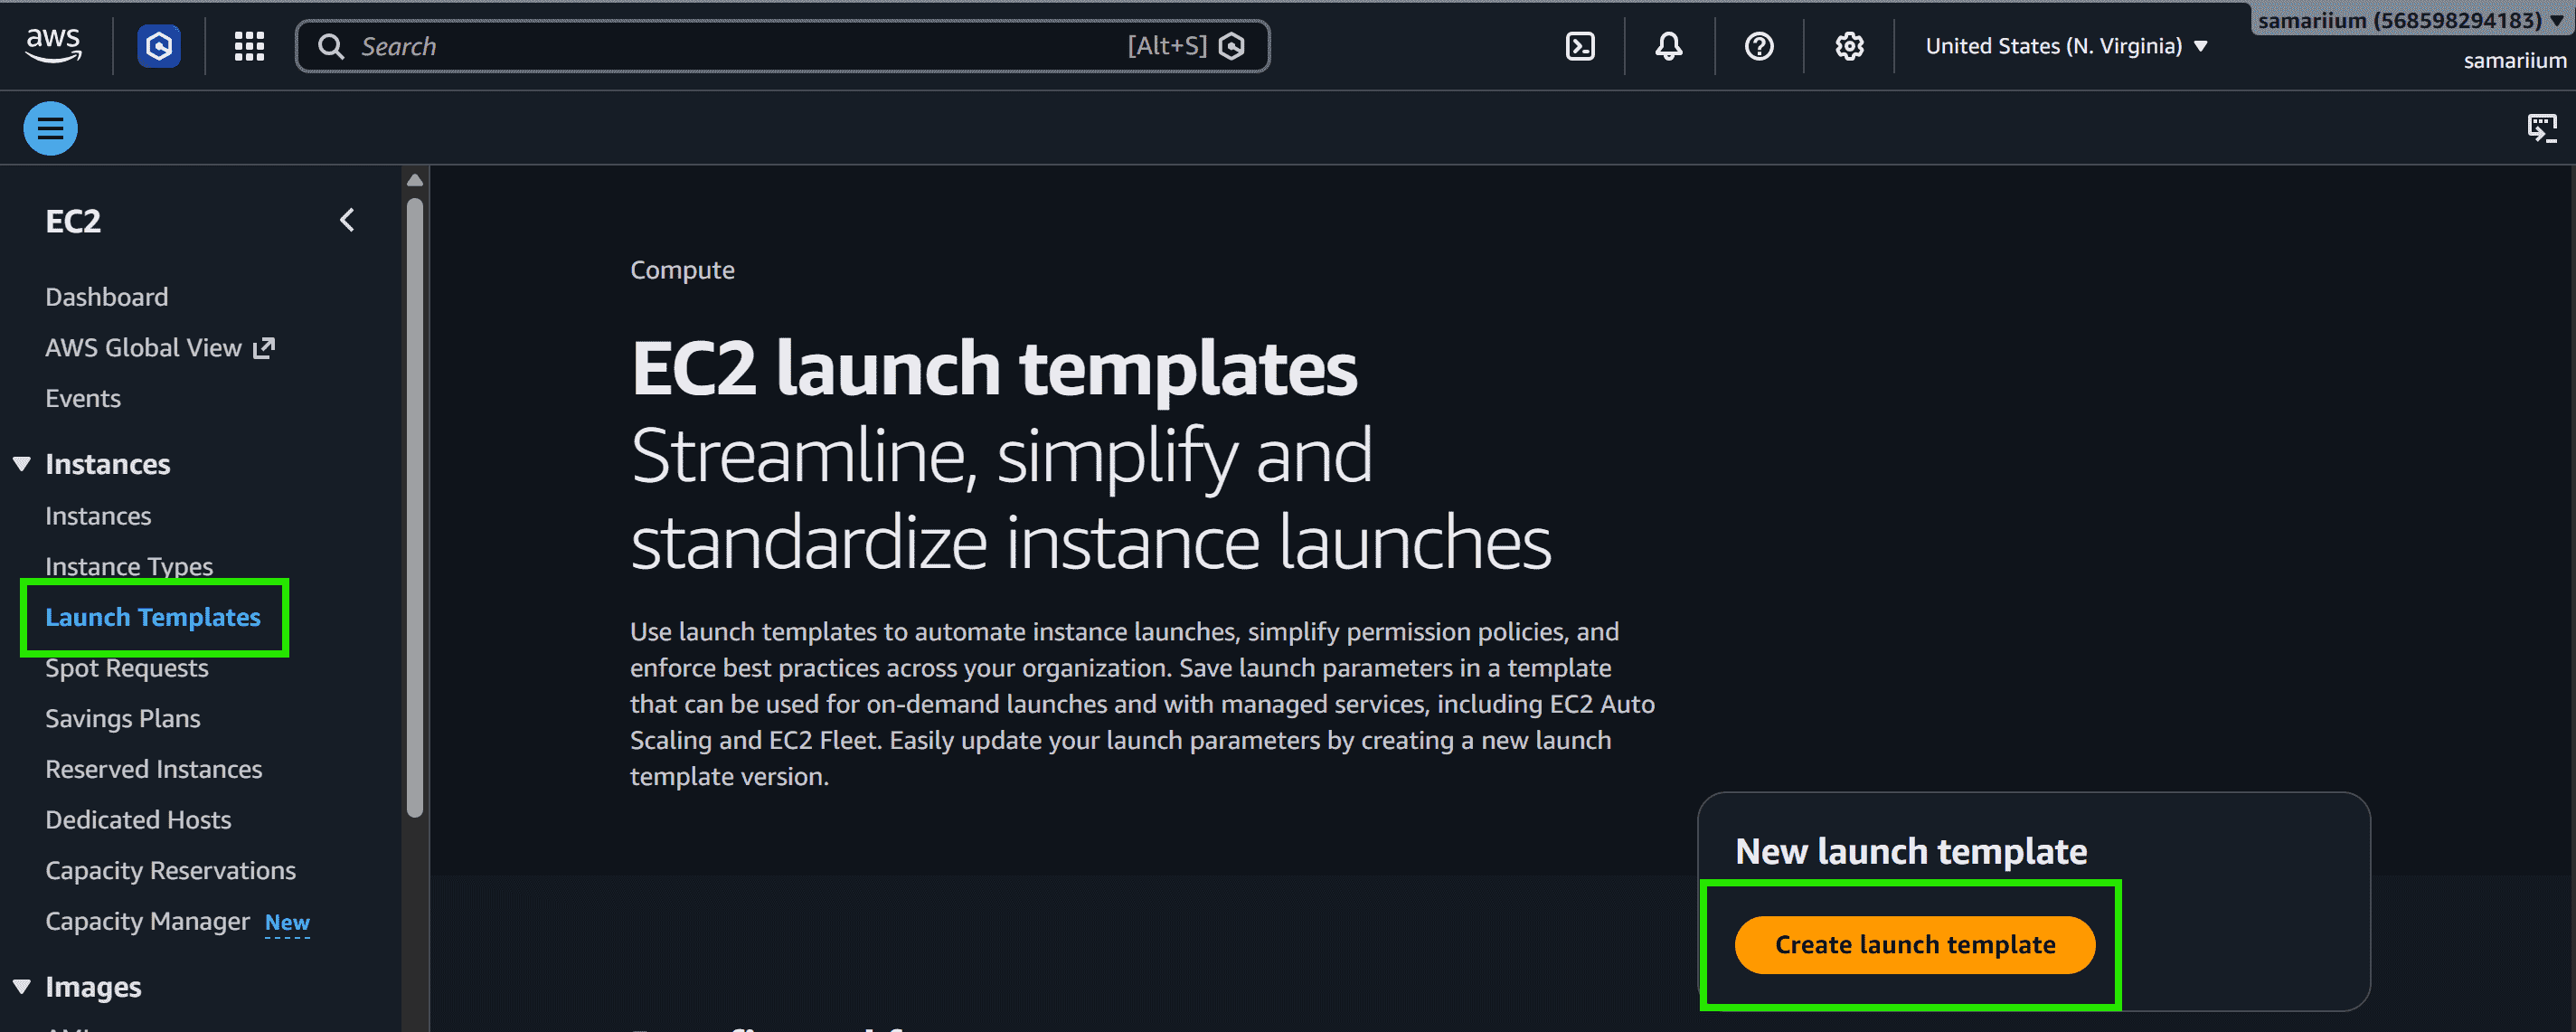
Step 3: Scroll Down and click on the Launch Templates and click on the Create launch template
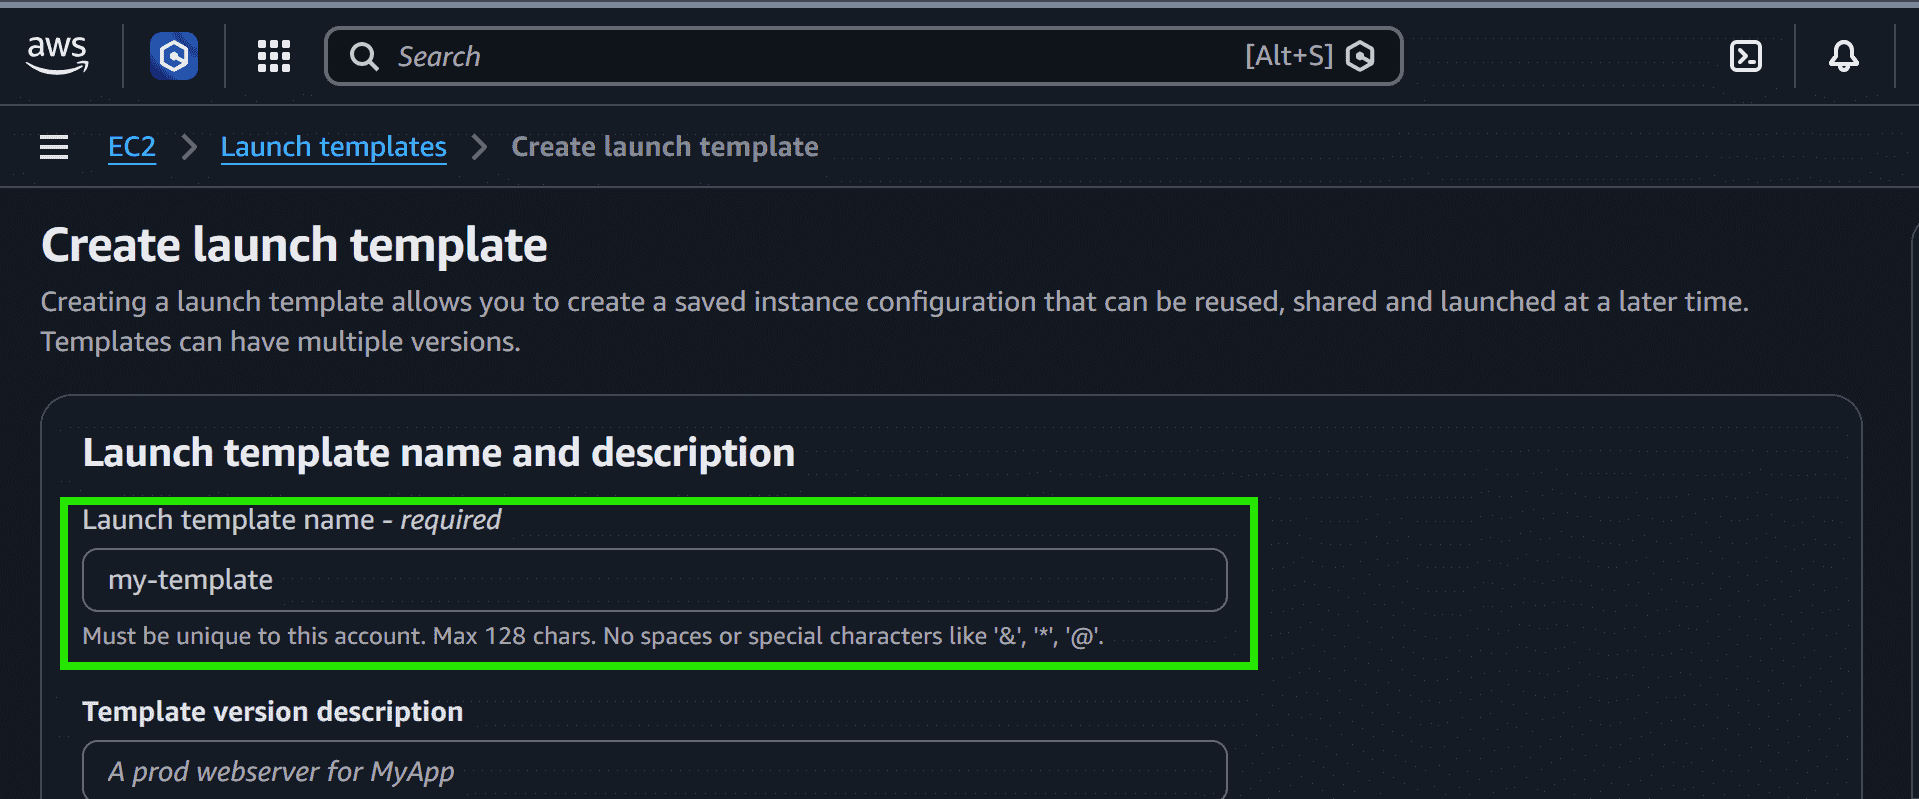
Step 4: Type the Template name.
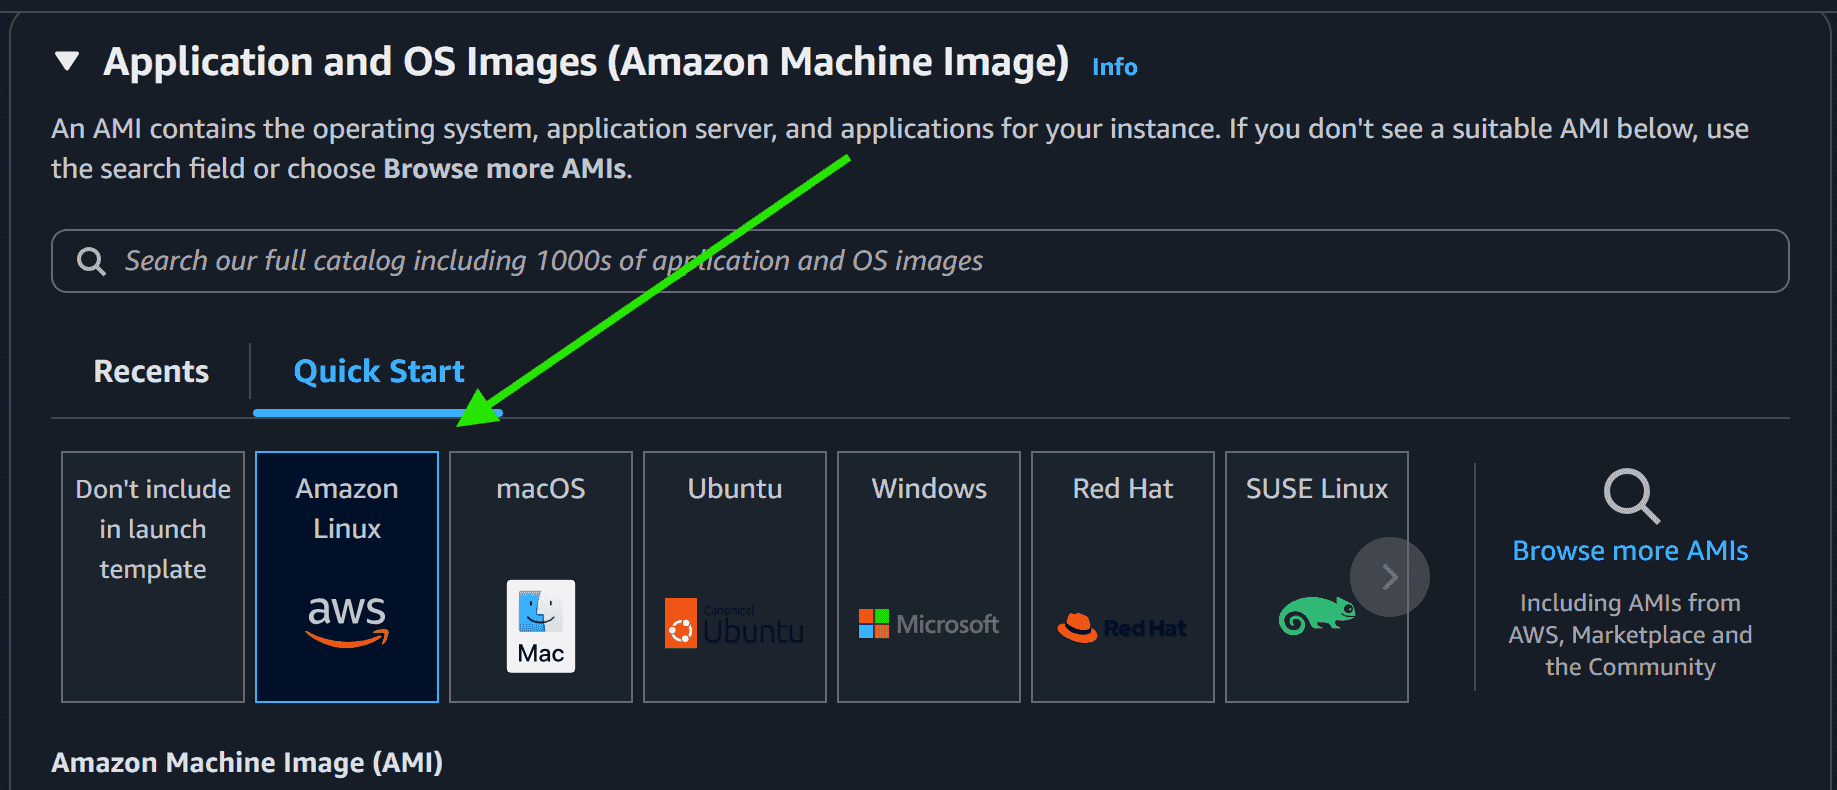
Step 5: Select the Amazon Machine Image.
Step 6: Select the Instance Type and Key pair.
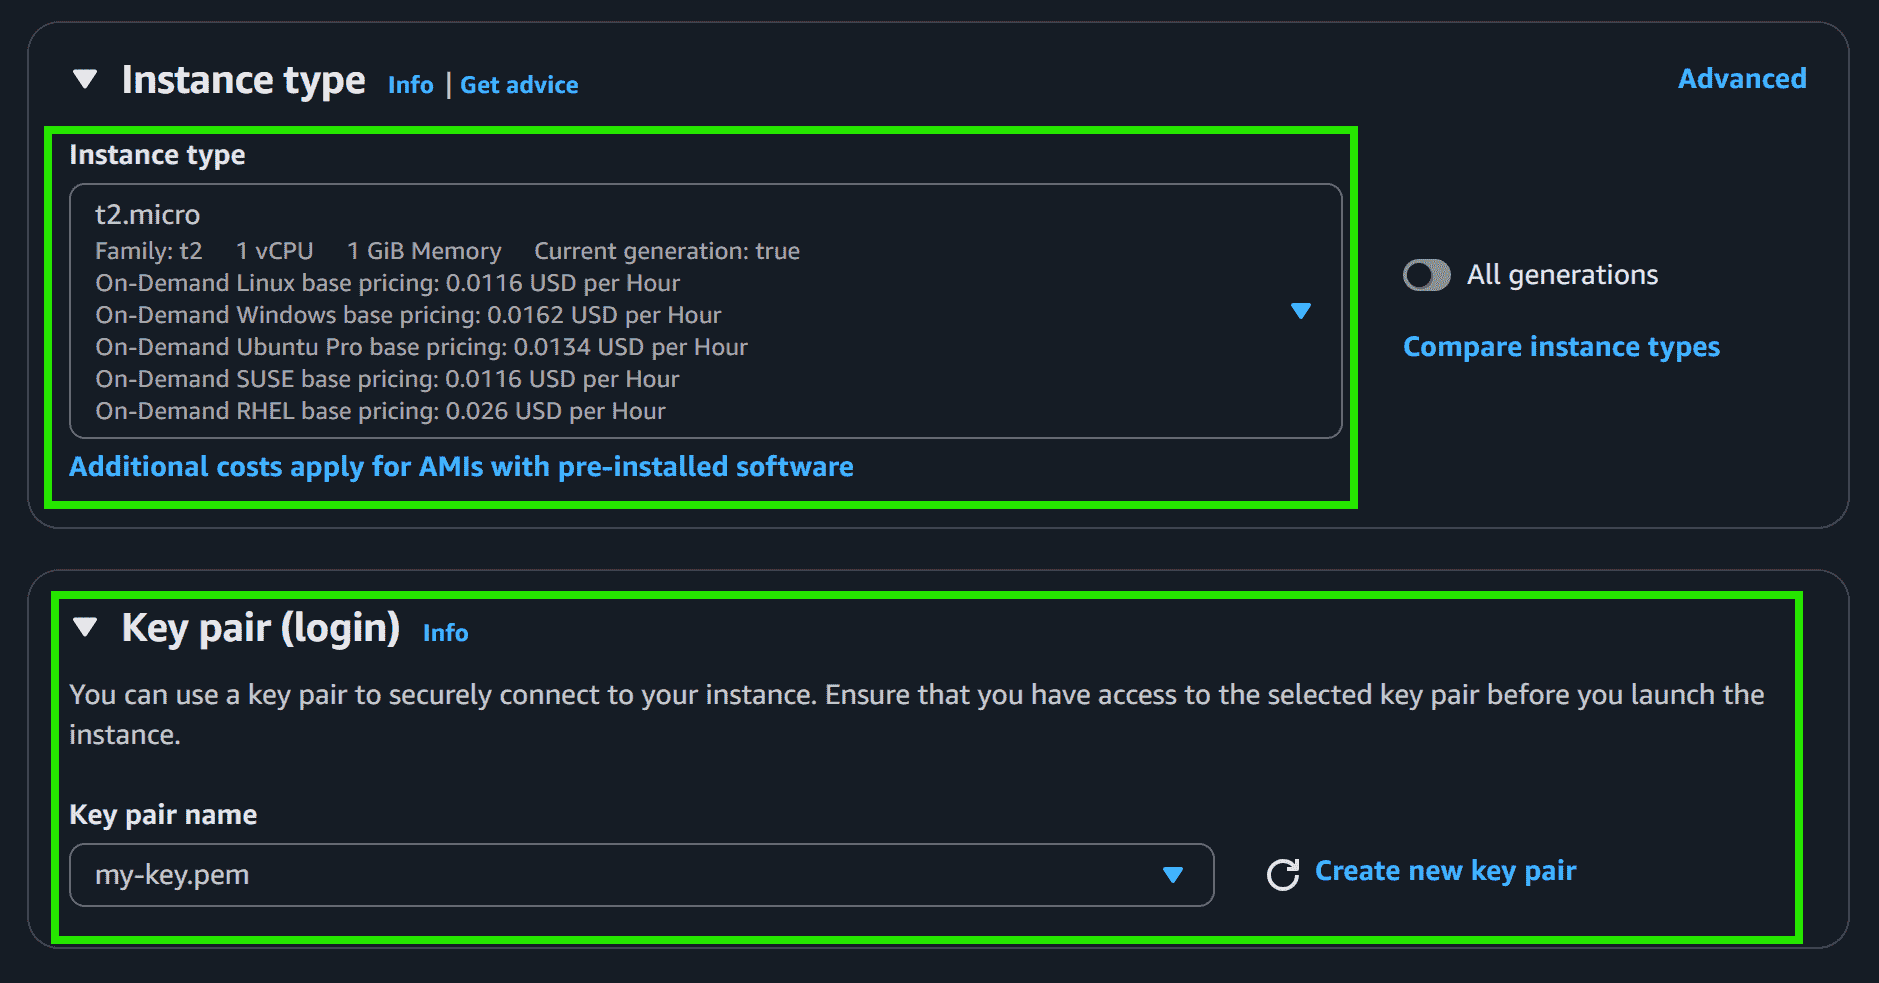
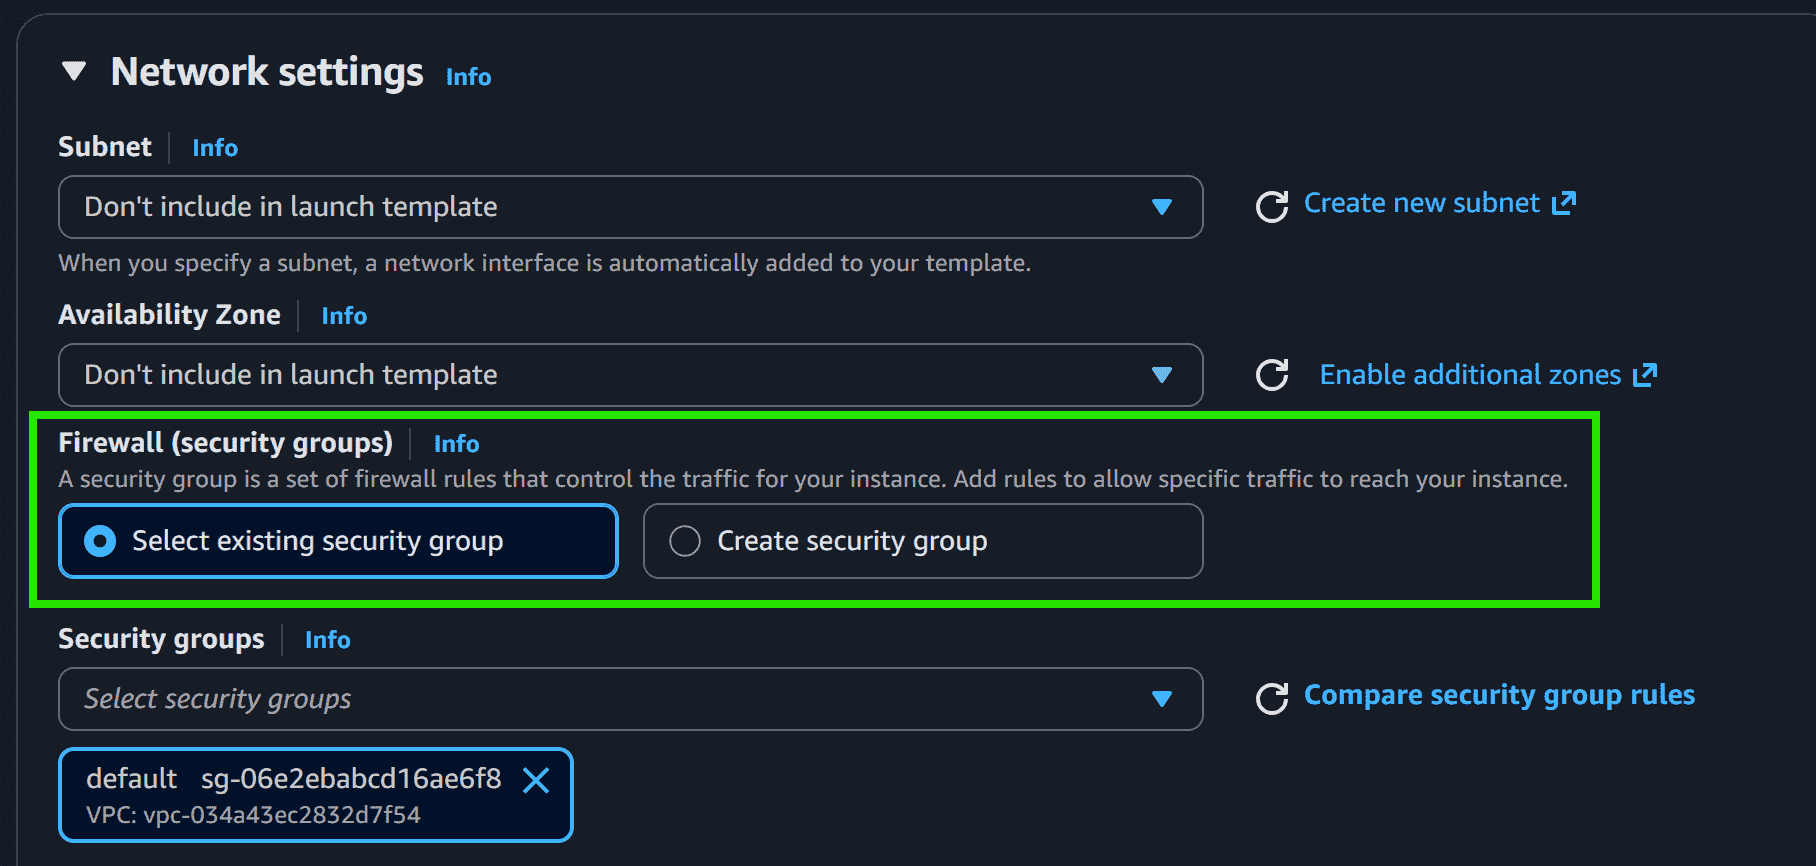
Step 7: Select the Security Group or Create the new one.
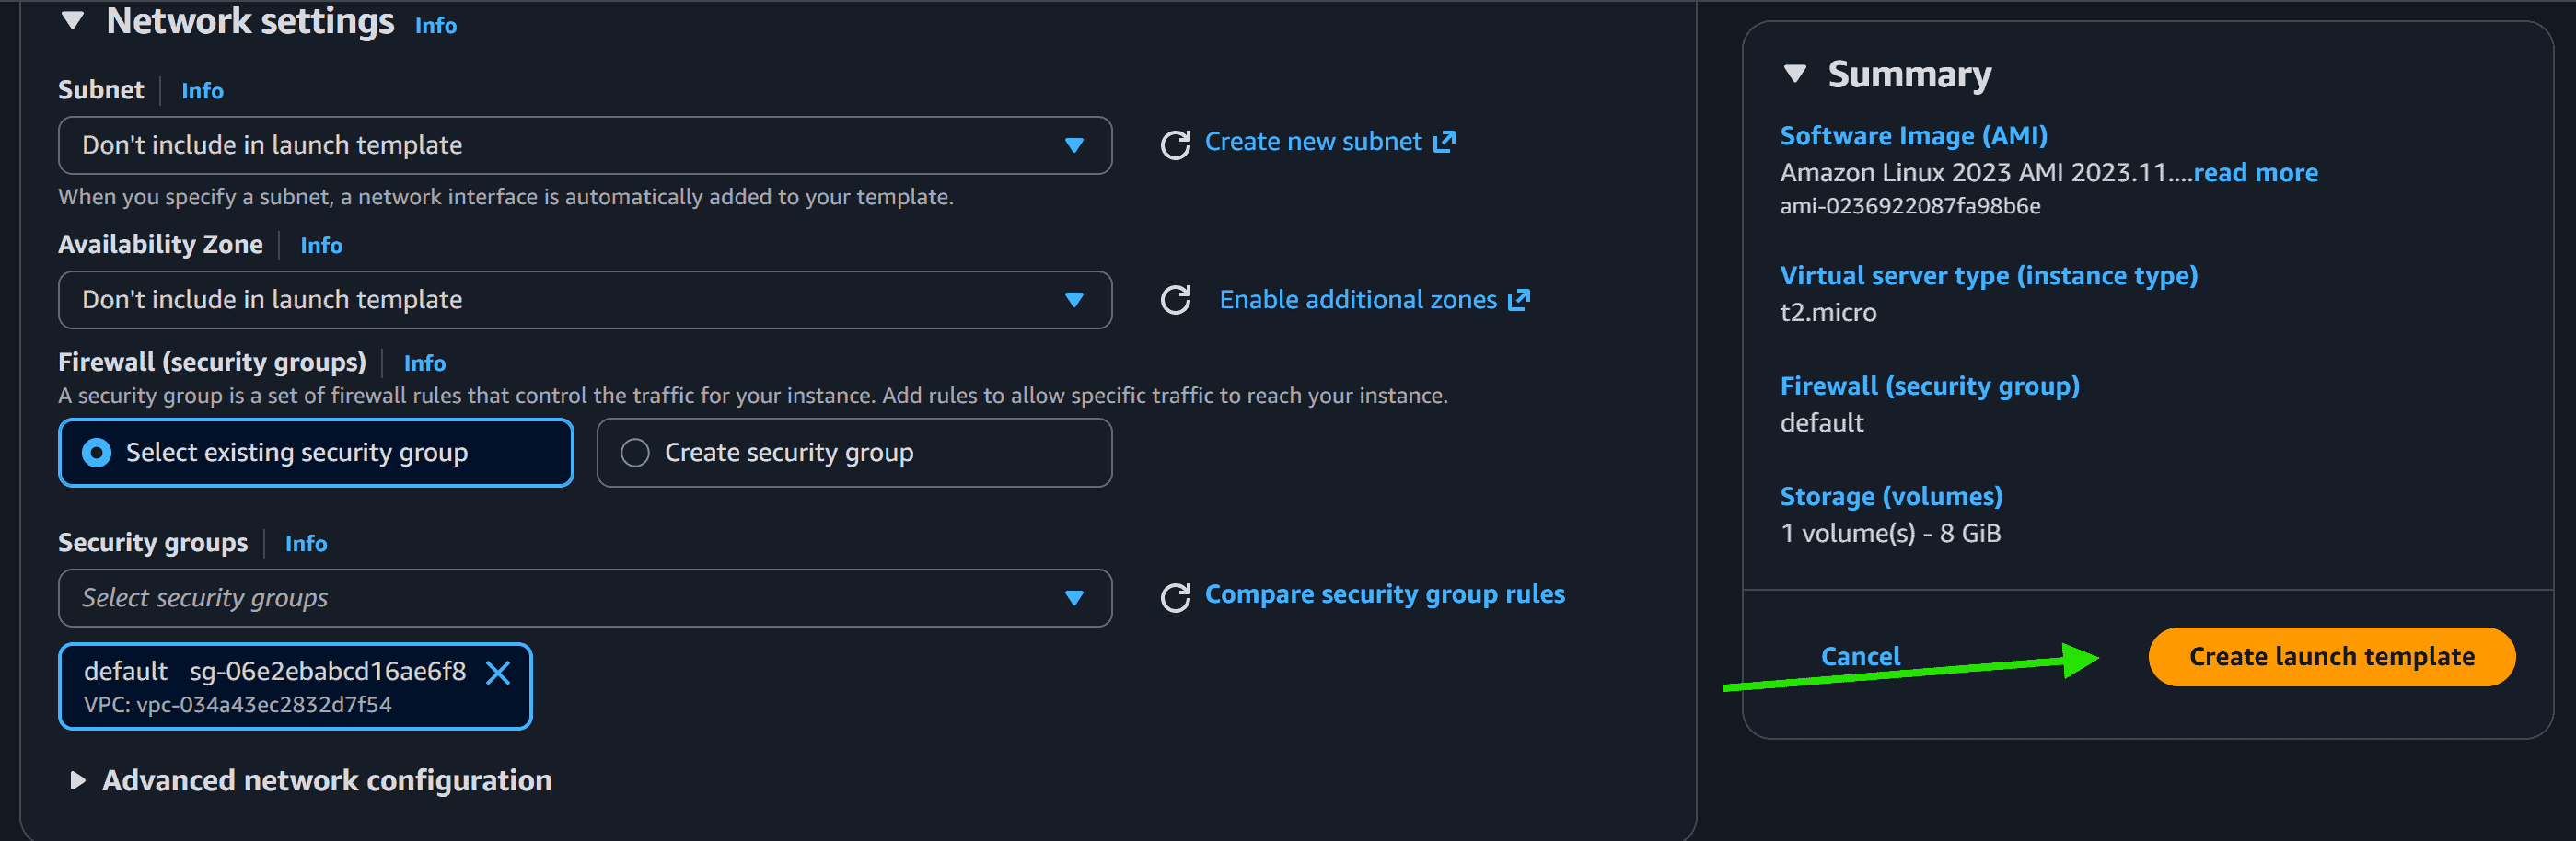
Step 8: Click on the Create Launch Template.
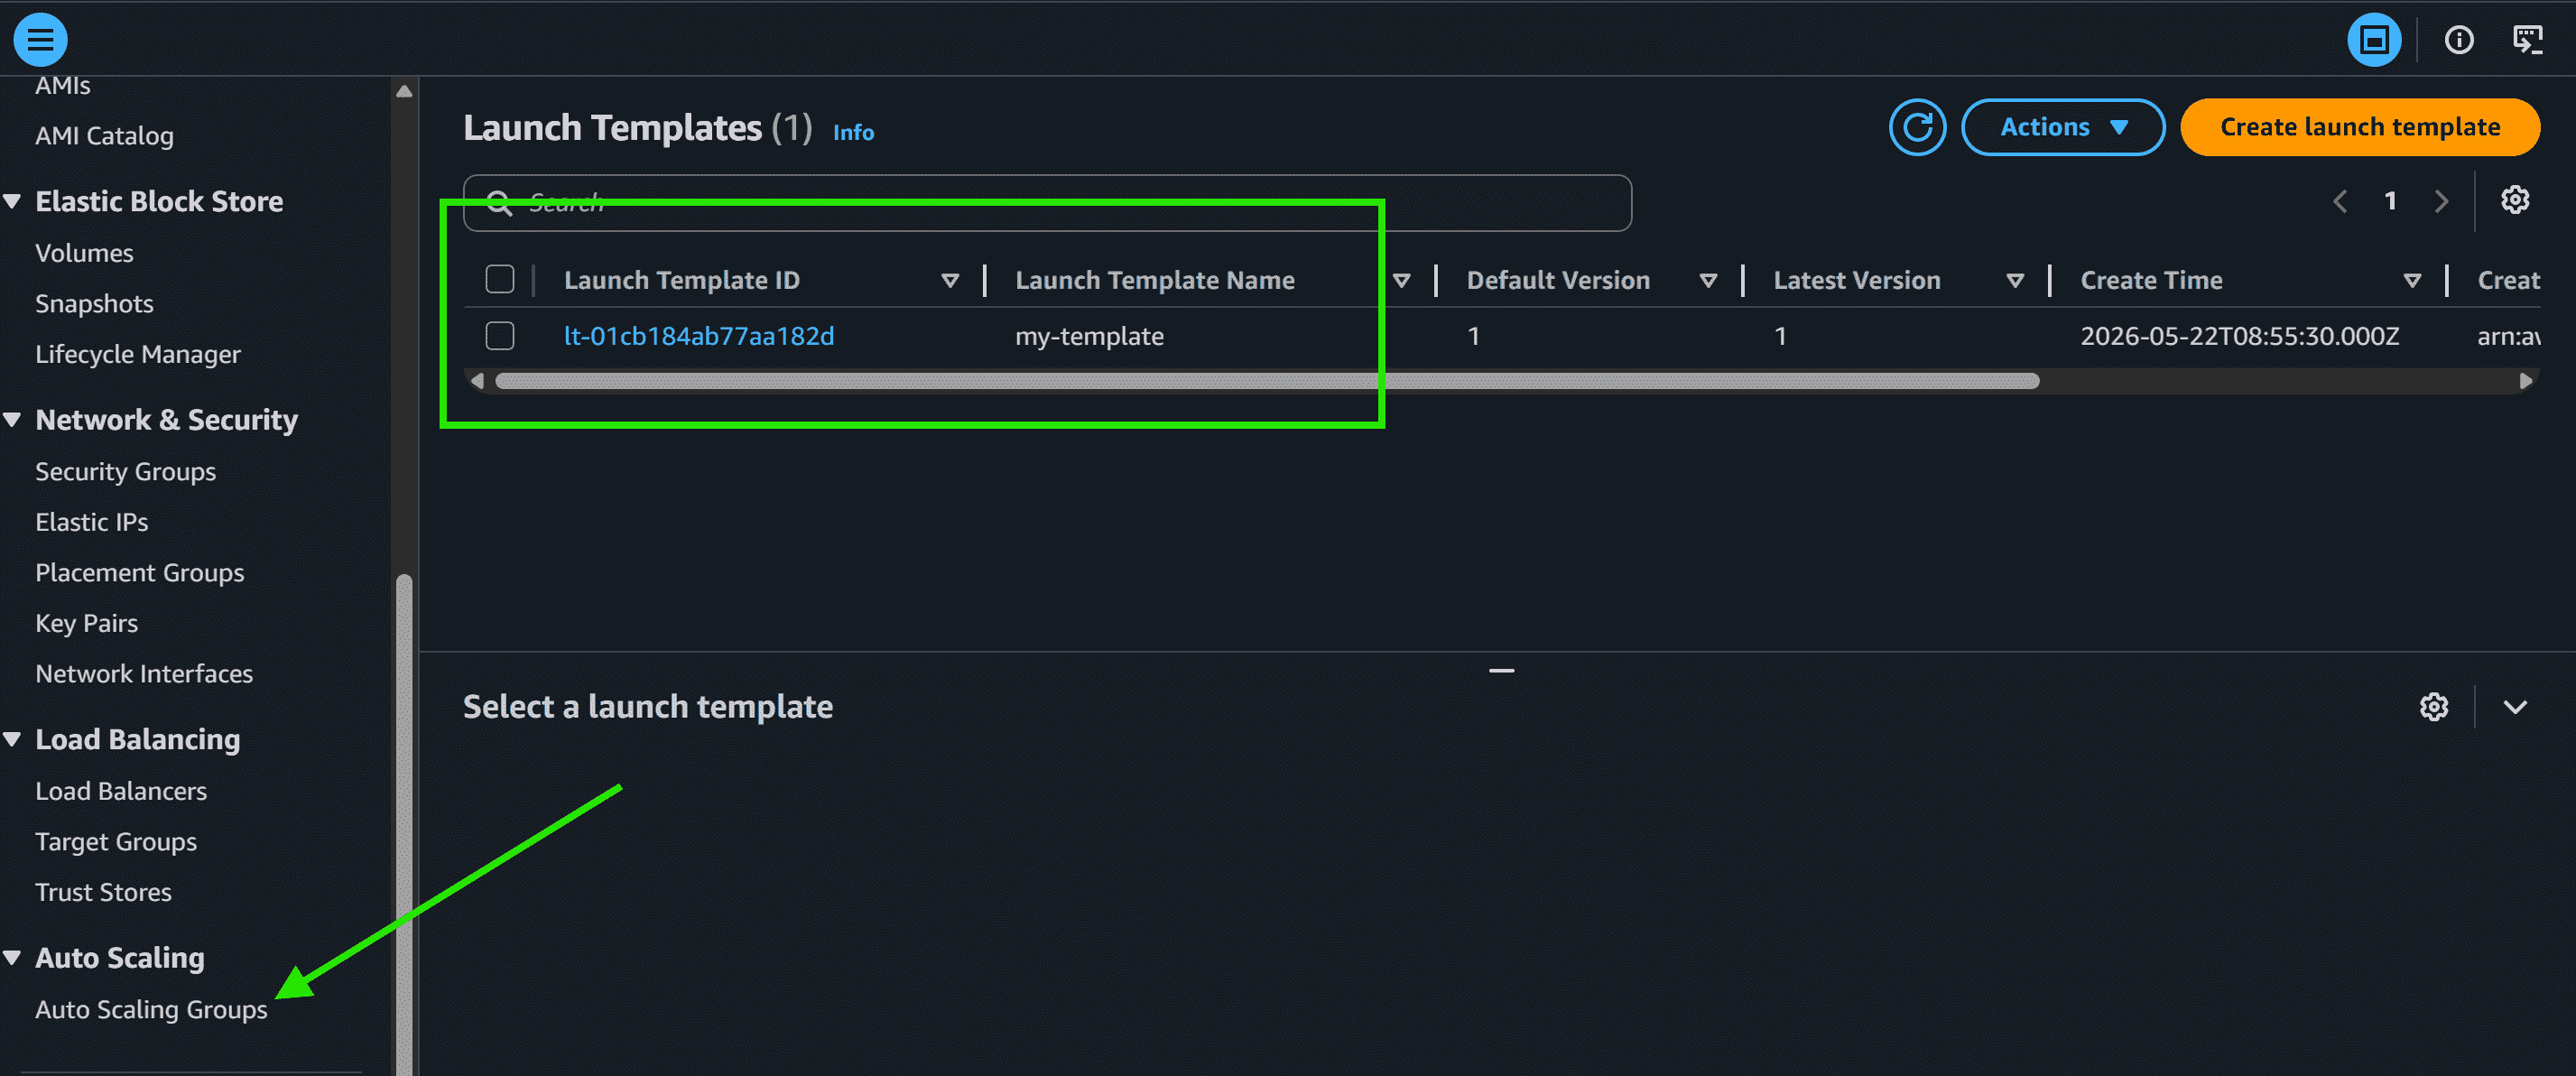
Step 9: Now you can see the template is created. Now, scroll down and click on the Auto Scaling Groups.
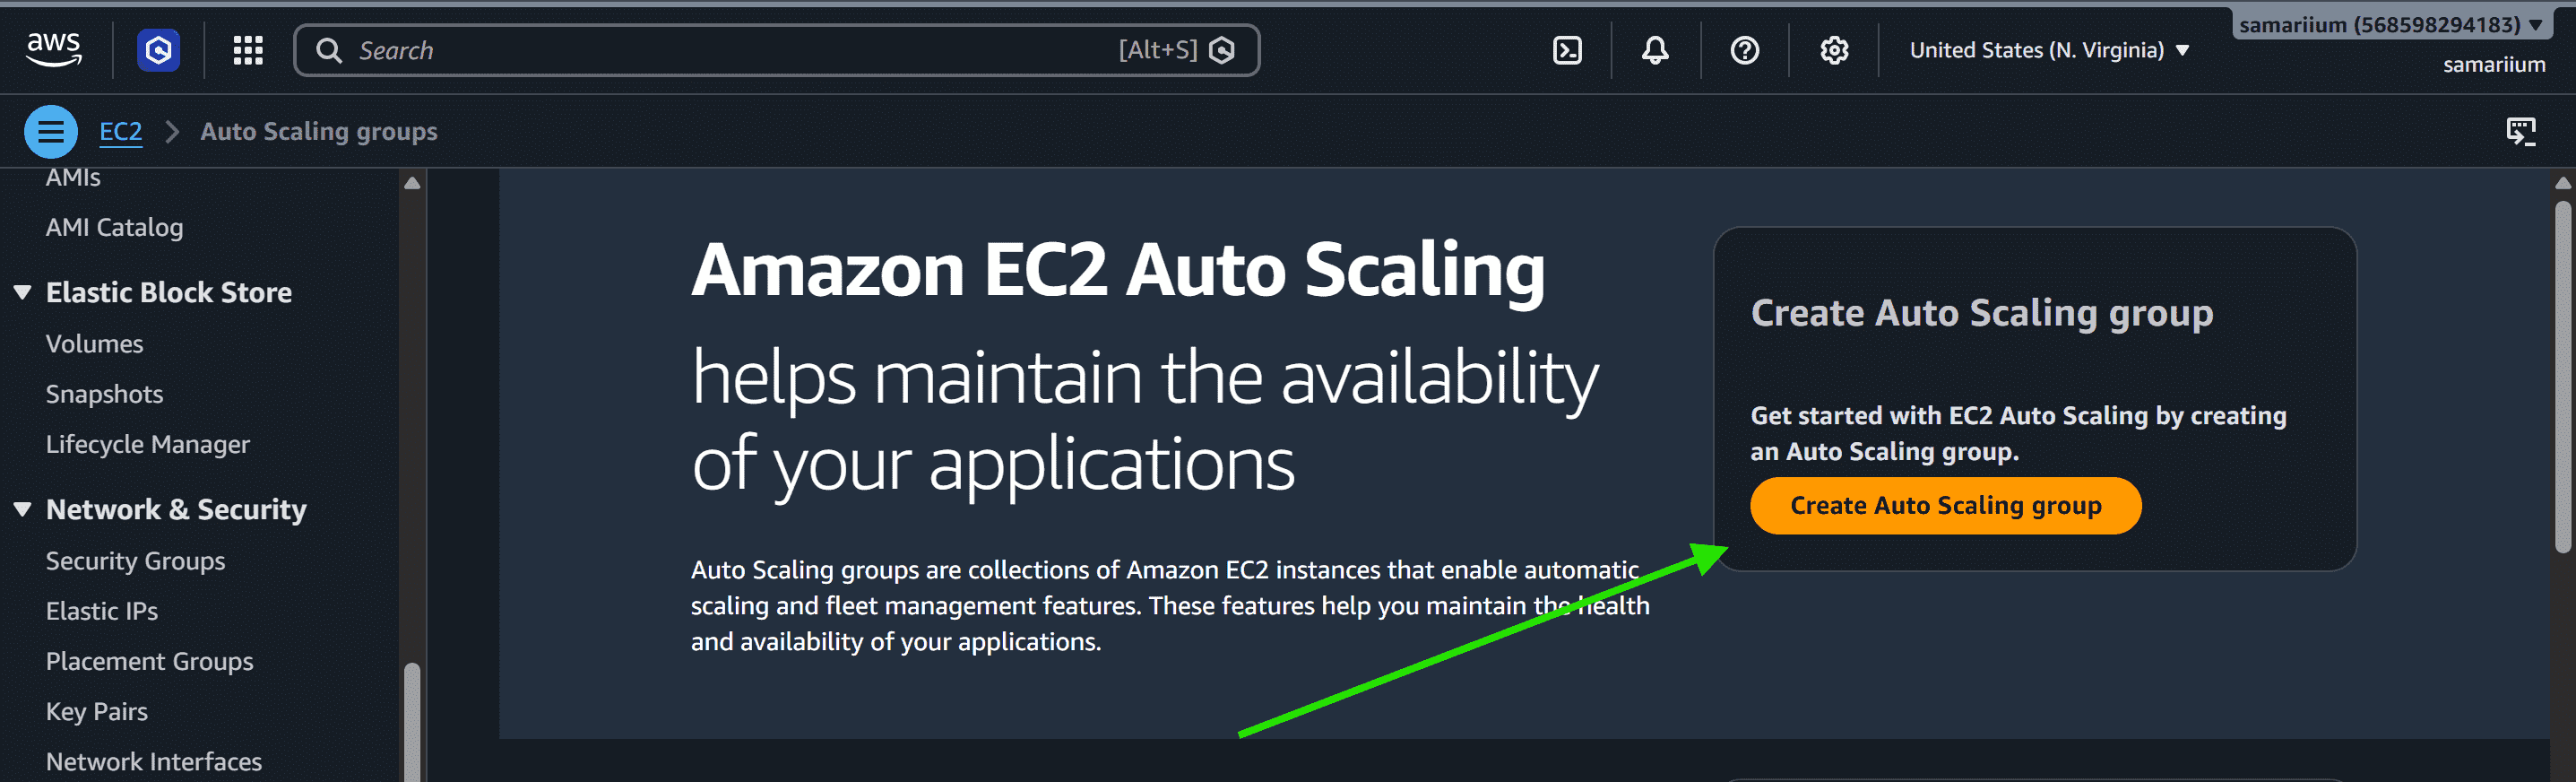
Create An Auto Scaling Group Using a Launch Template
Step 1: Click on the Create Auto Scaling group.
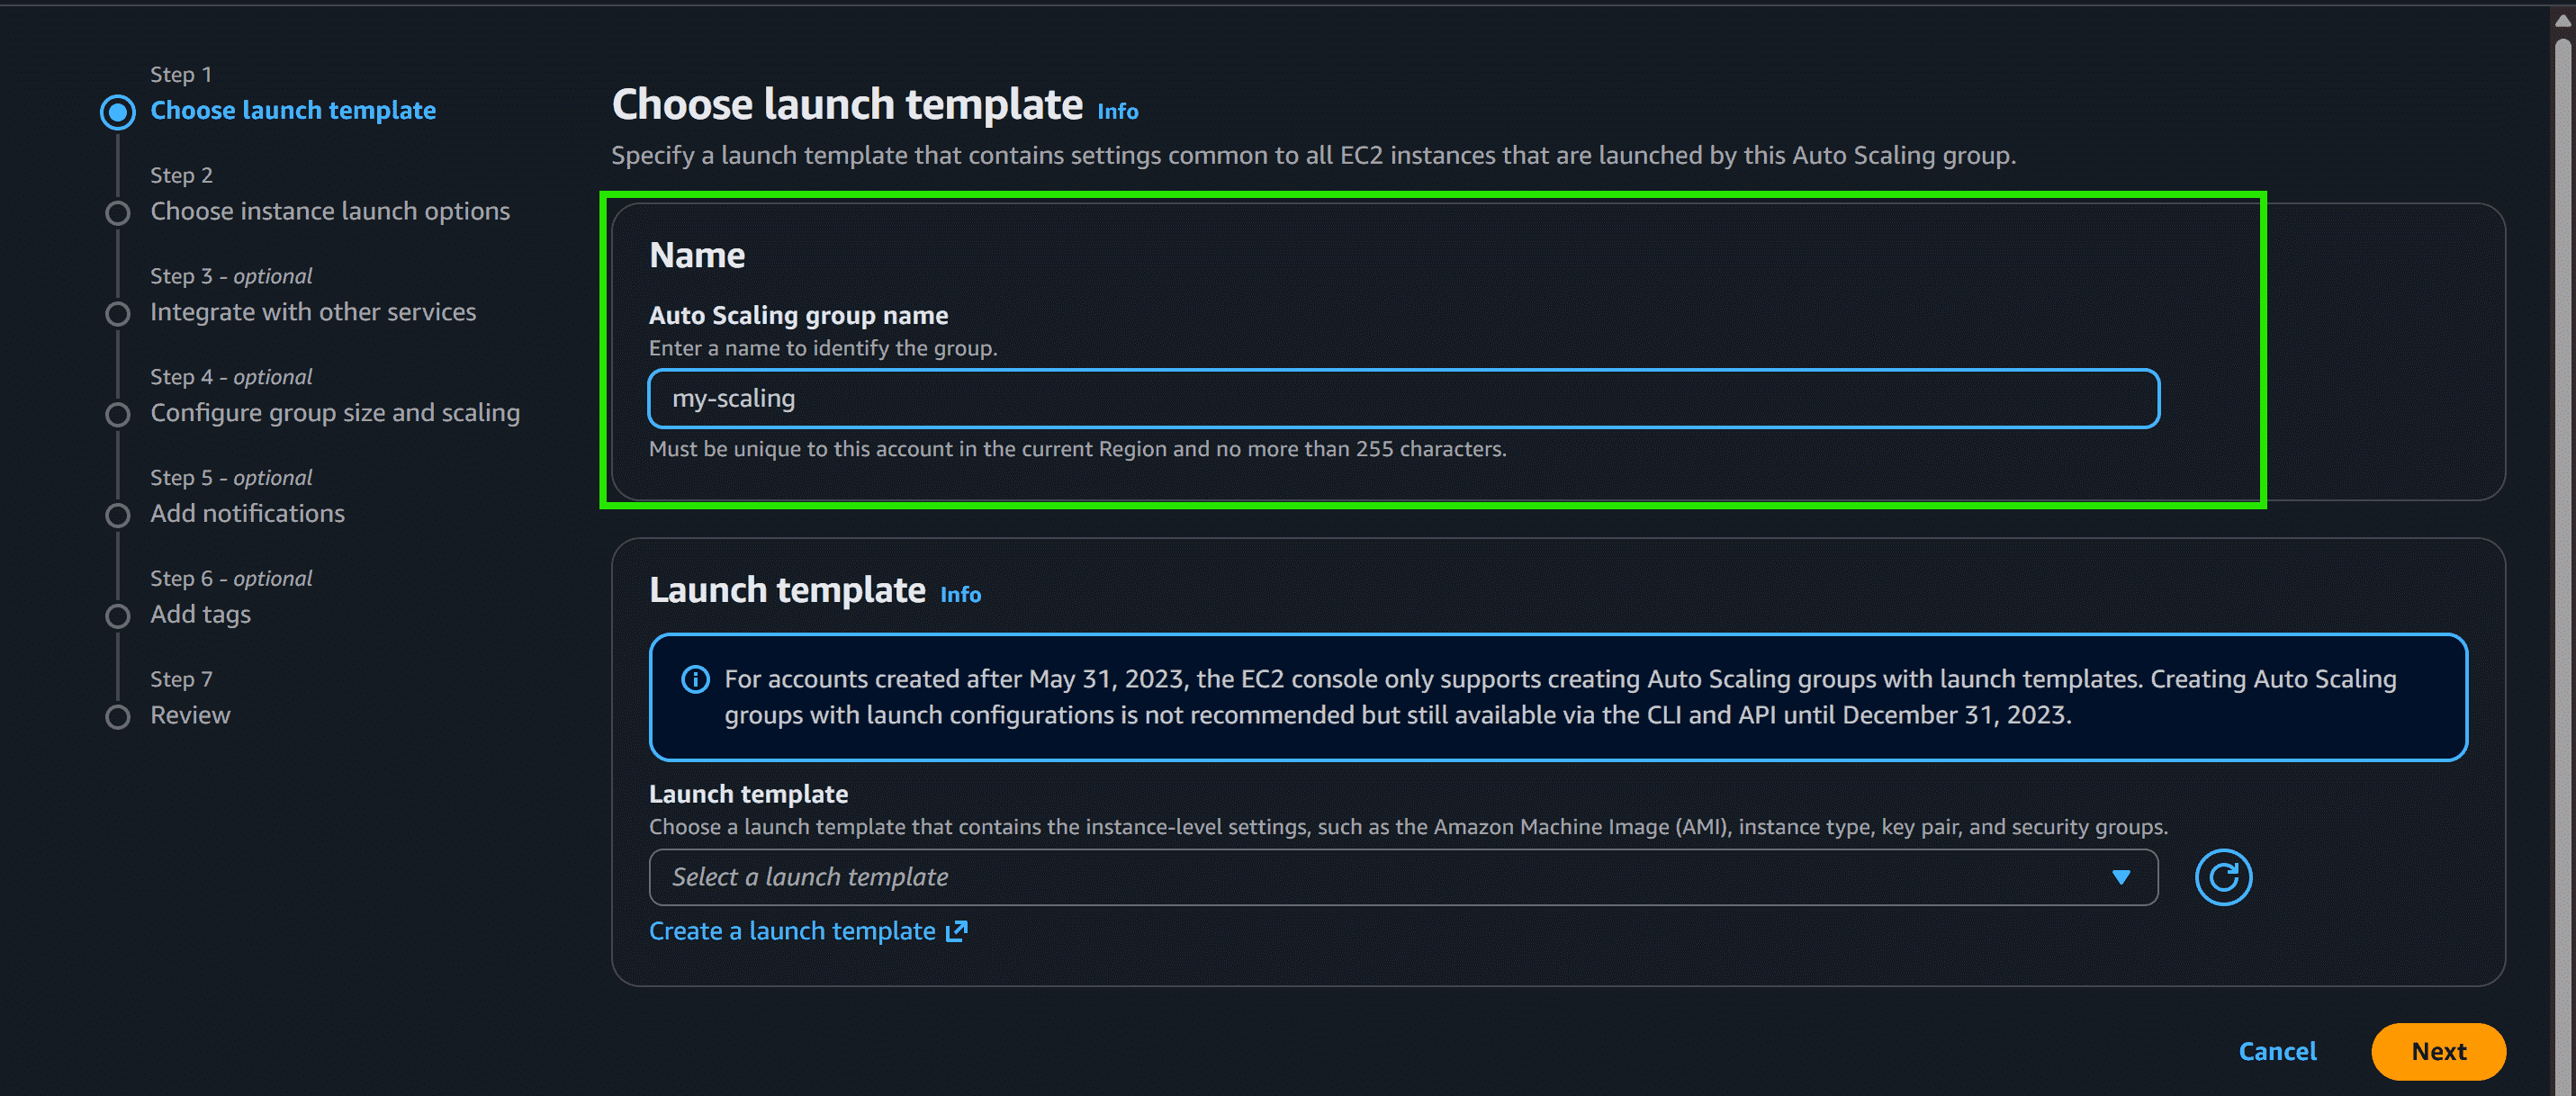
Step 2: Type the Auto Scaling group name.
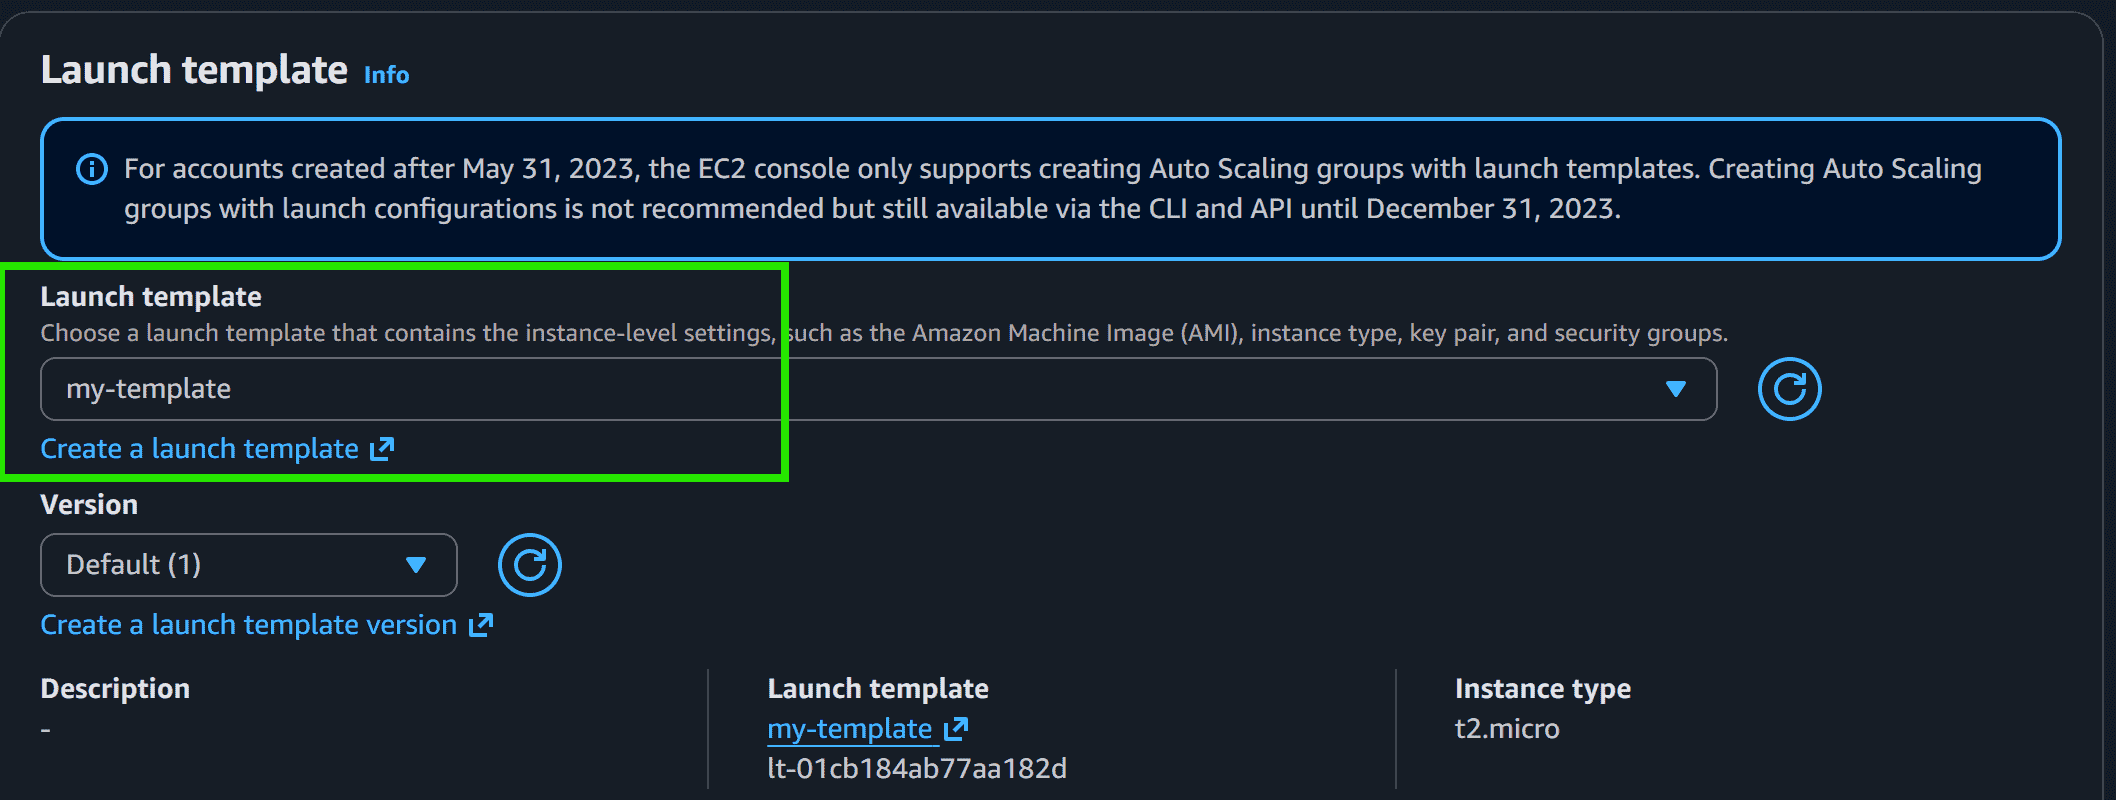
Step 3: Select your Template.
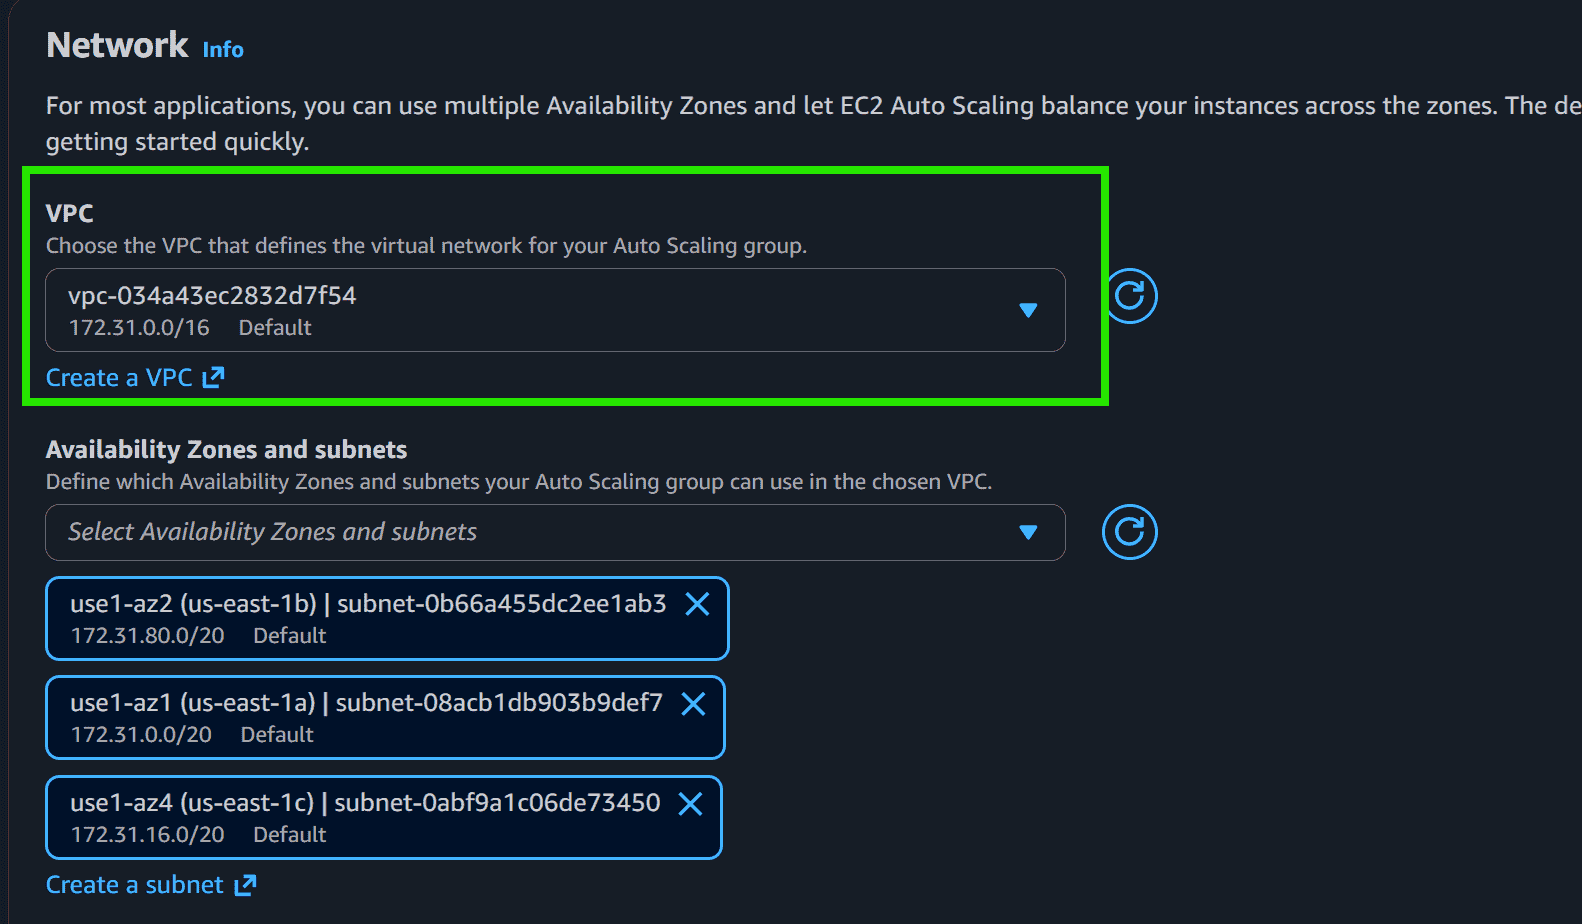
Step 4: Select the VPC or go with the default VPC and also select the Availability zone.
Step 5: Skip Integrate with other services
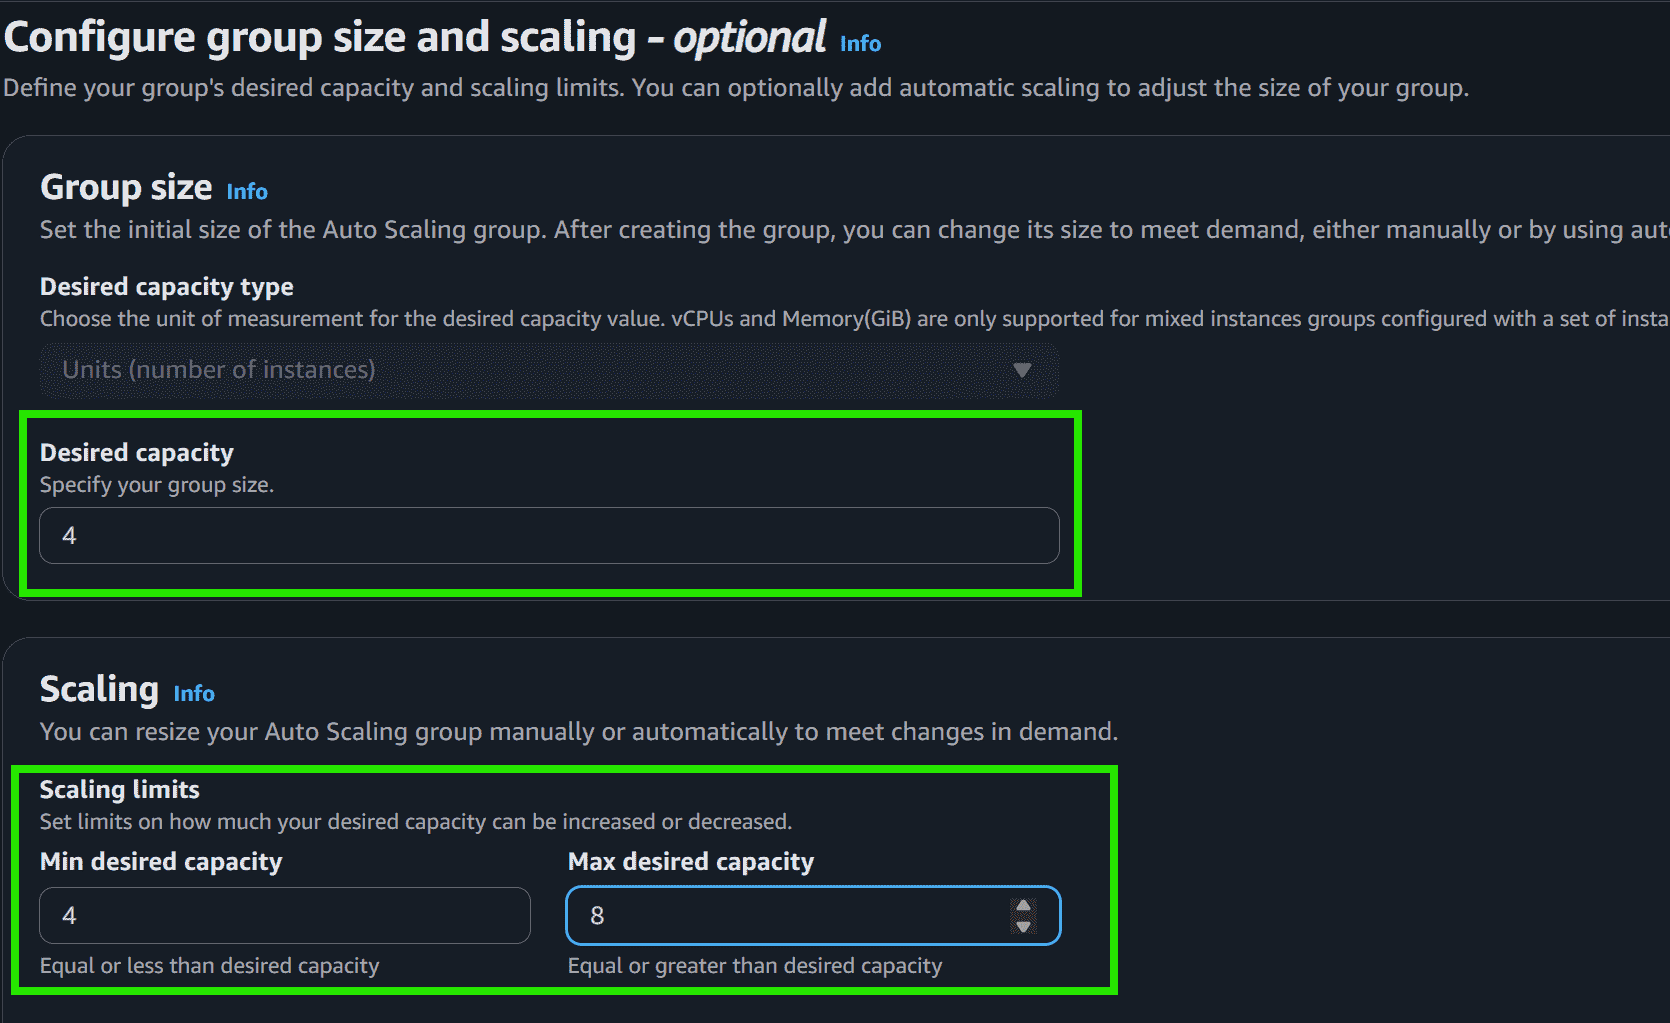
Step 6: Configure the Group size and Scaling policies.
Select as per your requirement:
- Desired: 4
- Minimum: 4
- Maximum: 8
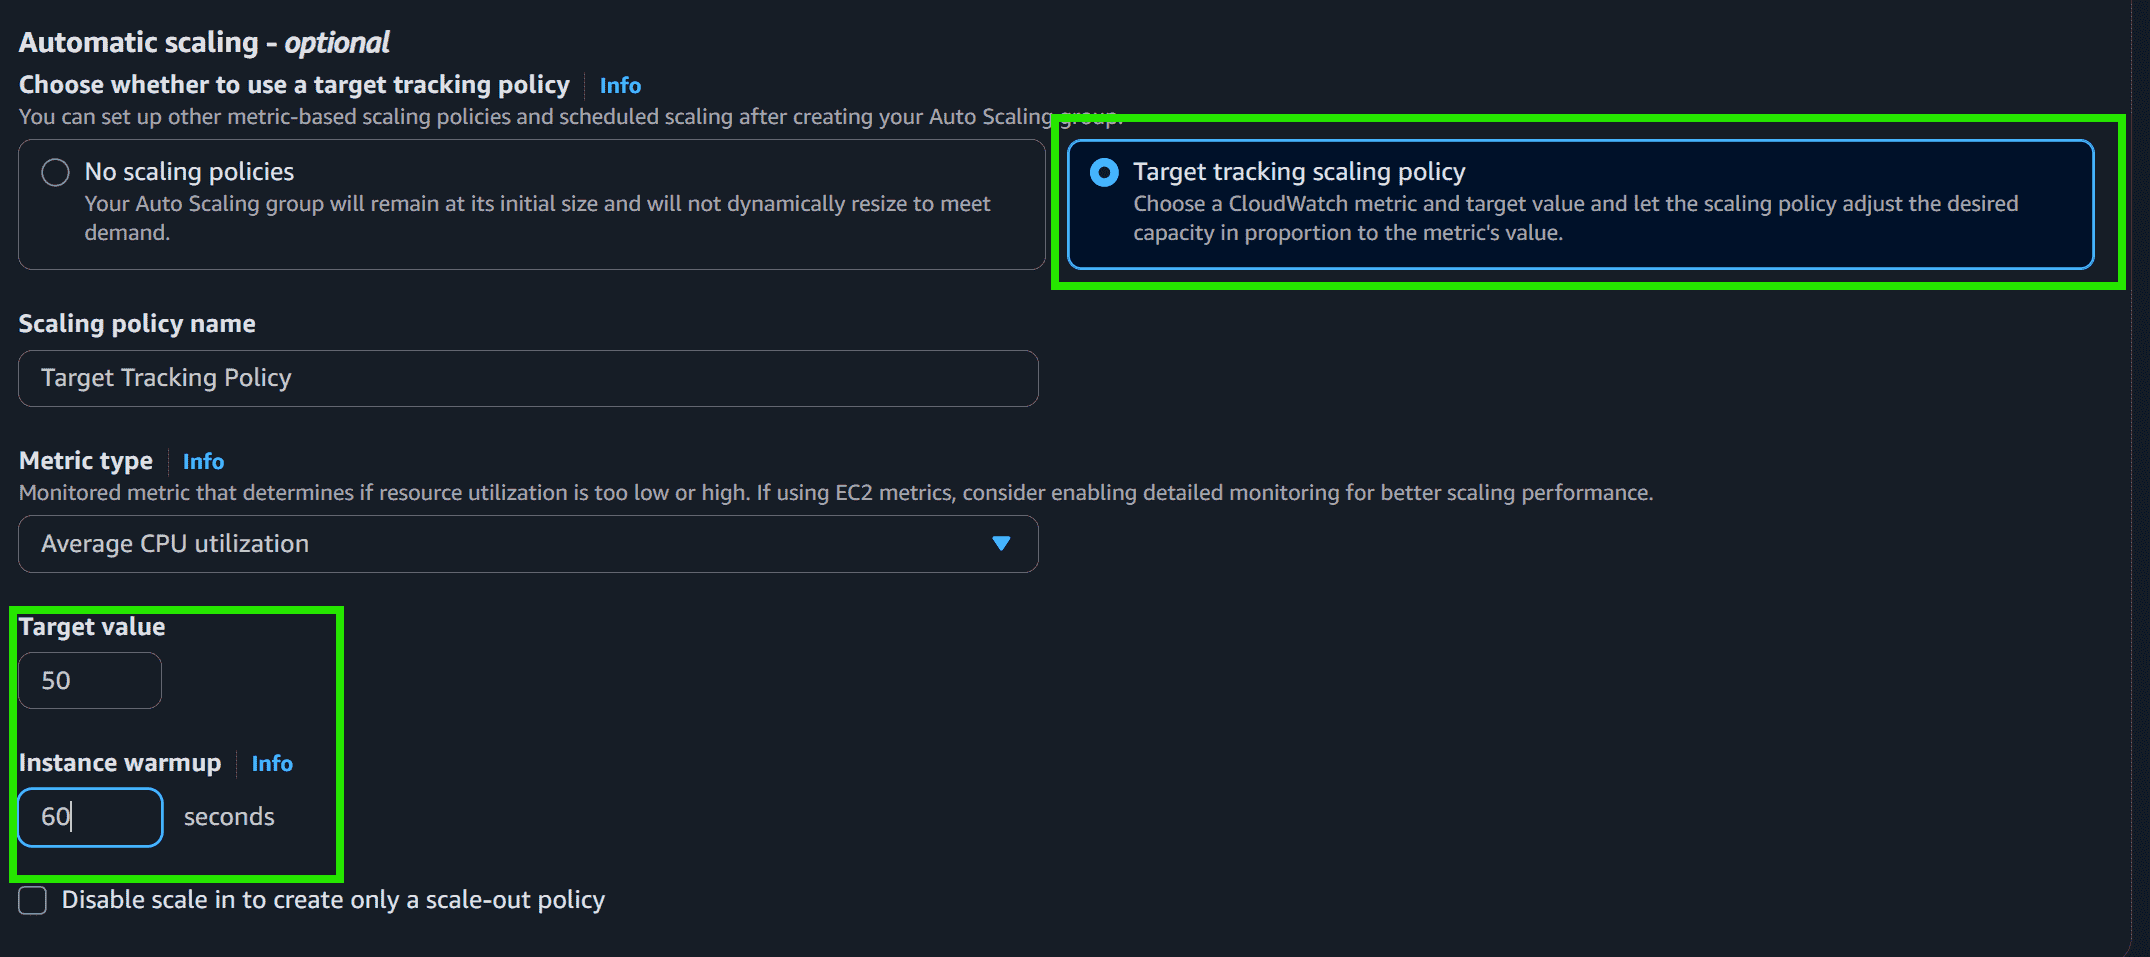
Step 7: Select the Target tracking scaling policy.
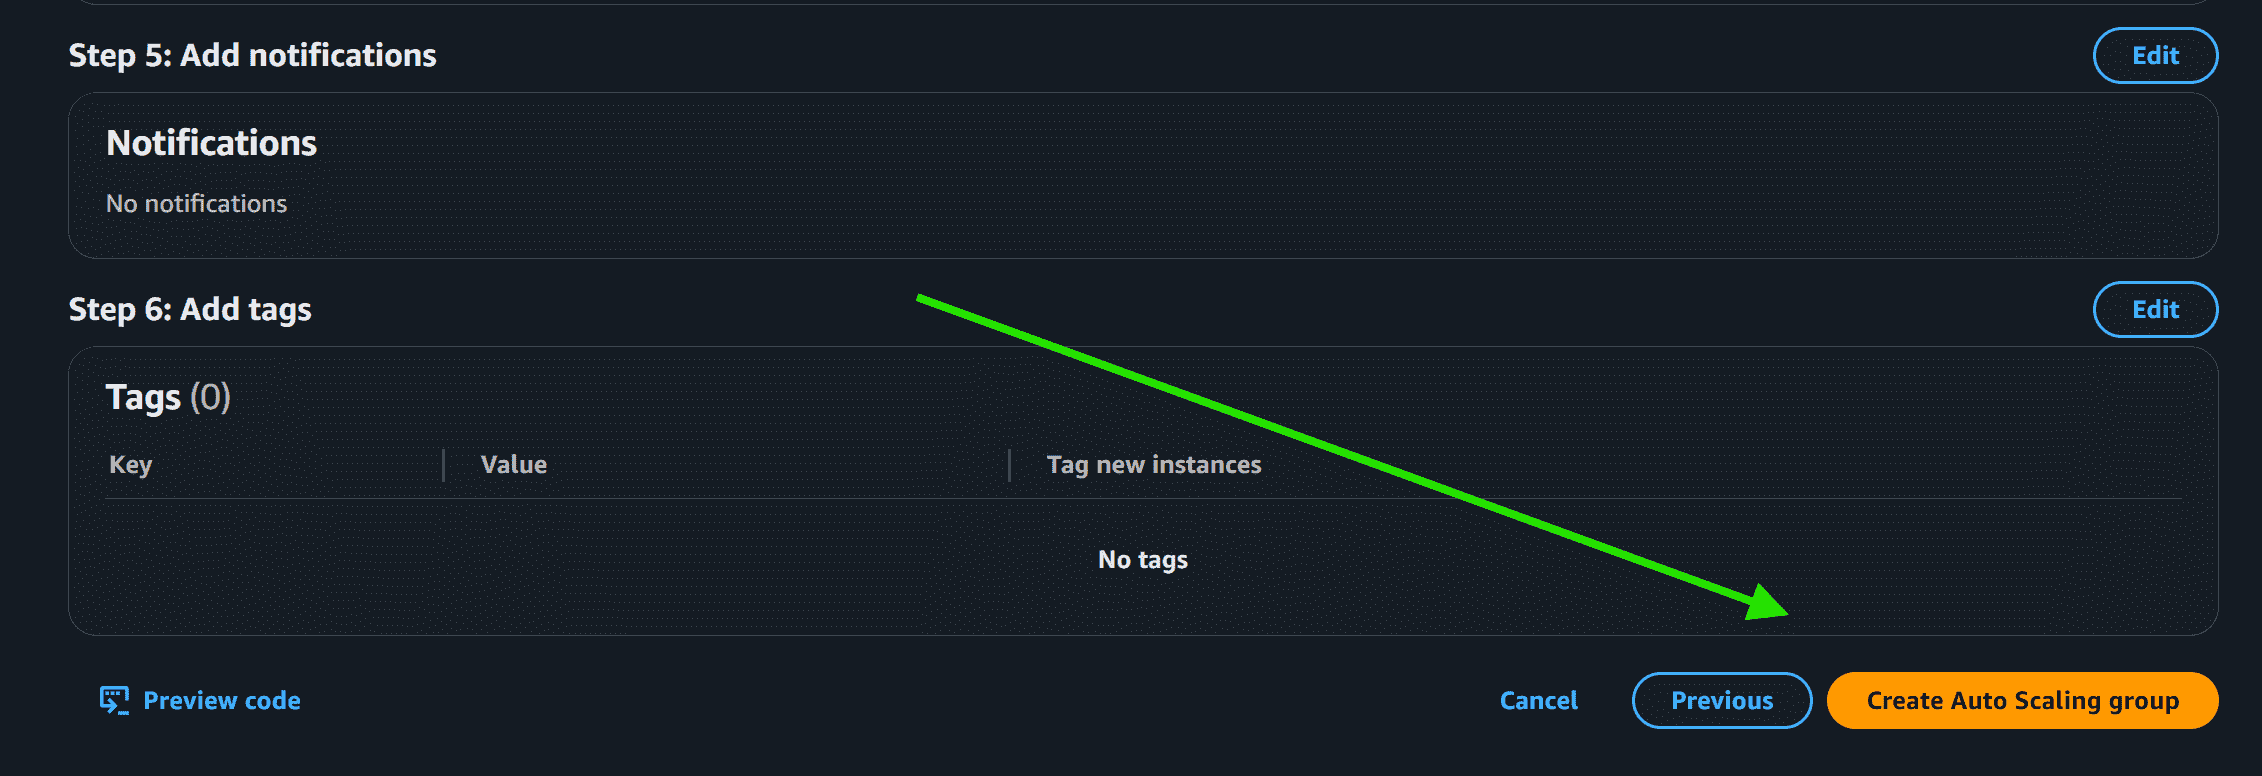
Step 8: Click on the Create Auto Scaling Group.
- Now you can see the Auto Scaling is creating and it is also creating the desired state of the EC2 Instance

- We selected the Desired state equal to 4 and you can see the 4 Instance is Running
