Task automation in Word involves using built-in tools to perform repetitive actions automatically, reducing manual effort and minimizing errors. These tools include Quick Parts and AutoText for reusable content, Macros for recorded commands, and Templates for standardized document layouts.
Key Features
- Quick Parts and AutoText: Insert pre-saved text or objects with a few clicks (see the "Quick Parts and Building Blocks" article for details).
- Macros: Record and replay sequences of actions to automate complex tasks.
- Templates: Create reusable document formats with predefined settings.
- Efficiency: Streamline repetitive tasks like formatting reports or inserting boilerplate text.
Example: Automate the insertion of a company letterhead or record a macro to format tables consistently.
Steps to Automate Tasks
Step 1. Use Quick Parts and AutoText
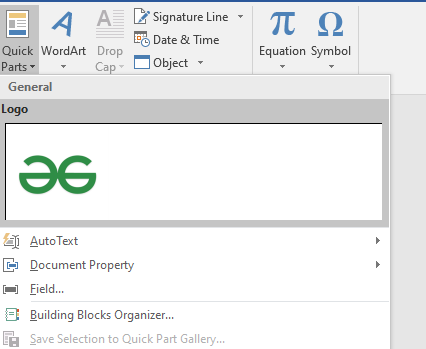
Create Quick Parts:
- Select content (e.g., a formatted signature or logo).
- Go to Insert > Quick Parts > Save Selection to Quick Part Gallery.
- Name the entry, choose AutoText or Quick Parts as the gallery, and save to a template (e.g., Normal.dotx).

Insert Quick Parts or AutoText:
- Place the cursor where needed.
- Go to Insert > Quick Parts > select the saved entry or type the AutoText name and press F3.
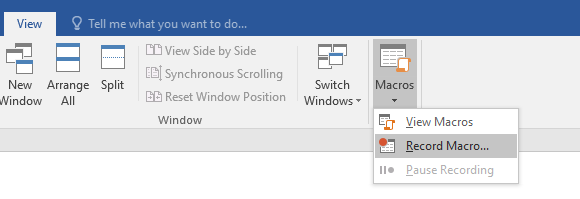
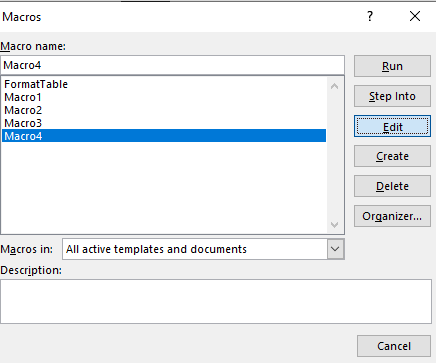
Step 2. Record and Run Macros
Record a Macro:
- Go to View > Macros > Record Macro.
- In the dialog box:
- Enter a Macro name (e.g., “FormatTable”).
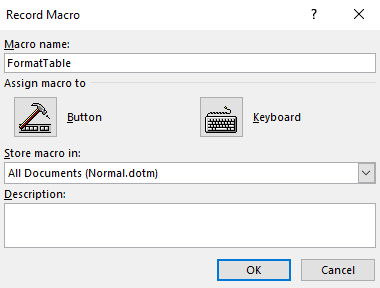
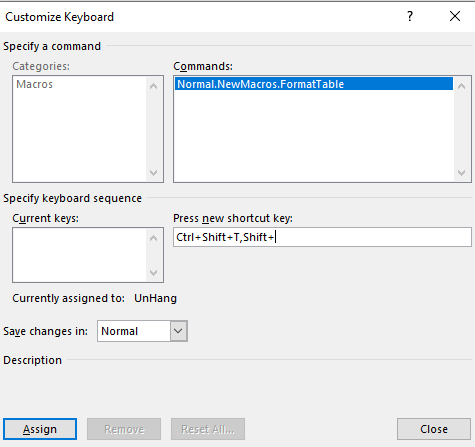
- Assign a Keyboard Shortcut (e.g., Ctrl+Shift+T) or Button (optional).
- Choose where to save (Normal.dotm for all documents or current document).
- Click OK, perform the actions (e.g., format a table with specific borders), then click Stop Recording (View > Macros > Stop Recording).

Run a Macro:
- Go to View > Macros > View Macros, select the macro, and click Run.
- Alternatively, use the assigned shortcut or button.
Step 3. Create and Use Templates
Create a Template:
- Create a document with desired settings (e.g., headers, footers, styles, Quick Parts).
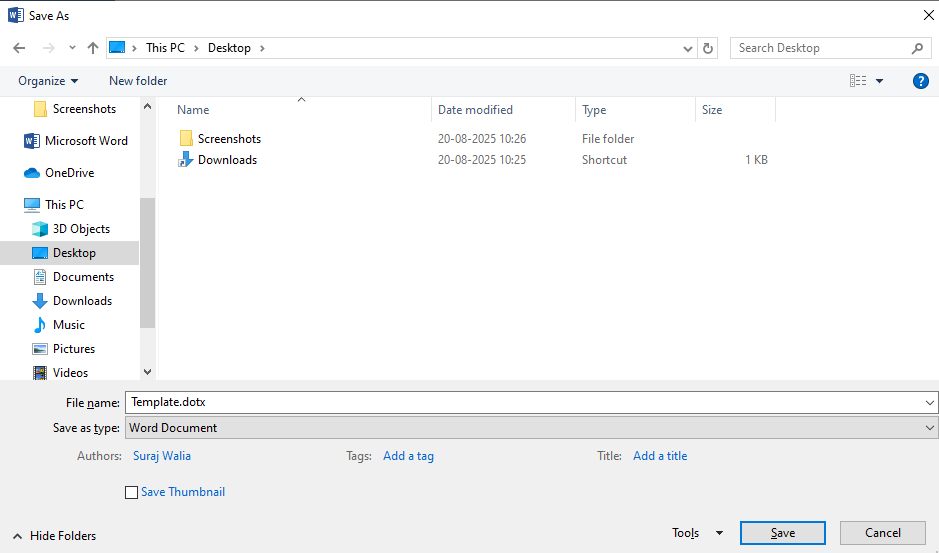
- Go to File > Save As > choose Word Template (*.dotx) in Save as type.
- Name the template (e.g., “Template.dotx”) and save to the Templates folder or a custom location.
Use a Template:
- Go to File > New > Personal or Custom, select the template, and click Create.
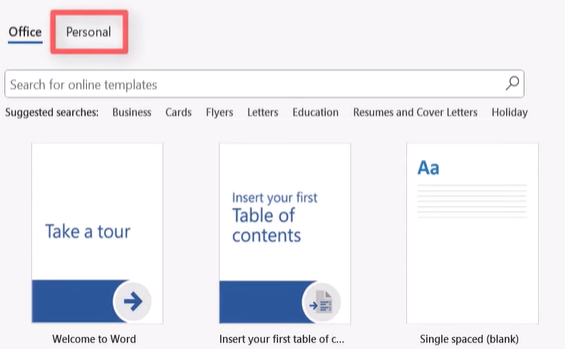
- The new document inherits the template’s settings and content.
Step 4. Manage Automation Tools
Edit Macros:
- Go to View > Macros > View Macros, select a macro, and click Edit to modify its VBA code (advanced users).
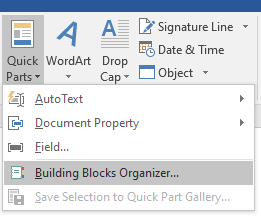
Organize Quick Parts:
- Use Insert > Quick Parts > Building Blocks Organizer to manage or delete AutoText and Quick Parts entries.
Update Templates:
- Open the template file (.dotx), make changes, and resave to update all future documents created from it.