Securing APIs is essential to ensure that only authorized clients can access application resources. One common approach is using an API Key and API Secret, which act as credentials sent with each request. Spring Security allows us to validate these credentials before granting access to protected endpoints.
- API Key and Secret provide a simple authentication mechanism for APIs.
- Requests are validated before accessing protected resources.
- Spring Security filters can be used to intercept and authenticate API requests.
Major concepts
The following concepts are fundamental to understanding how API Key and Secret authentication works in Spring Security.
1. Authentication and Authorization
Authentication: It verifies the identity of the client making the request.
Example: Checking whether the provided API Key and Secret are valid.
Authorization:It determines whether the authenticated client has permission to access a resource.
Example: Allowing authenticated users to access /api/** endpoints.
2. API Key and Secret
- API Key : A public identifier used to identify the client.
- API Secret : A private credential used to verify the client.
3. Custom Authentication token
A custom authentication token stores the API Key and Secret during the authentication process.
- Holds authentication credentials.
- Maintains authentication state.
4. Custom Authentication Filter
The filter intercepts incoming HTTP requests and extracts credentials from request headers.
- Read API Key and Secret.
- Create authentication token.
5. Security Configuration
Spring Security configuration defines:
- Protected endpoints.
- Authentication rules.
6. API Endpoint
The controller exposes secured REST endpoints that can only be accessed after successful authentication.
Implementation to Secure Spring Boot API With API Key and Secret
We can develop the simple spring boot application that can demonstrates the securing spring boot API key and secret of the application.
Step 1: Create the Spring project.
Create a new Spring Boot project using Spring Initializr and add the required dependencies,
- Spring Web
- Spring Security
- Lombok
- Spring DevTools
pom.xml
<?xml version="1.0" encoding="UTF-8"?>
<project xmlns="https://maven.apache.org/POM/4.0.0" xmlns:xsi="https://www.w3.org/2001/XMLSchema-instance"
         xsi:schemaLocation="https://maven.apache.org/POM/4.0.0 https://maven.apache.org/xsd/maven-4.0.0.xsd">
    <modelVersion>4.0.0</modelVersion>
    <parent>
        <groupId>org.springframework.boot</groupId>
        <artifactId>spring-boot-starter-parent</artifactId>
        <version>3.2.5</version>
        <relativePath/> <!-- lookup parent from repository -->
    </parent>
    <groupId>org.example</groupId>
    <artifactId>spring-boot-secure-API</artifactId>
    <version>0.0.1-SNAPSHOT</version>
    <name>spring-boot-secure-API</name>
    <description>spring-boot-secure-API</description>
    <properties>
        <java.version>17</java.version>
    </properties>
    <dependencies>
        <dependency>
            <groupId>org.springframework.boot</groupId>
            <artifactId>spring-boot-starter-security</artifactId>
        </dependency>
        <dependency>
            <groupId>org.springframework.boot</groupId>
            <artifactId>spring-boot-starter-web</artifactId>
        </dependency>

        <dependency>
            <groupId>org.springframework.boot</groupId>
            <artifactId>spring-boot-devtools</artifactId>
            <scope>runtime</scope>
            <optional>true</optional>
        </dependency>
        <dependency>
            <groupId>org.projectlombok</groupId>
            <artifactId>lombok</artifactId>
            <optional>true</optional>
        </dependency>
        <dependency>
            <groupId>org.springframework.boot</groupId>
            <artifactId>spring-boot-starter-test</artifactId>
            <scope>test</scope>
        </dependency>
        <dependency>
            <groupId>org.springframework.security</groupId>
            <artifactId>spring-security-test</artifactId>
            <scope>test</scope>
        </dependency>
    </dependencies>

    <build>
        <plugins>
            <plugin>
                <groupId>org.springframework.boot</groupId>
                <artifactId>spring-boot-maven-plugin</artifactId>
                <configuration>
                    <excludes>
                        <exclude>
                            <groupId>org.projectlombok</groupId>
                            <artifactId>lombok</artifactId>
                        </exclude>
                    </excludes>
                </configuration>
            </plugin>
        </plugins>
    </build>

</project>
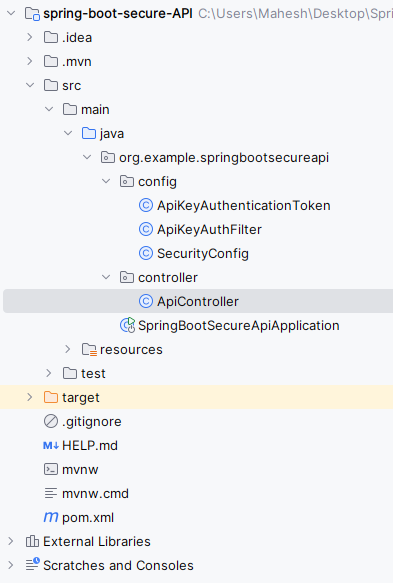
After the creation of the project has done, the folder structure will be like below image.
Step 2: Configure the Application properties
Open application.properties file and add the configuration for the server port in the project.
spring.application.name=spring-boot-secure-api
server.port=8081
Step 3: Create the ApiKeyAuthentication Token class
Create a custom authentication token class.
- Store API Key.
- Store API Secret.
package org.example.springbootsecureapi.config;


import org.springframework.security.authentication.AbstractAuthenticationToken;
import org.springframework.security.core.GrantedAuthority;

import java.util.Collection;


public class ApiKeyAuthenticationToken extends AbstractAuthenticationToken {

    private final String apiKey;
    private final String apiSecret;

    public ApiKeyAuthenticationToken(String apiKey, String apiSecret) {
        super(null);
        this.apiKey = apiKey;
        this.apiSecret = apiSecret;
        setAuthenticated(false);
    }

    public ApiKeyAuthenticationToken(String apiKey, String apiSecret, Collection<? extends GrantedAuthority> authorities) {
        super(authorities);
        this.apiKey = apiKey;
        this.apiSecret = apiSecret;
        super.setAuthenticated(true);
    }

    @Override
    public Object getCredentials() {
        return this.apiSecret;
    }

    @Override
    public Object getPrincipal() {
        return this.apiKey;
    }

    @Override
    public void setAuthenticated(boolean isAuthenticated) throws IllegalArgumentException {
        if (isAuthenticated) {
            throw new IllegalArgumentException("Cannot set this token to trusted - use constructor which takes a GrantedAuthority list instead");
        }
        super.setAuthenticated(false);
    }

    @Override
    public void eraseCredentials() {
        super.eraseCredentials();
    }
}
Step 4: Create the ApiKeyAuthFilter class
Create a custom filter that intercepts requests.
- Extract API Key header.
- Extract API Secret header.
package org.example.springbootsecureapi.config;

import jakarta.servlet.FilterChain;
import jakarta.servlet.ServletException;
import jakarta.servlet.http.HttpServletRequest;
import jakarta.servlet.http.HttpServletResponse;
import org.springframework.security.core.Authentication;
import org.springframework.security.core.AuthenticationException;
import org.springframework.security.web.authentication.AbstractAuthenticationProcessingFilter;
import org.springframework.security.web.util.matcher.RequestMatcher;

import java.io.IOException;


public class ApiKeyAuthFilter extends AbstractAuthenticationProcessingFilter {

    private static final String API_KEY_HEADER = "API-Key";
    private static final String API_SECRET_HEADER = "API-Secret";

    public ApiKeyAuthFilter(RequestMatcher requiresAuth) {
        super(requiresAuth);
    }

    @Override
    public Authentication attemptAuthentication(HttpServletRequest request, HttpServletResponse response)
            throws AuthenticationException, IOException {
        String apiKey = request.getHeader(API_KEY_HEADER);
        String apiSecret = request.getHeader(API_SECRET_HEADER);

        if (apiKey == null || apiSecret == null) {
            throw new RuntimeException("Missing API Key or Secret");
        }

        Authentication auth = new ApiKeyAuthenticationToken(apiKey, apiSecret);
        return getAuthenticationManager().authenticate(auth);
    }

    @Override
    protected void successfulAuthentication(HttpServletRequest request, HttpServletResponse response, FilterChain chain, Authentication authResult) throws IOException, ServletException {
        super.successfulAuthentication(request, response, chain, authResult);
        chain.doFilter(request, response);
    }
}
Step 5: Create the SecurityConfig class
Create the SecurityConfig class.
- Register custom filter.
- Protect API endpoints.
package org.example.springbootsecureapi.config;


import org.springframework.context.annotation.Bean;
import org.springframework.context.annotation.Configuration;
import org.springframework.security.config.annotation.web.builders.HttpSecurity;
import org.springframework.security.config.annotation.web.configuration.EnableWebSecurity;
import org.springframework.security.core.authority.SimpleGrantedAuthority;
import org.springframework.security.web.SecurityFilterChain;
import org.springframework.security.web.authentication.UsernamePasswordAuthenticationFilter;
import org.springframework.security.web.util.matcher.AntPathRequestMatcher;


import java.util.Collections;


import java.util.Collections;

@Configuration
@EnableWebSecurity
public class SecurityConfig {

    @Bean
    public SecurityFilterChain securityFilterChain(HttpSecurity http) throws Exception {
        ApiKeyAuthFilter filter = new ApiKeyAuthFilter(new AntPathRequestMatcher("/api/**"));
        filter.setAuthenticationManager(authentication -> {
            String apiKey = (String) authentication.getPrincipal();
            String apiSecret = (String) authentication.getCredentials();

            if ("valid-api-key".equals(apiKey) && "valid-api-secret".equals(apiSecret)) {
                return new ApiKeyAuthenticationToken(apiKey, apiSecret, Collections.singletonList(new SimpleGrantedAuthority("ROLE_USER")));
            } else {
                authentication.setAuthenticated(false);
            }

            return authentication;
        });

        http
                .csrf().disable()
                .authorizeRequests(authorizeRequests ->
                        authorizeRequests
                                .requestMatchers("/api/**").authenticated()
                                .anyRequest().permitAll()
                )
                .addFilterBefore(filter, UsernamePasswordAuthenticationFilter.class);

        return http.build();
    }
}
Step 6: Create the ApiController class
- Create a secured REST controller.
- Provides a protected API endpoint.
package org.example.springbootsecureapi.controller;

import org.springframework.web.bind.annotation.GetMapping;
import org.springframework.web.bind.annotation.RequestMapping;
import org.springframework.web.bind.annotation.RestController;

@RestController
@RequestMapping("/api")
public class ApiController {

    @GetMapping("/data")
    public String getSecureData() {
        return "This is Spring Boot API secured data!";
    }
}
Step 7: Main Class
Create the Spring Boot entry point.
package org.example.springbootsecureapi;

import org.springframework.boot.SpringApplication;
import org.springframework.boot.autoconfigure.SpringBootApplication;

@SpringBootApplication
public class SpringBootSecureApiApplication {

    public static void main(String[] args) {
        SpringApplication.run(SpringBootSecureApiApplication.class, args);
    }

}
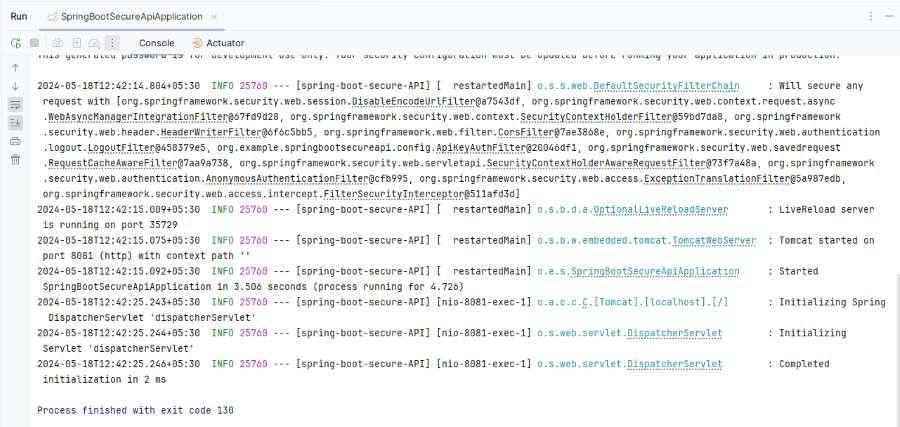
Step 8: Run the application
Once, we run the application, it will start at port 8081.
Step 9: Endpoint Testing
1. Endpoint without the api key and secret
GET http://localhost:8081/api/data
Then show the error like below:
Missing API Key and secret
Output:

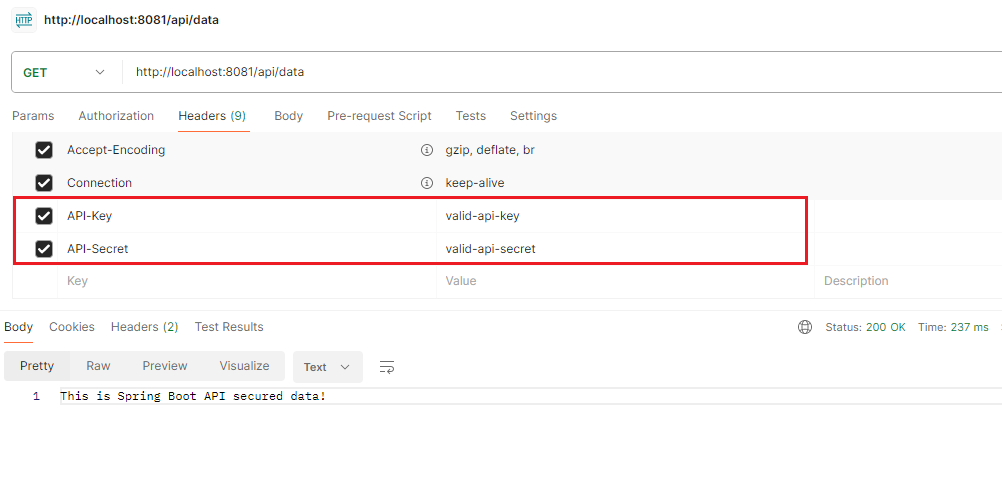
2. Endpoint Test with API key and secret
GET http://localhost:8081/api/data
Add the API key and secret in Header section.
API Key : valid-api-key
API Secret: valid-api-key
Output:
By the following these steps, we can secure the Spring Boot API using API keys and secrets. This method ensures that only the clients with valid credentials can access the API endpoints and thereby adding the extra layer of the security to the Spring Boot application.