Spring Security allows developers to control authentication and authorization in Spring Boot applications. In many applications, different users need different dashboards after login. It provides role-based redirection using a custom authentication success handler. After successful login, users can be redirected to different pages based on their roles and authorities.
- Redirect users to different pages after successful login.
- Handle role-based access using ROLE_ADMIN and ROLE_USER.
- Improve user experience with personalized dashboards.
Implementation to Redirect to Different Pages After Login
Below are the implementation steps to redirect to different pages after login with spring.
Step 1: Create Spring Boot Project
Create a Spring Boot project using Spring Initializr with the following dependencies:
- Spring Web
- Spring Security
- Thymeleaf
- Lombok
- Spring DevTools
- Spring Data JPA
- MySQL Driver
<?xml version="1.0" encoding="UTF-8"?>
<project xmlns="https://maven.apache.org/POM/4.0.0" xmlns:xsi="https://www.w3.org/2001/XMLSchema-instance"
         xsi:schemaLocation="https://maven.apache.org/POM/4.0.0 https://maven.apache.org/xsd/maven-4.0.0.xsd">
    <modelVersion>4.0.0</modelVersion>
    <parent>
        <groupId>org.springframework.boot</groupId>
        <artifactId>spring-boot-starter-parent</artifactId>
        <version>3.2.5</version>
        <relativePath/> <!-- lookup parent from repository -->
    </parent>
    <groupId>org.example</groupId>
    <artifactId>spring-security-redirect-pages</artifactId>
    <version>0.0.1-SNAPSHOT</version>
    <name>spring-security-redirect-pages</name>
    <description>spring-security-redirect-pages</description>
    <properties>
        <java.version>17</java.version>
    </properties>
    <dependencies>
        <dependency>
            <groupId>org.springframework.boot</groupId>
            <artifactId>spring-boot-starter-data-jpa</artifactId>
        </dependency>
        <dependency>
            <groupId>org.springframework.boot</groupId>
            <artifactId>spring-boot-starter-security</artifactId>
        </dependency>
        <dependency>
            <groupId>org.springframework.boot</groupId>
            <artifactId>spring-boot-starter-thymeleaf</artifactId>
        </dependency>
        <dependency>
            <groupId>org.springframework.boot</groupId>
            <artifactId>spring-boot-starter-web</artifactId>
        </dependency>
        <dependency>
            <groupId>org.thymeleaf.extras</groupId>
            <artifactId>thymeleaf-extras-springsecurity6</artifactId>
        </dependency>

        <dependency>
            <groupId>org.springframework.boot</groupId>
            <artifactId>spring-boot-devtools</artifactId>
            <scope>runtime</scope>
            <optional>true</optional>
        </dependency>
        <dependency>
            <groupId>com.mysql</groupId>
            <artifactId>mysql-connector-j</artifactId>
            <scope>runtime</scope>
        </dependency>
        <dependency>
            <groupId>org.projectlombok</groupId>
            <artifactId>lombok</artifactId>
            <optional>true</optional>
        </dependency>
        <dependency>
            <groupId>org.springframework.boot</groupId>
            <artifactId>spring-boot-starter-test</artifactId>
            <scope>test</scope>
        </dependency>
        <dependency>
            <groupId>org.springframework.security</groupId>
            <artifactId>spring-security-test</artifactId>
            <scope>test</scope>
        </dependency>
    </dependencies>

    <build>
        <plugins>
            <plugin>
                <groupId>org.springframework.boot</groupId>
                <artifactId>spring-boot-maven-plugin</artifactId>
                <configuration>
                    <excludes>
                        <exclude>
                            <groupId>org.projectlombok</groupId>
                            <artifactId>lombok</artifactId>
                        </exclude>
                    </excludes>
                </configuration>
            </plugin>
        </plugins>
    </build>

</project>
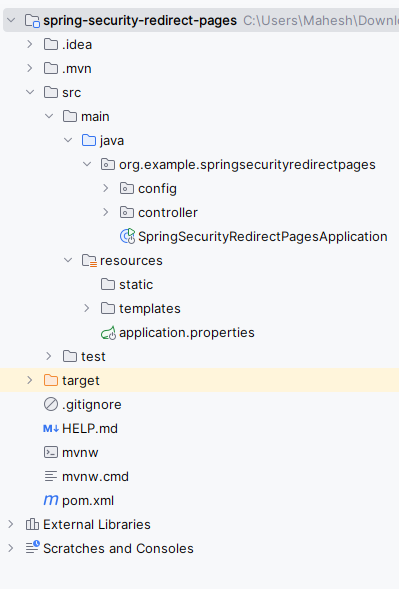
After the project creation done, the folder structure will be like the below image:
Step 2: Configure application.properties
Add database and user credentials configuration inside application.properties.
spring.application.name=spring-security-redirect-pages
# Database Configuration
spring.datasource.url=jdbc:mysql://localhost:3306/example
spring.datasource.username=root
spring.datasource.password=
spring.jpa.hibernate.ddl-auto=update
spring.jpa.show-sql=true# User Credentials
spring.security.user.name=user
spring.security.user.password=password
spring.security.user.roles=USER# Admin Credentials
spring.security.admin.name=admin
spring.security.admin.password=password
spring.security.admin.roles=ADMIN
Step 3: Configure Spring Security
Create SecurityConfig.java inside the config package.
- SecurityFilterChain secures application URLs.
- /admin/** is accessible only to ADMIN users.
package org.example.springsecurityredirectpages.config;

import org.springframework.context.annotation.Bean;
import org.springframework.context.annotation.Configuration;
import org.springframework.security.config.annotation.web.builders.HttpSecurity;
import org.springframework.security.web.SecurityFilterChain;
import org.springframework.security.web.authentication.AuthenticationSuccessHandler;

@Configuration
public class SecurityConfig {

    @Bean
    public SecurityFilterChain securityFilterChain(HttpSecurity http) throws Exception {

        http
                .authorizeHttpRequests(auth -> auth
                        .requestMatchers("/admin/**").hasRole("ADMIN")
                        .requestMatchers("/user/**").hasRole("USER")
                        .anyRequest().authenticated()
                )
                .formLogin(form -> form
                        .loginPage("/login")
                        .successHandler(customSuccessHandler())
                        .permitAll()
                )
                .logout(logout -> logout.permitAll());

        return http.build();
    }

    @Bean
    public AuthenticationSuccessHandler customSuccessHandler() {
        return new CustomAuthenticationSuccessHandler();
    }
}
Step 4: Create Custom Authentication Success Handler
Create CustomAuthenticationSuccessHandler.java inside the config package.
- Checks authenticated user roles.
- Redirects ADMIN users to /admin/home.
package org.example.springsecurityredirectpages.config;

import jakarta.servlet.ServletException;
import jakarta.servlet.http.HttpServletRequest;
import jakarta.servlet.http.HttpServletResponse;
import org.springframework.security.core.Authentication;
import org.springframework.security.web.authentication.AuthenticationSuccessHandler;

import java.io.IOException;

public class CustomAuthenticationSuccessHandler implements AuthenticationSuccessHandler {
    @Override
    public void onAuthenticationSuccess(HttpServletRequest request, HttpServletResponse response, Authentication authentication) throws IOException, ServletException {
        String redirectURL = request.getContextPath();

        if (authentication.getAuthorities().stream().anyMatch(a -> a.getAuthority().equals("ROLE_ADMIN"))) {
            redirectURL = "/admin/home";
        } else if (authentication.getAuthorities().stream().anyMatch(a -> a.getAuthority().equals("ROLE_USER"))) {
            redirectURL = "/user/home";
        }

        response.sendRedirect(redirectURL);
    }
}
Step 5: Create Admin Controller
Create AdminController.java.
- Handles requests for the admin dashboard.
- Returns adminHome.html page.
package org.example.springsecurityredirectpages.controller;

import org.springframework.stereotype.Controller;
import org.springframework.web.bind.annotation.GetMapping;

@Controller
public class AdminController {

    @GetMapping("/admin/home")
    public String adminHome() {
        return "adminHome";
    }
}
Step 6: Create User Controller
Create UserController.java.
- Handles user dashboard requests.
- Returns login page for authentication.
package org.example.springsecurityredirectpages.controller;

import org.springframework.stereotype.Controller;
import org.springframework.web.bind.annotation.GetMapping;

@Controller
public class UserController {

    @GetMapping("/user/home")
    public String userHome() {
        return "userHome";
    }

    @GetMapping("/login")
    public String login() {
        return "login";
    }
}
Step 7: Main Application Class
Open the main class and write the below code. (No change are required)
package org.example.springsecurityredirectpages;

import org.springframework.boot.SpringApplication;
import org.springframework.boot.autoconfigure.SpringBootApplication;

@SpringBootApplication
public class SpringSecurityRedirectPagesApplication {

    public static void main(String[] args) {
        SpringApplication.run(SpringSecurityRedirectPagesApplication.class, args);
    }

}
Step 8: Create Login Page
Create login.html inside templates.
<!DOCTYPE html>
<html xmlns:th="http://www.thymeleaf.org">
<head>
    <title>Login</title>
</head>
<body>
<form th:action="@{/login}" method="post">
    <div>
        <label>Username:</label>
        <input type="text" name="username" />
    </div>
    <div>
        <label>Password:</label>
        <input type="password" name="password" />
    </div>
    <div>
        <button type="submit">Login</button>
    </div>
</form>
</body>
</html>
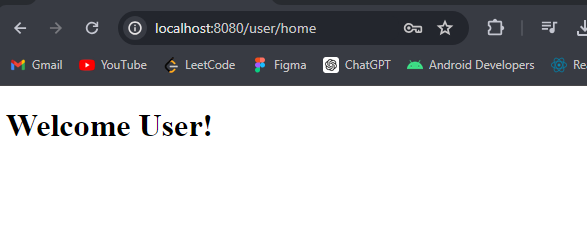
Step 9: Create User Home Page
Displayed after successful USER login.
<!DOCTYPE html>
<html xmlns:th="http://www.thymeleaf.org">
<head>
    <title>User Home</title>
</head>
<body>
<h1>Welcome User!</h1>
</body>
</html>
Step 10: Create Admin Home Page
Displayed after successful ADMIN login.
<!DOCTYPE html>
<html xmlns:th="http://www.thymeleaf.org">
<head>
    <title>Admin Home</title>
</head>
<body>
<h1>Welcome Admin!</h1>
</body>
</html>
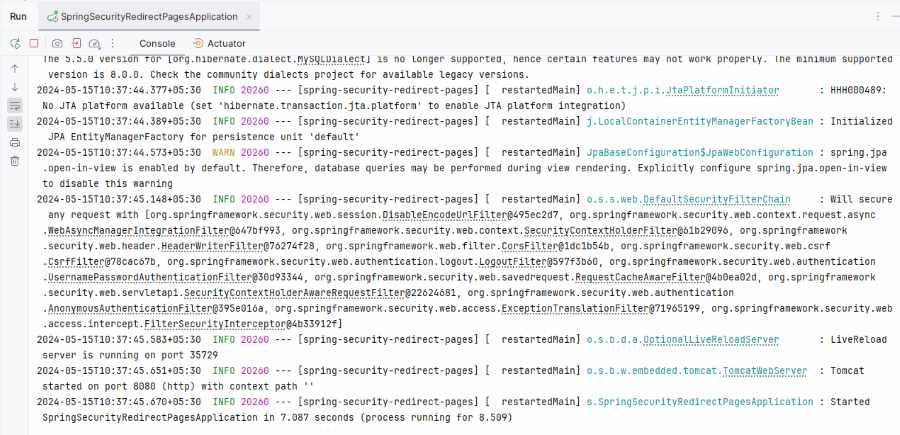
Step 12: Run the Application
Run the Spring Boot application. After completing the project, it will start at port 8080.
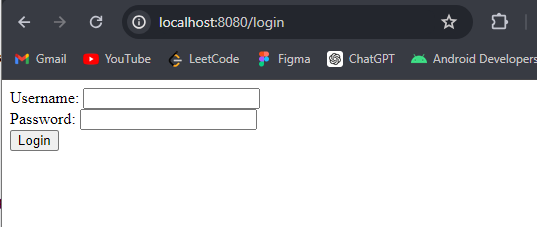
Login page:
API:
http://localhost:8080/login
If we enter the user credential the it redirects to the user home page.
- username: user
- password: password
If we enter the admin credential the it redirects to the user home page.
- username: admin
- password: password
Output:
AdminHome page:

UserHome page:
After hitting the URL, the below page will redirect.