Vaadin is a common front-end framework for Java that provides smooth inclusion with Spring Boot. In this article, we will walk through creating a basic Vaadin form integrated into Spring Boot.
Prerequisites:
Before we start, ensure we have installed the following:
- Java Development Kit (JDK) 8 or higher.
- Maven or Gradle.
- An Integrated Development Environment (IDE) like IntelliJ IDEA or Eclipse.
Implementation to Build a Form with Vaadin and Spring Boot
Below are the implementation steps to build a form with Vaadin and Spring Boot.
Step 1: Set Up the Project
Using Spring Initializr:
- Go to Spring Initializr.
- Configure the project with the following options:
- Project: Maven Project
- Language: Java
- Spring Boot: Choose the latest stable version
- Dependencies: Add Vaadin, Spring Web, and Spring Boot DevTools

- Click Generate to download the project.
- Unzip the downloaded project and open it in your IDE.
Step 2: Set Up Your Project in Visual Studio Code
1. Open the Project:
- Launch Visual Studio Code.
- Navigate to File > Open Folder and select your project folder.
2. Explore Project Structure:
- Inside your project folder, you will find standard Maven project directories (src, pom.xml) and Maven Wrapper files (mvnw, mvnw.cmd).
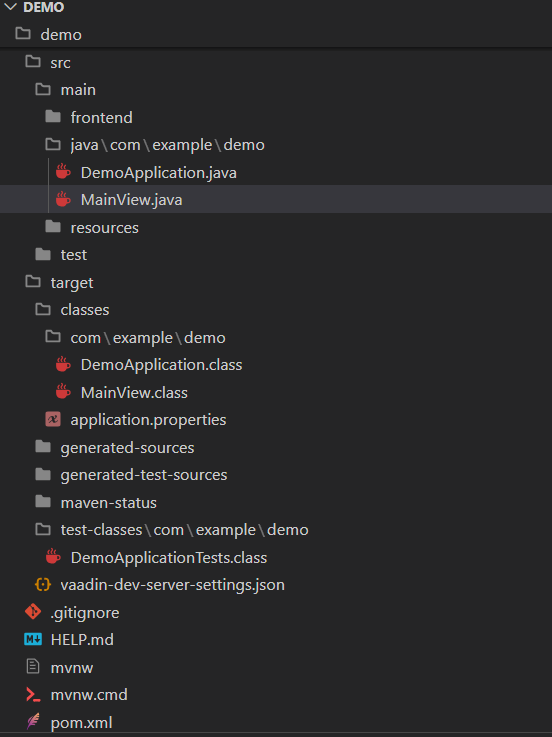
Project Structure:
After creating the project, the folder structure should look like below:
Step 3: Implementing a Vaadin UI
Create a Vaadin UI Component:
- Define a Java class for your Vaadin UI component (e.g., MainView.java).
- Utilize Vaadin components like TextField, Button, etc., to design your UI.
- Implement functionalities such as form submission, validation, etc.
MainView.java:
package com.example.demo;

import com.vaadin.flow.component.button.Button;
import com.vaadin.flow.component.formlayout.FormLayout;
import com.vaadin.flow.component.notification.Notification;
import com.vaadin.flow.component.orderedlayout.VerticalLayout;
import com.vaadin.flow.component.textfield.TextField;
import com.vaadin.flow.router.Route;

/**
 * MainView class that defines the main UI for the Vaadin application.
 * This class extends VerticalLayout and sets up a form with fields for first name, last name, and email.
 */
@Route("")
public class MainView extends VerticalLayout {

    /**
     * Constructor for the MainView class.
     * Initializes the form layout and adds components to it.
     */
    public MainView() {
        // Create a new form layout
        FormLayout formLayout = new FormLayout();

        // Create text fields for first name, last name, and email
        TextField firstName = new TextField("First Name");
        TextField lastName = new TextField("Last Name");
        TextField email = new TextField("Email");

        // Create a submit button
        Button submitButton = new Button("Submit");

        // Add a click listener to the submit button
        submitButton.addClickListener(event -> {
            // Show a notification with the submitted form data
            Notification.show("Submitted: " + firstName.getValue() + " " + lastName.getValue() + " " + email.getValue());
        });

        // Add the text fields and submit button to the form layout
        formLayout.add(firstName, lastName, email, submitButton);

        // Add the form layout to the main view layout
        add(formLayout);
    }
}
pom.xml:
<?xml version="1.0" encoding="UTF-8"?>
<project xmlns="https://maven.apache.org/POM/4.0.0" xmlns:xsi="https://www.w3.org/2001/XMLSchema-instance"
	xsi:schemaLocation="https://maven.apache.org/POM/4.0.0 https://maven.apache.org/xsd/maven-4.0.0.xsd">
	<modelVersion>4.0.0</modelVersion>
	<parent>
		<groupId>org.springframework.boot</groupId>
		<artifactId>spring-boot-starter-parent</artifactId>
		<version>3.3.1</version>
		<relativePath/> <!-- lookup parent from repository -->
	</parent>
	<groupId>com.example</groupId>
	<artifactId>demo</artifactId>
	<version>0.0.1-SNAPSHOT</version>
	<name>demo</name>
	<description>Demo project for Spring Boot</description>
	<url/>
	<licenses>
		<license/>
	</licenses>
	<developers>
		<developer/>
	</developers>
	<scm>
		<connection/>
		<developerConnection/>
		<tag/>
		<url/>
	</scm>
	<properties>
		<java.version>17</java.version>
		<vaadin.version>24.4.3</vaadin.version>
	</properties>
	<dependencies>
		<dependency>
			<groupId>org.springframework.boot</groupId>
			<artifactId>spring-boot-starter-web</artifactId>
		</dependency>
		<dependency>
			<groupId>com.vaadin</groupId>
			<artifactId>vaadin-spring-boot-starter</artifactId>
		</dependency>

		<dependency>
			<groupId>org.springframework.boot</groupId>
			<artifactId>spring-boot-devtools</artifactId>
			<scope>runtime</scope>
			<optional>true</optional>
		</dependency>
		<dependency>
			<groupId>org.springframework.boot</groupId>
			<artifactId>spring-boot-starter-test</artifactId>
			<scope>test</scope>
		</dependency>
	</dependencies>
	<dependencyManagement>
		<dependencies>
			<dependency>
				<groupId>com.vaadin</groupId>
				<artifactId>vaadin-bom</artifactId>
				<version>${vaadin.version}</version>
				<type>pom</type>
				<scope>import</scope>
			</dependency>
		</dependencies>
	</dependencyManagement>

	<build>
		<plugins>
			<plugin>
				<groupId>org.springframework.boot</groupId>
				<artifactId>spring-boot-maven-plugin</artifactId>
			</plugin>
		</plugins>
	</build>

	<profiles>
		<profile>
			<id>production</id>
			<dependencies>
				<dependency>
					<groupId>com.vaadin</groupId>
					<artifactId>vaadin-core</artifactId>
					<exclusions>
						<exclusion>
							<groupId>com.vaadin</groupId>
							<artifactId>vaadin-dev</artifactId>
						</exclusion>
					</exclusions>
				</dependency>

			</dependencies>
			<build>
				<plugins>
					<plugin>
						<groupId>com.vaadin</groupId>
						<artifactId>vaadin-maven-plugin</artifactId>
						<version>${vaadin.version}</version>
						<executions>
							<execution>
								<id>frontend</id>
								<phase>compile</phase>
								<goals>
									<goal>prepare-frontend</goal>
									<goal>build-frontend</goal>
								</goals>
							</execution>
						</executions>
					</plugin>
				</plugins>
			</build>
		</profile>
	</profiles>

</project>
Step 4: Running the Application
1. Run Using Maven Wrapper:
- Open a terminal in Visual Studio Code.
- Navigate to your project directory.
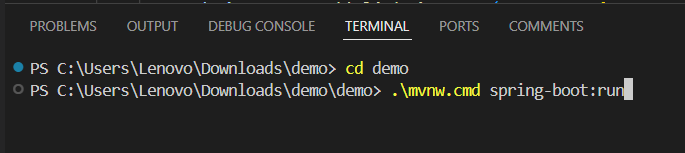
- Execute the following command to run your application:
.\mvnw.cmd spring-boot:run
- Wait for Maven to build and start your Spring Boot application.
Access the Application
To access Your Application:
- Once the application starts, open a web browser.
- Go to http://localhost:8080 (or configured port) to view your Vaadin application.
- Interact with the UI to test functionality such as form submission.

Conclusion
In this article, we've covered the essential steps to set up and run a Spring Boot application with Vaadin. We have been taught how to initiate a project through Spring Initializr, create a simple Vaadin UI and execute the application on a local server. With this kind of a foundation, it becomes easier for us to build more advanced web applications using Vaadin and Spring Boot.