My Other blog

Vote

Free Brushes

Showing posts with label Valentine. Show all posts
Showing posts with label Valentine. Show all posts
Saturday, 1 February 2025

:- Supplies Needed -:
Tube of choice - I used a lovely tube by Goldwasser HERE
Scrapkit called Love is in the air by me HERE
Mask by Vix Vix-ValMask2021-1c-BlogExclusive HERE
Font of choice.
♥
Info
C/P + Copy and paste
Resize (click image - resize)
Add d/s = Add drop shadow
♥
Lets Get Started
↓↓↓↓↓↓↓
Open a new transparent image 650 x 611 pixels
C/P PP8 as a new layer
Layers - mask layer - from image and select your mask
Layers - merge - merge group
Image - Canvas Size
Change canvas size to 650 x 650
≈☆≈
Open Ele76
C/P into your image.
Position towards the top left of your mask area.
Layers - Duplicate - Mirror
Add a d/s to both layers
≈☆≈
Open Ele74
C/P as a new layer
Resize 75%
≈☆≈
Add a new raster layer
Open Ele70
C/P into your image
resize 65%
Select the transparent layer below (the one you just made).
Using your selection tool, draw a selection around the frame
C/P PP6 into selection
Select none.
≈☆≈
Open Ele51
C/P as a new layer
Resize 65%
Position top Left of your frame
Add a d/s
≈☆≈
Add your tube.
Resize as needed
Position in the frame
Remove any lower parts of the tube that go beyond the bottom frame.
(See tag for reference)
Add D/S
≈☆≈
Open Ele45
C/P into your image
Resize 85%
Position towards the bottom of your tube area.
(See tag for reference)
≈☆≈
Open Ele32
C/P into your image
Resize 35%
Position towards the bottom left.
(See tag for reference)
≈☆≈
Open Ele44
C/P into your image.
Resize 35%
Position to the right of the hearts
Add a d/s
≈☆≈
Open Ele43
C/P into your image.
Resize 35%
Position on the tag (see tag for reference)
Add a d/s
≈☆≈
Open Ele66
C/P into your image.
Resize 35%
Position to the right of the tag
Add a d/s
≈☆≈
Open Ele47
C/P into your image.
Resize 35%
Position to the right of the candle
Add a d/s
≈☆≈
Open Ele7
C/P into your image.
Resize 35%
Position to the left of the tag by the red hearts
Add a d/s
≈☆≈
Open Ele5
C/P into your image.
Resize 35%
Position next to the red hearts on the left
Add a d/s
≈☆≈
Open Ele79
C/P into your image.
Resize 35%
Position in between the black roses
(see tag for reference)
Add a D/S
≈☆≈
Open Ele36
C/P into your image.
Resize 35%
Slightly darken to make the red deeper.
Position top right of your tag
Duplicate and mirror
Resize 70%
Position on the left side (see tag for reference(
Add a d/s to both layers
≈☆≈
Position your elements how you like
Add any other elements you wish
Resize your tag if needed (resize before adding your copyrights)
Add copyrights
♥
Tutorial written on 1st February 2025
Wednesday, 29 January 2025
Simply right click and save as.


Thank you so much Kitt
Friday, 10 January 2025


Monday, 12 February 2024

:- Supplies Needed -:
Tube of choice - 354-1 Keith Garvey https://www.cdoestore.com/product-p/keithgarvey-354-1.htm
Scrapkit called An Afternoon In Paris by me. You can get it https://diamondcreationsdc.blogspot.com/2024/02/ftu-afternoon-in-paris.html
Mask https://vixpsp.blogspot.com/2011/06/more-big-masks-set-2.html (bottom mask)
Font of choice. I am using Farmland
♥
Info
C/P + Copy and paste
Resize (click image - resize)
Add d/s = Add drop shadow
♥
Lets Get Started

Open a new transparent image 800 x 800 pixels
C/P PP2 as a new layer
Layers - mask layer - from image and select your mask
Layers - merge - merge group
≈☆≈
Open Ele27
C/P into your image as a new layer
Layers - New Raster Layer
≈☆≈
Open Ele21
C/P into your image as a new layer
Resize 80%
Using your selection tool select around the frame
In your layer pallet select the layer below the frame
Open PP3 and paste into selection.
Selections - Select none.
Select the frame layer - Add a d/s
≈☆≈
Open Ele22
C/P into your image as a new layer
Position to the right of your image.
Add a d/s
≈☆≈
Open Ele10
C/P into your image as a new layer
Position to the top left of your image.
Add a d/s
≈☆≈
C/P your tube into your image
Resize if needed.
If you are using the same tube resize 85%
Add a d/s
≈☆≈
Open Ele6
C/P into your image as a new layer
Position to the right of your image.
Add a d/s
≈☆≈
Open Ele4
C/P into your image as a new layer
Position right next to the tower.
Add a d/s
≈☆≈
Open Ele43
C/P into your image as a new layer
Position slightly to the left of your image.
Add a d/s
≈☆≈
Open Ele38
C/P into your image as a new layer
Position on top of the book
≈☆≈
Position your elements how you like
Add any other elements you wish
Resize your tag if needed (resize before adding your copyrights)
Add copyrights
Tutorial written 12th February 2024
Thank you Jill

Thank you Lavada

Sunday, 28 January 2024
This cluster is made using Tenderness kit by MizTeeques Digital Designs http://mizteeques.blogspot.com
If you download the kit remember to say thank you ♥


Friday, 26 January 2024

:- Supplies Needed -:
Tube of choice - I used a lovely tube by Keith Garvey https://www.cdoestore.com/product-p/keithgarvey-142-1.htm
Scrapkit called Waiting Game by Chaos Priestess https://scrapsbychaospriestess.blogspot.com/2017/06/new-waiting-gme-ftu-mini-taggers-kit.html
Mask by me https://sensualposers.blogspot.com/2023/04/brand-new-mask-set.html (the 4th mask)
Font of choice. I used Advantage
♥
Info
C/P + Copy and paste
Resize (click image - resize)
Add d/s = Add drop shadow
♥
Lets Get Started
↓↓↓↓↓↓↓
Open a new transparent image 650 x 650pixels
C/P WG_Paper03 as a new layer
Layers - mask layer - from image and select your mask
Layers - merge - merge group
Open WG_BackdropEl
C/P as a new layer
≈☆≈
Open WG_FlowerEl03
Position towards the upper right. You will need to reposition this shortly.
Add a d/s
Add a new transparent layer
≈☆≈
Open WG_FrameEl02
C/P into your image
Select the transparent layer below.
Using your selection tool, draw a selection around the frame
C/P WG_Paper02 into selection
Select none.
Position the flower element to poke past the frame (see my tag for reference)
≈☆≈
Open WG_ButterflyEl01
C/P as a new layer
Resize 45%
Position top right of your frame
Add a d/s
≈☆≈
Open WG_ClusterEl01
C/P into your image
Resize 65%
Position to the left side of your image.
Add a d/s
≈☆≈
Add your tube.
Resize if needed
Add a d/s
Select the frame
Selections - Select all
Selections - Float
Selections - defloat
Click back on your tube.
Using your eraser tool remove any tube that is inside of the selection.
Selections - Select none
Erase any tube still showing below the frame
≈☆≈
Open WG_RibbonEl01
C/P into your image.
Position towards the bottom of your image
Add a d/s
≈☆≈
Open WG_LeafEl01
C/P into your image
Position towards the lower middle of your image (see mine for reference)
Add a d/s
≈☆≈
Position your elements how you like
Add any other elements you wish
Resize your tag if needed (resize before adding your copyrights)
Add copyrights
♥
Tutorial written on 26th January 2024
Thank you Rosey


Thursday, 25 January 2024

:- Supplies Needed -:
Tube of choice - PinUpToons Feb 2014 https://www.cdoestore.com/product-p/pinuptoons-feb2014.htm
Scrapkit called My Valentine by Designz By Shelly https://designzbyshellywooodruffcombsdesignz.blogspot.com/2024/01/my-valentine-ptu-now-ftu-kit.html
Mask by me https://sensualposers.blogspot.com/2023/04/brand-new-mask-set.html (the first mask)
Font of choice. I used Sweet Like Honey
♥
Info
C/P + Copy and paste
Resize (click image - resize)
Add d/s = Add drop shadow
≈☆≈
Lets Get Started
↓↓↓↓↓↓↓
Open a new transparent image 800 x 800 pixels
C/P Paper 2 as a new layer
Layers - mask layer - from image and select your mask
Layers - merge - merge group
≈☆≈
Open element 121
C/P into your image as a new layer
Resize 90%
Using your magic wand, click inside the circle.
Selections - Modify - Expand by 5 pixels
Layers - New layer. Drag below the frame
Open Paper 9 into selection
Selections - Select None.
Select the frame layer, add a d/s
≈☆≈
Open Element 132
Resize 60%
Position to the left of your image.
Add a d/s
≈☆≈
Open Element 51
Resize 65%
Position to the right of your image.
Add a d/s
≈☆≈
C/P your tube into your image
Resize if needed.
If you are using the same tube resize 50%
Add a d/s
≈☆≈
Open Element 50
Resize 65%
Position to the left of your image.
Add a d/s
≈☆≈
Open Element 43
Resize 60%
Position to the right of your image.
Add a d/s
≈☆≈
Open Element 1
Resize 35%
Position to the middle of your image.
Add a d/s
≈☆≈
Open Element 15
Resize 35%
Position to the left of your image.
See my tag for reference
Add a d/s
≈☆≈
Open Element 16
Resize 35%
Position to the left of your image next to the other glass.
See my tag for reference
Add a d/s
≈☆≈
Open Element 26
Resize 45%
Position to the right of your image.
Add a d/s
≈☆≈
Position your elements how you like
Add any other elements you wish
Resize your tag if needed (resize before adding your copyrights)
Add copyrights
Tutorial written on 25th January 2024
Thank you Debbie

Thank you Kitt


Thank you Shelly

Sunday, 8 January 2023
These clusters are made using Manipulated By Magik's gorgeous kit called Romance In Red
You can purchase the kit


Friday, 18 February 2022
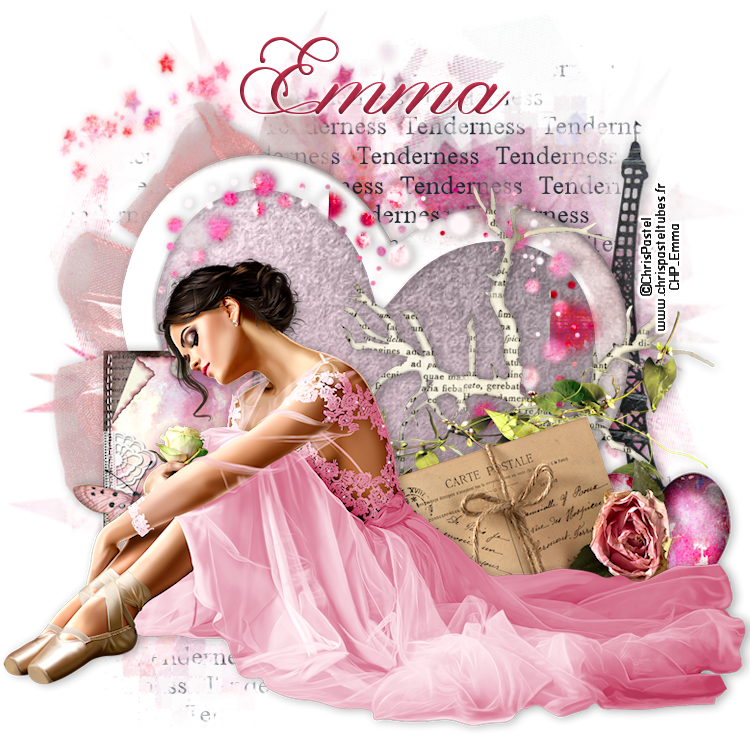
Supplies needed
Tube of choice -I am using Ballerine by Chris Pastel Tubes
You can purchase it http://www.chrispasteltubes.fr/index.php?route=product/product&path=20_87&product_id=266
Scrapkit called Tenderness by Miz https://mizteeques.blogspot.com/2019/04/new-ftu-kit-tenderness.html
Mask 463 by Vix psp https://vixpsp.blogspot.com/2019/06/more-new-masks-vixmask459-463.html
Font of choice - I used Magnolia Light
♥♥♥♥♥♥♥♥♥♥
Info
C/P = Copy and paste
Resize (click image - resize)
Add D/S = Add drop shadow
♥♥♥♥
Lets get started
♥♥♥♥
Open a new transparent image 800 x 800 pixels
C/P paper Miz_Tenderness_paper 3 as a new layer
Layers - mask layer - from image and select mask463
Layers - merge - merge group
♥♥♥♥
Open Miz_Tenderness_element 32
C/P as a new layer
Open Miz_Tenderness_element 16
C/P into your image
Resize 60% position over to the right
Add D/S
♥♥♥♥
Open Miz_Tenderness_element 42
C/P into your image
Position over to the left (see tag for placement)
Add a d/s
♥♥♥♥
Open Miz_Tenderness_element 11
C/P as a new layer
Using your magic wand (selection tool) select the inside of the heart frame
Selections - expand 5 pixels
Open Miz_Tenderness_paper 16
C/P as a new layer
Drag below the heart frame
Selections - invert
Hit delete
Selections - select none
♥♥♥♥
Select the frame layer
Add a d/s
Open Miz_Tenderness_element 34
C/P as a new layer
Positon how you like over your heart frame
Add a d/s
♥♥♥♥
Open Miz_Tenderness_element 2
C/P as a new layer
Resize 70%
Move to the right
Add a d/s
♥♥♥♥
Open Miz_Tenderness_element 19
C/P as a new layer
Position towards the middle right of your image (see tag for placement)
Add a d/s
♥♥♥♥
Open Miz_Tenderness_element 28
C/P as a new layer
Resize 50%
Position over to the right (see tag placement for reference)
Add a d/s
♥♥♥♥
Open Miz_Tenderness_element 27
C/P as a new layer
Resize 50%
Position over to the left
Add a d/s
♥♥♥♥
Open Miz_Tenderness_element 58
C/P as a new layer
Resize 50%
Position just to the left of the centre
Add a d/s
:hearts:
Add your tube
If you are using the same tube I am resize 35%
Add a d/s
♥♥♥♥
Resize tag to your liking
Add copyrights and your name
Save as PNG
♥♥♥♥
Tutorial written by Emma on January 30th 2022
Tag by Tamie


Saturday, 25 July 2020


Subscribe to:
Posts
(Atom)