Editor’s note: This article was updated in March 2026 to include Sevalla, a solution developed by Kinsta for deploying and hosting applications, databases, and static sites across global data centers. It was previously updated by Emmanuel John to reflect the most updated information for each deployment service and add more alternatives that offer free tiers for deploying Node.js apps.

For years, Heroku’s free tier was the standard by which many developers released prototypes, hobby projects, and portfolio pieces to the public. Unfortunately, after Heroku retired its free tier in 2022, developers have had to find alternatives to host their Bootcamp and portfolio projects — and many are still looking for suitable alternatives to this day.
In this article, we’ll review several alternatives to using Heroku for deploying apps. We’ll build a simple, framework-free Node.js app, and then deploy it to eight different services that offer a free tiers. We’ll also explore some Heroku alternatives for static deployment and serverless functions.
Let’s get started!
The Replay is a weekly newsletter for dev and engineering leaders.
Delivered once a week, it's your curated guide to the most important conversations around frontend dev, emerging AI tools, and the state of modern software.
We’ll build a plain vanilla Node.js server, but the same principles would apply if you’re using any popular Node.js frameworks, like Express, Koa, Fastify, NestJS, FoalTS, or others. You should already have Node.js installed on your machine.
Open your editor to an empty folder. Create a new Node.js project from your terminal using the npm init -y command.
Create an index.js file called touch index.js. In package.json, let’s set up our start script with the command below:
  "scripts": {
    "start": "node index.js"
  },
Inside index.js, run the following code to configure a basic “Hello, World!” Node.js server:
// Import http library
const http = require("http")
// use env variable to define tcp/ip port with a default
const PORT = process.env.PORT || 8080
//create our server object
const server = http.createServer()
// We define a function that runs in response a request event
server.on("request", (request, response) => {
  // handle request based on method then URL
  response.statusCode = 200
  response.write("Hello World")
  response.end()
})
// get the server to start listening
server.listen(PORT, err => {
  // error checking
  err ? console.error(err) : console.log(`listening on port ${PORT}`)
})
Let’s test this locally by running node start and then heading to localhost:8080. If you see “Hello, World!”, then it’s working, and you can begin deploying it.
From your terminal, create a Git repository called git init. Add all of your files to staging with the git add . command, then make a commit with the following command:
git commit -m"First Commit"
Next, head over to GitHub, create a new repository, and get the URL. Add your GitHub repo as a remote to your local repo, and be sure to use your URL:
git remote add origin https://github.com/username/reponame
Then, push your code up to remote:
git push origin main
You can confirm whether your branch is the main or master branch with the command git branch.
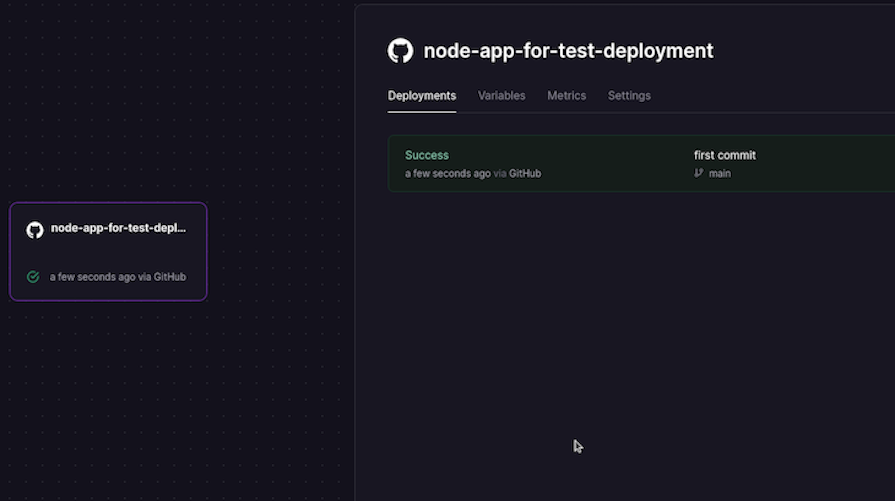
Now that we have our example code on GitHub, we can begin deploying it. For reference, you can check out my repo for this tutorial.
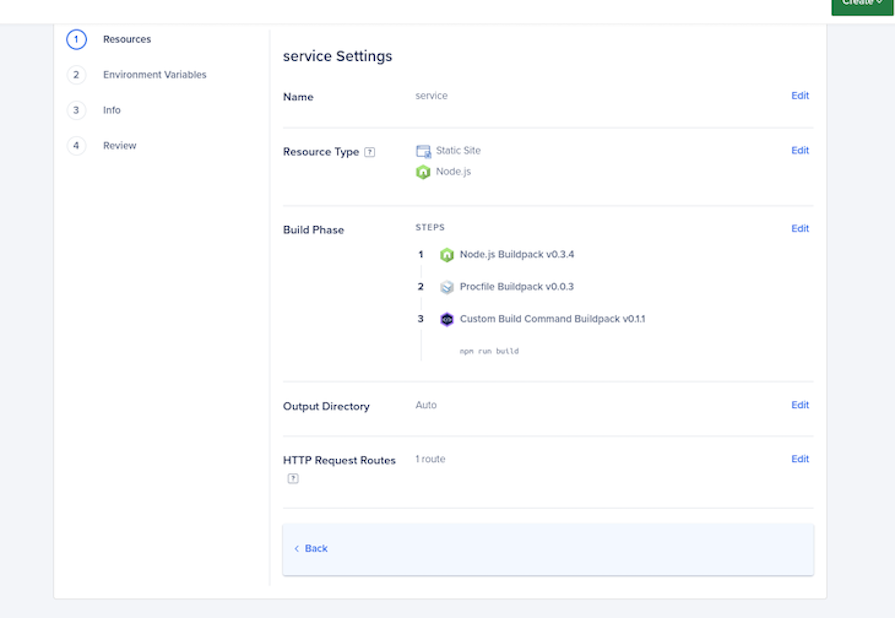
Render’s free tier makes static deployments for React, Vue, and Angular apps easy, as well as web service deployments for Node.js apps. Just follow these steps:
From the following screen, we wait for the deployment to complete, which can take a while. In the upper left hand corner, you can find the URL for when it is done:
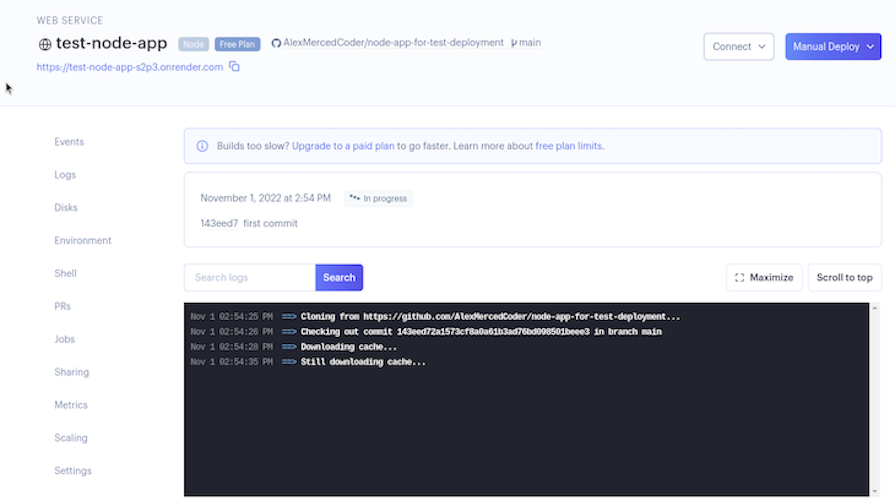
Once it’s done, click on the URL that was generated for you, and you should see our “Hello, World!” message. That was pretty easy, wasn’t it?
Render offers other services that you may find useful as you build your application, like databases and cron jobs, which are scripts that run on a set schedule.
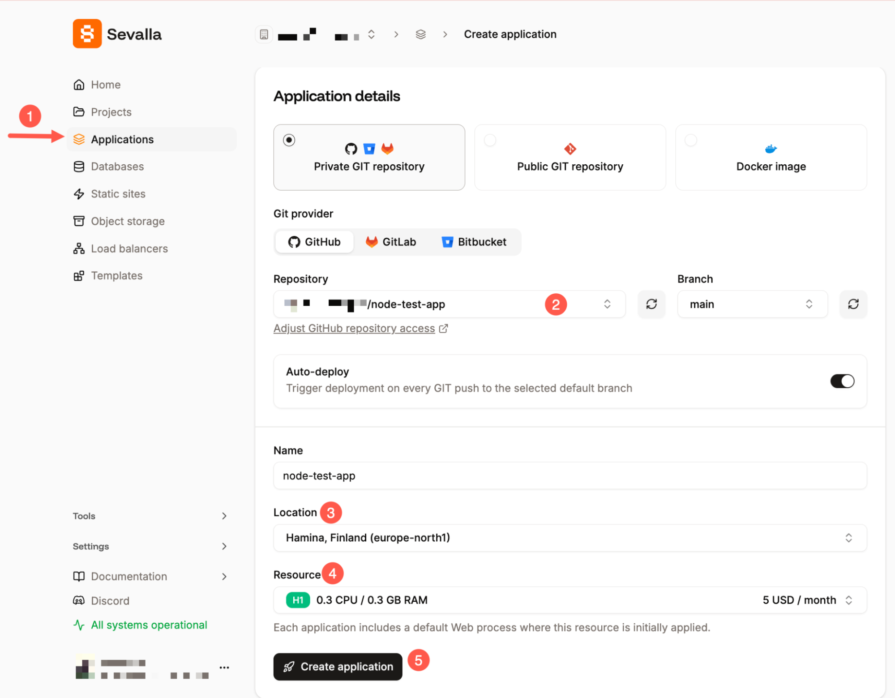
Sevalla is a cloud application platform that builds, deploys, runs, and scales your application with zero configuration. It’s built by the team at Kinsta and runs on Kubernetes with Cloudflare handling speed and security on the edge.
The steps to deploy our Node.js application on Sevalla are very similar to those for Render:
 Sevalla will auto-detect your Node.js app and kick off the build. Once it’s done, you’ll get a live URL right from the dashboard.
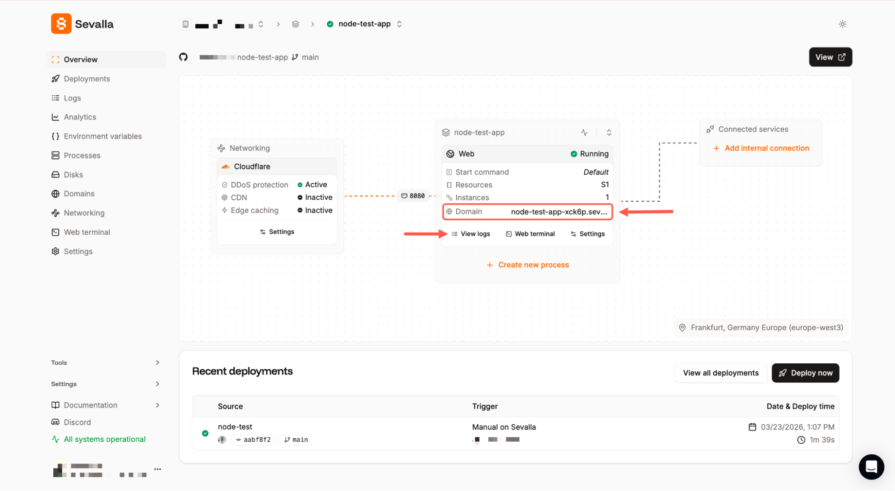 Right from the overview page, you can view logs, access the web terminal, and build settings.
Beyond simple deployments, Sevalla also lets you spin up managed databases like PostgreSQL, MySQL, and Redis, connect them to your app over a private internal network, and run background workers and cron jobs from the same dashboard.
If you’re migrating from Heroku specifically, they have a step-by-step migration guide that maps every Heroku concept (dynos, Procfiles, pipelines, config vars) to its Sevalla equivalent.
Similar to Render, Railway is a service that allows you to deploy your application and provision several types of databases, like Postgres, mySQL, and MongoDB. The steps to deploy our Node.js application on Railway will be very similar to those for Render:
It should complete pretty quickly, and you’ll see the following screen:
By default, it will not have a publicly accessible domain name. To generate one, head over to the Settings tab and click Generate Domain; this will create a URL that you can use to share your project with others. That’s it!
Fly.io focuses primarily on deploying Docker containers, and over the last few years, it has made the process much easier. First, sign up using your GitHub account. We’ll take a different approach when deploying with Fly.io:
flyctl auth login. It will ask for payment info, but you won’t be charged as long as you remain within the free tierflyctl launchIt may take a while, but once it is deployed, you’ll see the application on your Fly.io dashboard as well as the URL where it is located.
If you need to update your app in the future, simply run the flyctl deploy command from the directory where your application is. When you ran flyctl launch, it created a fly.toml file with all the deployment settings for speeding up updates, so it knows which deployment to update.
If it doesn’t work, double check that the port that is exposed in fly.toml is the same one that is exposed in your index.js on line four as the default port.
Similar to Render, Koyeb is a service that builds, deploys, runs, and scales your application with zero configuration and provisions several types of databases, like Postgres, mySQL, and MongoDB:
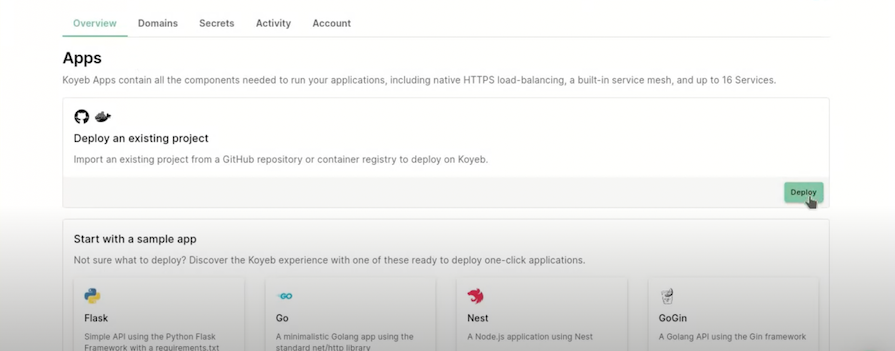
The steps to deploy our Node.js application on Koyeb will be very similar to those for Render:
It will generate a build log, and you’ll see the following screen:
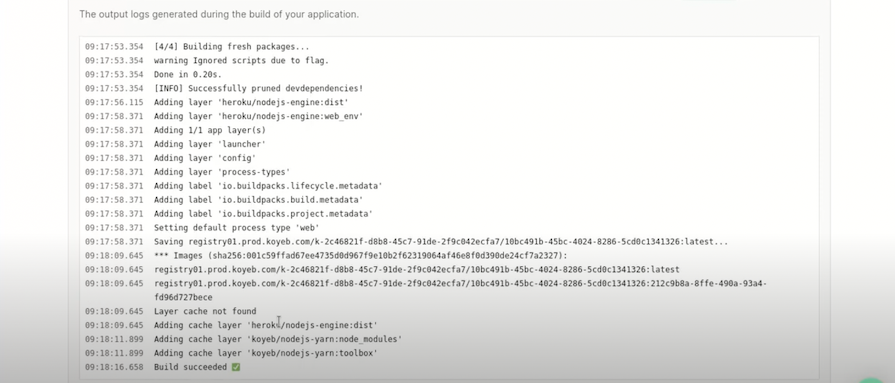
Upon a successful build, Koyeb will generate a deployment URL to access your NodeJs application.
Back4App is a cloud platform for building, deploying and scaling applications:
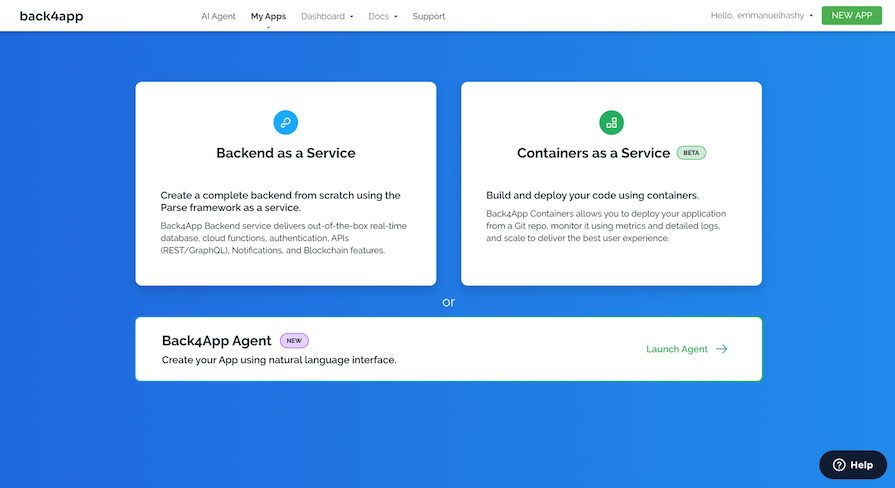
It increases developer productivity with its Backend as a Service feature, eliminates DevOps, and does not require a credit card to get started:
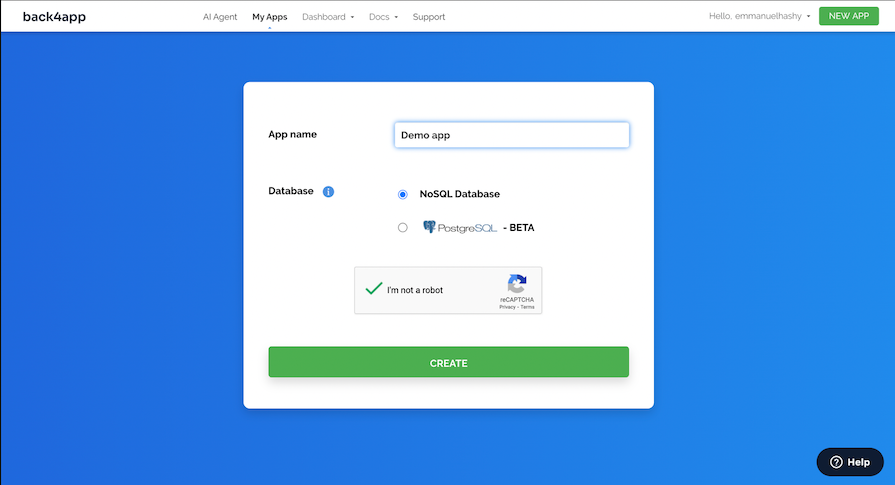
The steps to deploy our Node.js application on Back4App will be quite different compared to Render:
App settings > Security and Keys to get your app credentialsAPP_ID and JAVASCRIPT_KEY to your frontend applicationBack4App deploys your API backend by default on the fly when the backend application is created on the dashboard:
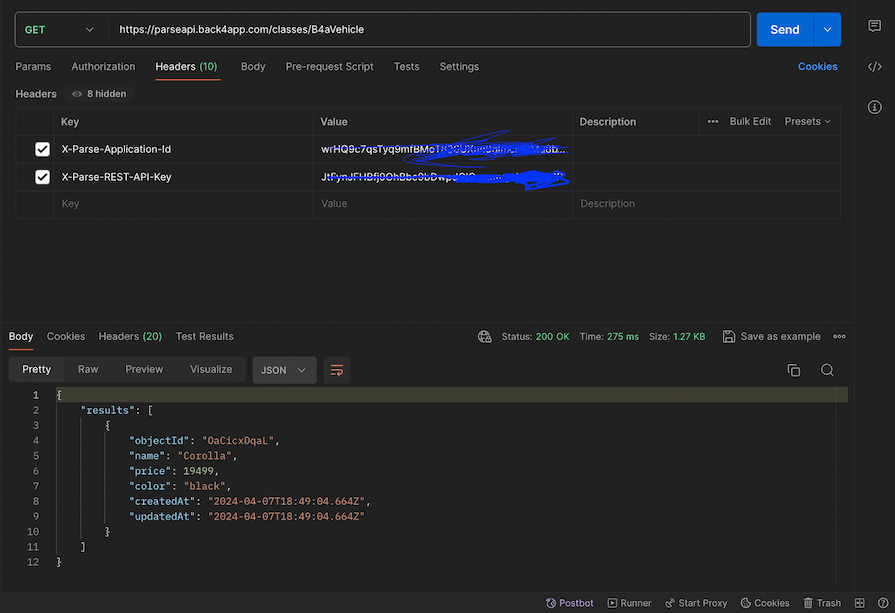
You can refer to the official documentation for a detailed guide on getting started with Back4App.
Cyclic is a cloud platform that focuses primarily on deploying apps entirely on a serverless cloud infrastructure, and even with its free tier, you can access database and storage features, and your apps are ready on-demand — immediately and at all times — with no sleeping or recycling.
The steps to deploy our Node.js application on Cyclic will be very similar to those for Render:
It should complete pretty quickly, and you’ll see the following screen:
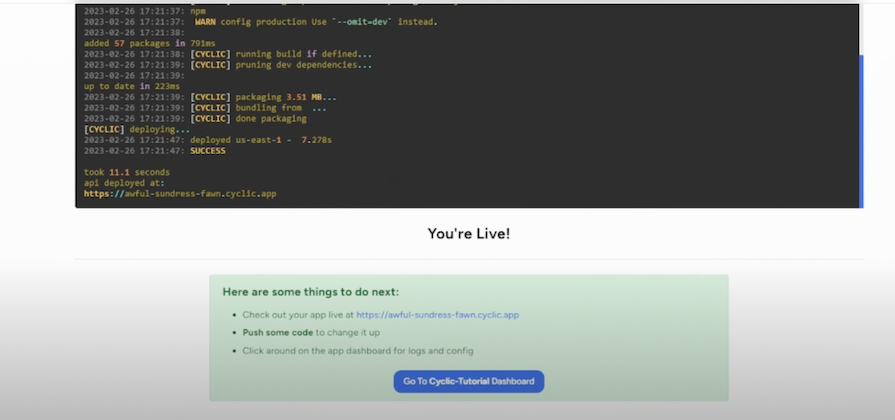
You can also change your sub-domain by heading to the environments tab to create a custom sub-domain.
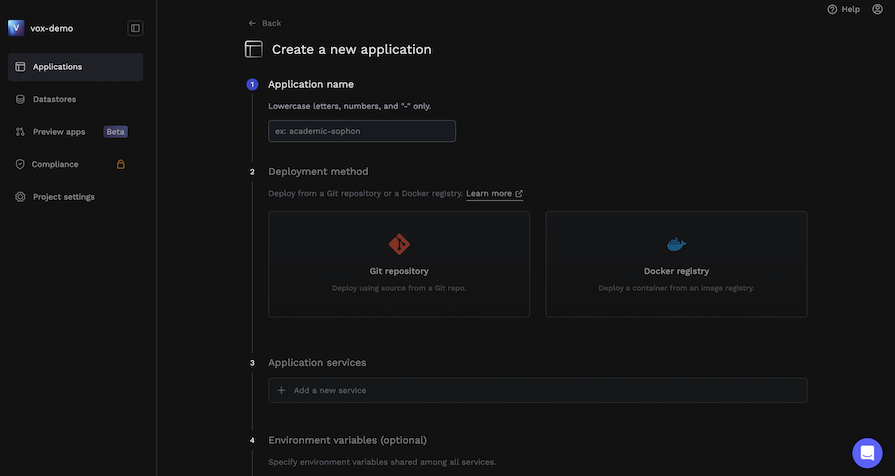
Porter is a platform as a service (PaaS) that builds, deploys, runs, and scales your application with just a few clicks into a cloud provider of your choice, AWS, GCP, or Azure. It offers a free tier and $5 in free credits on sign-up:
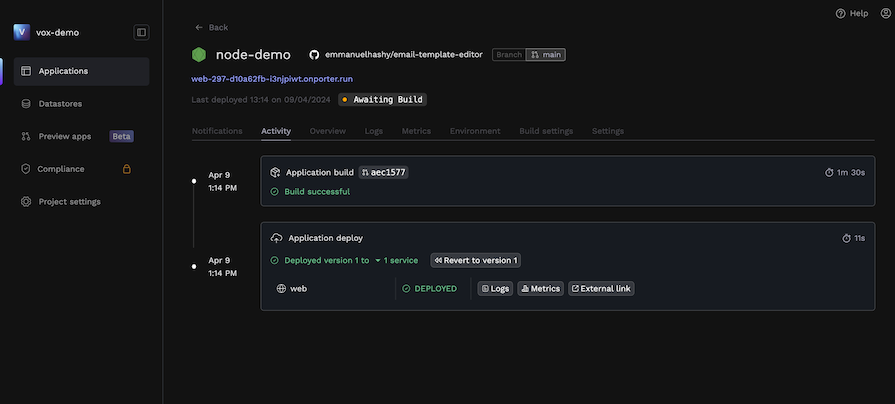
Here are the steps to deploy our Node.js application on Porter:
You’ll see the following screen once deployment is successful:
Adaptable is a platform as a service (PaaS) that provides all the benefits of an advanced continuous deployment system without having to deal with Kubernetes and Docker making deployment very easy:
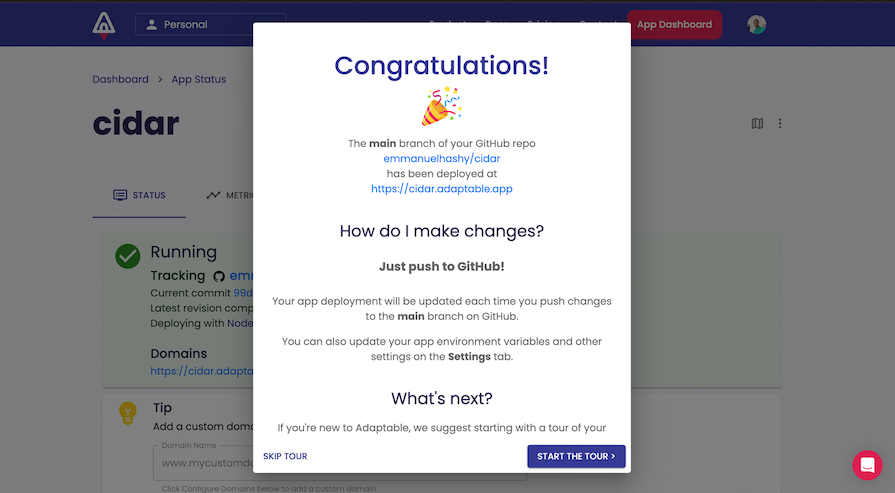
Adaptable monitors your connected GitHub branch and automatically updates your deployment when you push. It supports autoscaling, serverless, scalable databases, load balancing, fully-managed HTTPS, and more.
Here are the steps to deploy our Node.js application on Adaptable:
https://your-app-name.adaptable.appYou’ll see the following screen once deployment is successful:
Not every application requires you to deploy a server. For example, frontend React, Vue, SolidJS, Svelte, and Angular apps can be deployed as static apps.
There are several options for deploying these static apps for free that only require you to connect your GitHub repository with your project, including Render, Railway, Fly.io, Netlify, GitHub Pages, Vercel, App by Digital Ocean, Surge.sh, Firebase, and Azure Static Apps.
Instead of persistently running server code on the providers’ severs, only the static HTML, CSS, and JavaScript files in your project are being delivered. Therefore, there are fewer free options. Let’s explore some of the top Heroku alternatives for static deployment now.
To deploy a static site on Render, go to your dashboard and add a new Static Site:
From here, you just have to connect the repository with your static website, specify any build commands like npm run build for React, then click Deploy.
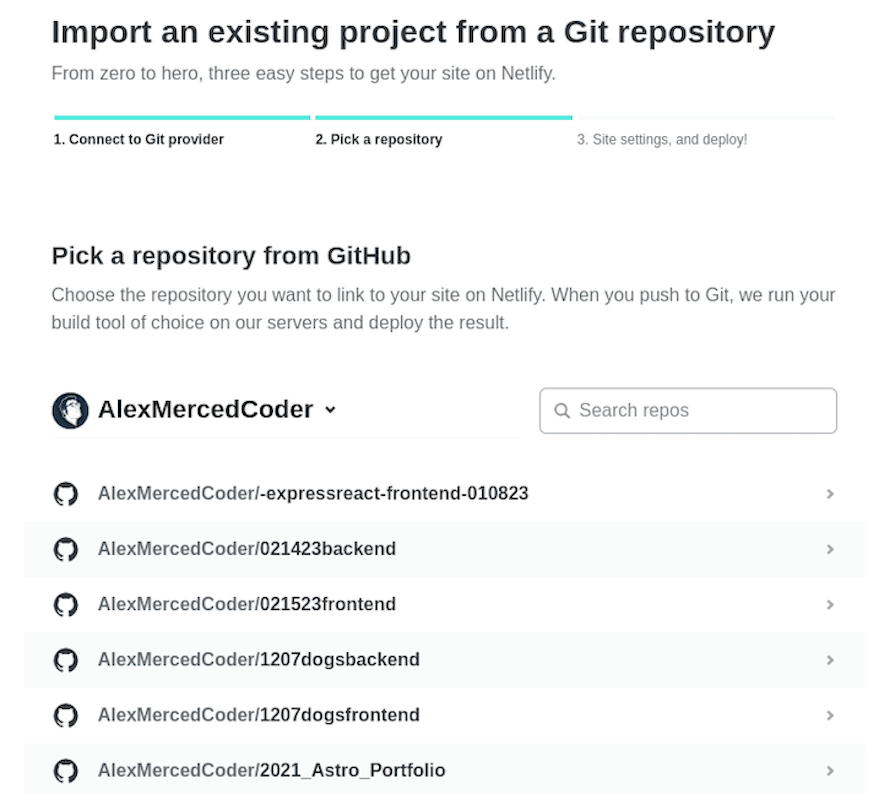
Log in to Netlify and click Add new site from the dashboard:
Then, select a GitHub repository:
Set your build command and publish directory, which will differ based on what frontend framework you use:
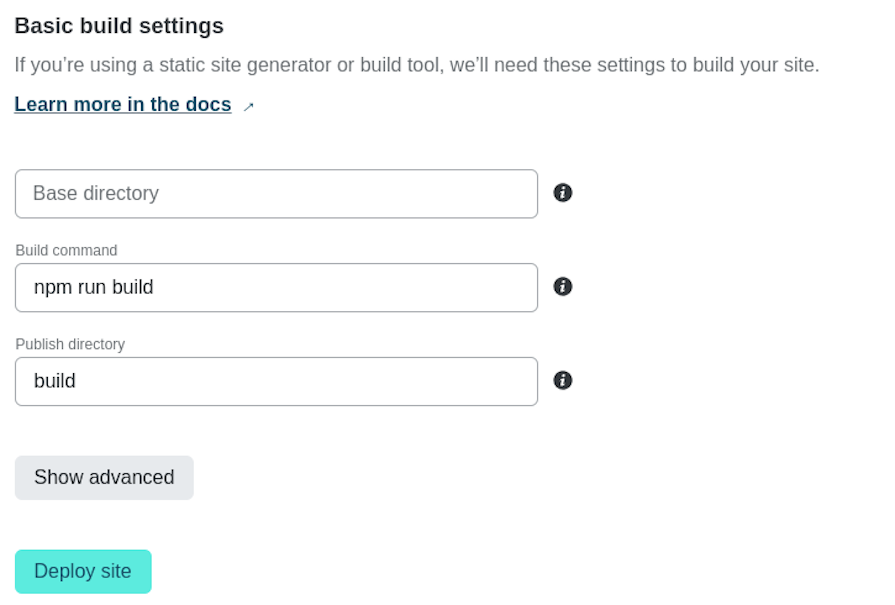
Finally, click Deploy site, and you’re done!
Log into Vercel. From the dashboard, click on Add New, then select Project:
Select a GitHub repository to deploy:
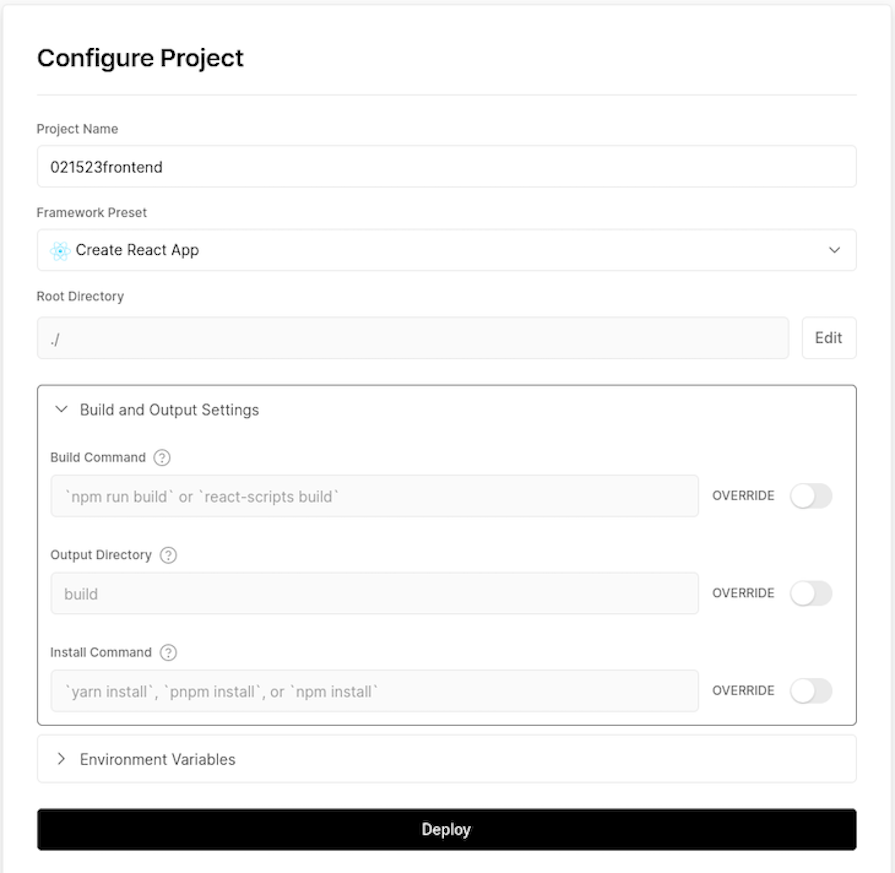
Set up your build command and output directory, then click Deploy:
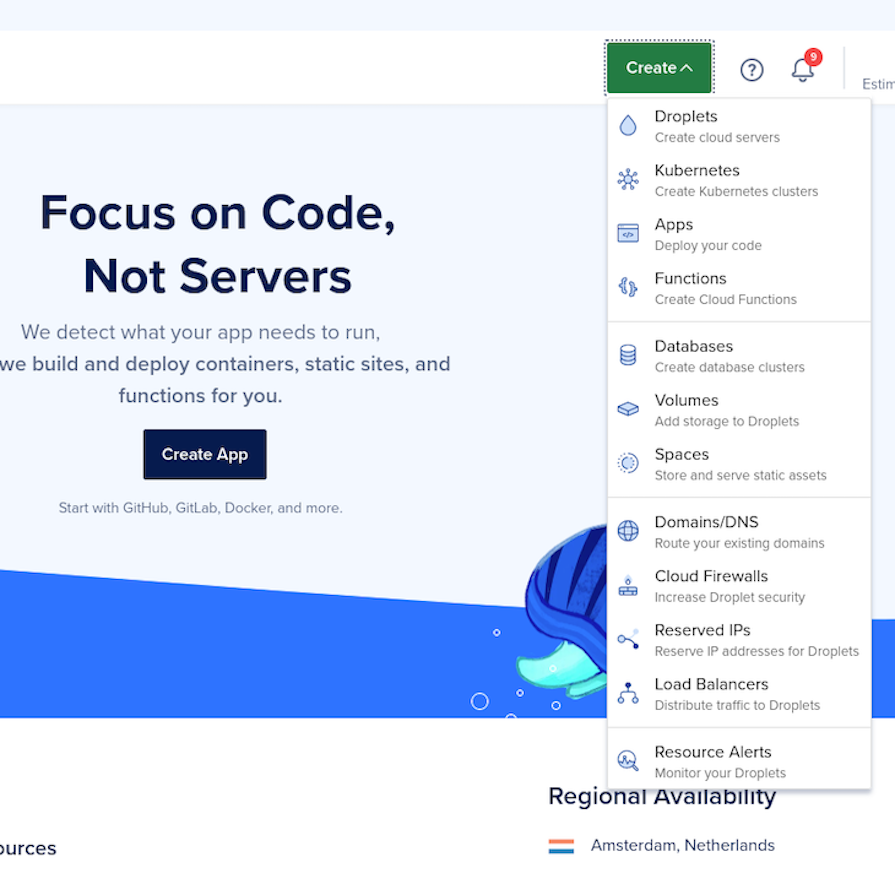
Head over to the Apps section of the Digital Ocean dashboard, then click on Create and select Apps:
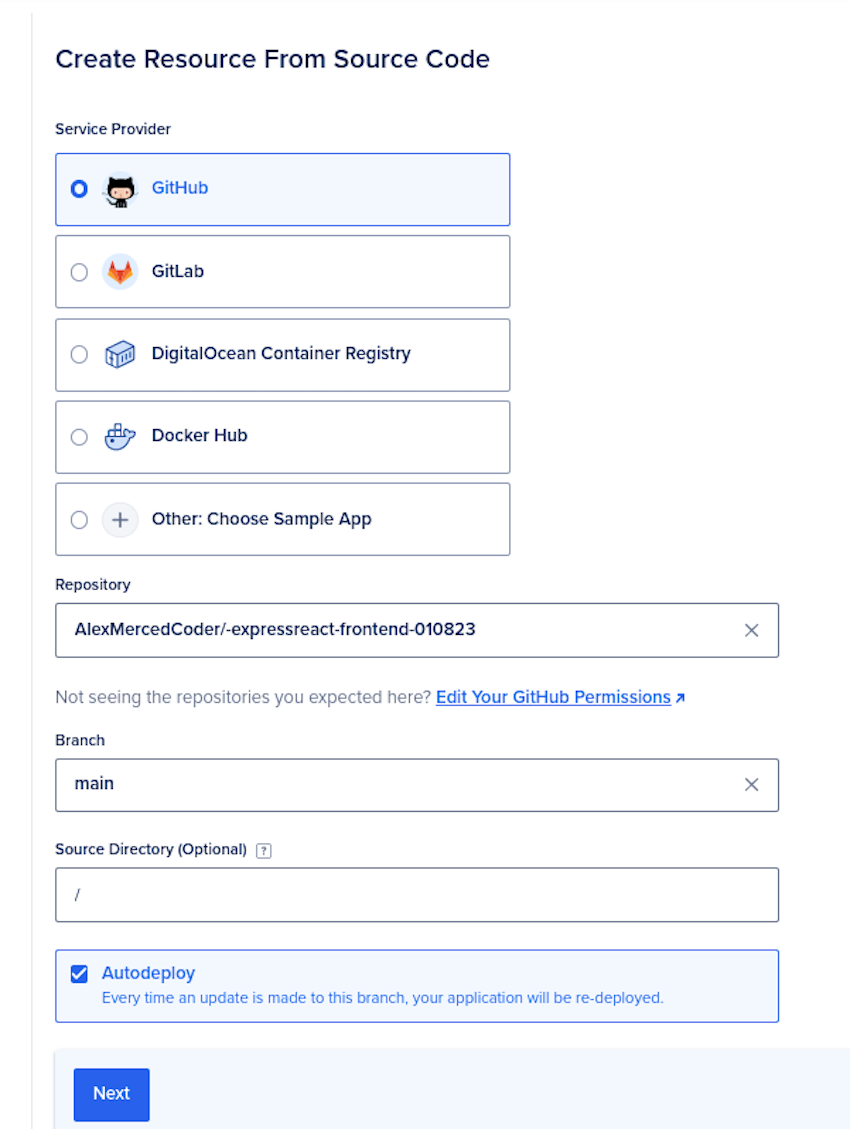
Select a GitHub repository with your application and pass it the necessary configurations, like the source directory:
On the next page, we‘ll set our app to deploy as a static site:
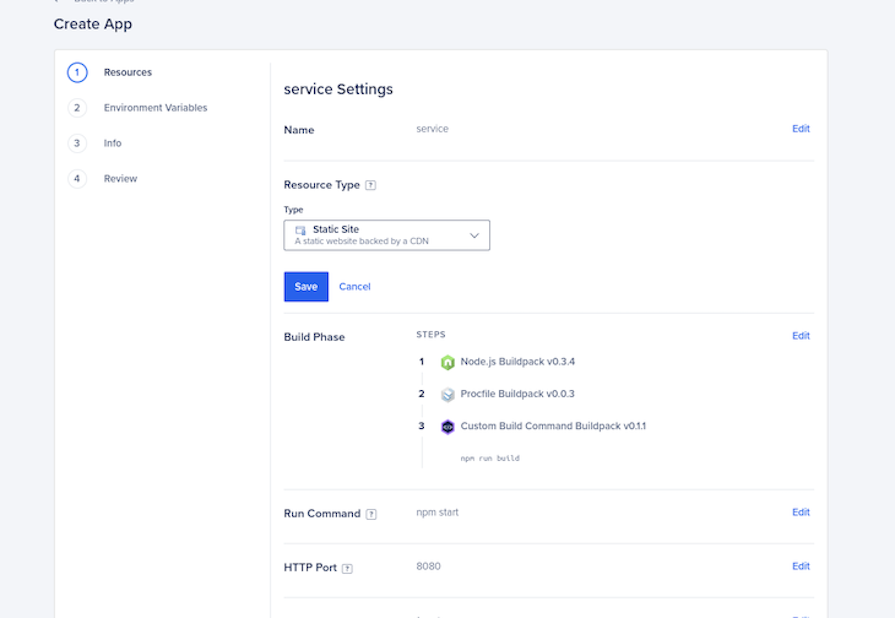
To deploy a backend service like Heroku, you can also select Web Service, but this is not free on Digital Ocean. After changing it to a static site, make sure to check the build command and output directory:
Click on Review and then Create Resource, and your app will be deployed!
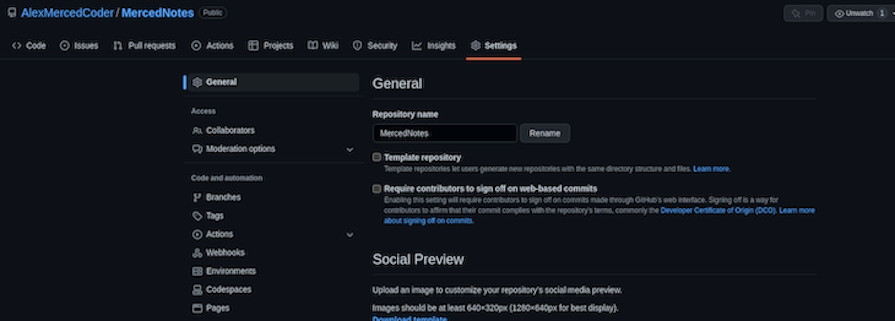
On any GitHub repository that holds a static site, just go into the Settings section and click on Pages:
Next, select a branch to deploy and select Save:
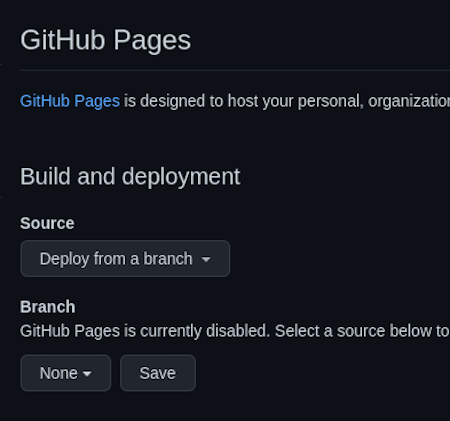
In a few minutes, the site should be live!
Serverless functions are another option for handling backend database interactions and API delivery, which is what we would normally deploy server applications for.
Instead of writing a server that runs 24/7, you can write functions with your desired logic that run on demand on the provider’s servers. All of the major clouds, like AWS, Azure, and Google provide serverless functions as a service, but there are other services that make using serverless functions much easier.
Usually, these services require you to connect a GitHub repo with one file for each function you want to deploy, which is then assigned a URL that you can call from your frontend application.
To add a bit of backend functionality into your static apps deployed on Netlify, simply create a /netlify/functions folder in your repository. You can add as many JavaScript files in this folder as you’d like.
For example, let’s imagine I created a /netlify/functions/cheese.js file that looked like the following:
exports.handler = async function (event, context) {
  return {
    statusCode: 200,
    body: JSON.stringify({ cheese: "Gouda" }),
  };
};
When the code above is deployed to Netlify, it’ll create a route that you can make requests to at /.netlify/functions/cheese. You can use any of the libraries loaded in the project’s package.json, so connecting to databases and other typical backend activities are all fair game.
To use serverless functions with static apps deployed on Vercel, you can use Vercel functions, which have a similar feel to ExpressJS when you use JavaScript.
Simply create your JavaScript or TypeScript files in a folder called /api in your project. For example, let’s say I create a file called /api/cheese.js that does the following:
export default function handler(req,res) {
  res.json({cheese: "gouda"});
}
When I deploy my application to Vercel, I can make any API request to /api/cheese to get back the response from this function.
Heroku’s main purpose was to deploy dynamic server applications. Beyond the free options from Render, Railway, and Fly.io, some other paid options work along the same lines, connecting your GitHub repo and releasing your app:
Yes, it’s a little disruptive that we’ve lost Heroku’s free tier, but the resulting splintering across many different services like Render, Railway, and Fly.io will make the industry more resilient. With developers no longer beholden to one vendor, the competition for market share will accelerate the drive to innovation.
To summarize the Heroku alternatives we covered in this article:
| Provider | Free static deployment | Free server deployment | Free serverless functions | Paid entry point |
|---|---|---|---|---|
| Fly.io | ❌ | ✅ | ❌ | Metered prices |
| Sevalla | ✅ | ✅ | ❌ | $5 |
| Render | ✅ | ✅ | ❌ | Starter projects $7/mo |
| Railway | ✅ | ✅ | ❌ | Metered pricing |
| Heroku | ❌ | ❌ | ❌ | $5/mo |
| Netlify | ✅ | ❌ | ✅ | $19/ mo |
| GitHub Pages | ✅ | ❌ | ❌ | None |
| Vercel | ✅ | ❌ | ✅ | $20/mo |
| App by Digital Ocean | ✅ | ❌ | ❌ | $5/mo enabling server/static |
| Firebase | ✅ | ❌ | ✅ | Metered pricing |
| Surge.sh | ✅ | ❌ | ❌ | $30/mo |
| Koyeb | ✅ | ✅ | ❌ | $79/mo |
| Back4app | ❌ | ❌ | ❌ | $15/mo |
| Cyclic | ✅ | ✅ | ✅ | $3/mo |
| Porter | ✅ | ✅ | ❌ | $10/mo |
| Adaptable | ✅ | ✅ | ❌ | $3/mo |
I hope you enjoyed this article. Be sure to leave a comment if you have any questions, and let me know which service you prefer as an alternative to Heroku. Happy coding!
 Monitor failed and slow network requests in production
Deploying a Node-based web app or website is the easy part. Making sure your Node instance continues to serve resources to your app is where things get tougher. If you’re interested in ensuring requests to the backend or third-party services are successful, try LogRocket.

LogRocket lets you replay user sessions, eliminating guesswork around why bugs happen by showing exactly what users experienced. It captures console logs, errors, network requests, and pixel-perfect DOM recordings — compatible with all frameworks.
LogRocket's Galileo AI watches sessions for you, instantly identifying and explaining user struggles with automated monitoring of your entire product experience.
LogRocket instruments your app to record baseline performance timings such as page load time, time to first byte, slow network requests, and also logs Redux, NgRx, and Vuex actions/state. Start monitoring for free.

Learn how to use Gemini CLI subagents to delegate frontend, backend, testing, and docs tasks to specialized agents with guardrails and clear ownership.

Learn how next-browser gives AI agents runtime context for debugging Next.js apps, including React props, hydration, PPR, forms, and performance.

Build dynamic LLM routing in Next.js with OpenRouter, TanStack AI, task classification, model fallbacks, and cost-aware routing.

TSRX adds first-class control flow, conditional hooks, and scoped styles to React via a TypeScript compiler extension — no new framework required.
Would you be interested in joining LogRocket's developer community?
Join LogRocket’s Content Advisory Board. You’ll help inform the type of content we create and get access to exclusive meetups, social accreditation, and swag.
Sign up now

