Showing posts with label easy. Show all posts

Sunday, January 21, 2024

Honey Garlic Chicken Tacos


Monica gave me this easy taco recipe and my family loved it so much that I have made it about 4 times in the last month!  And every time, I have to ask Monica for the recipe again because I can't find it on my phone.  So, I thought I better post this quick, so that I can find it next week when I want to make it again.


Honey Garlic Chicken Tacos
adapted from: Monica

4 Tbsp. honey
3 Tbsp. taco seasoning
6 cloves garlic, minced
2 Tbsp. oil
1/2 tsp. salt
1 lb. chicken, cut into 1 inch pieces
corn tortillas
chopped cabbage
sour cream
lime juice
chopped cilantro

In a large bowl, mix the honey, taco seasoning, garlic, oil and salt.  Toss in the chicken and coat it with the seasoning.  In a frying pan, over medium heat, cook the chicken until it is no longer pink in the center.  (Another way I have done this is to pour the mixture over some pre-cooked, shredded chicken and stir it well, then I just heated that up in a small frying pan).  In a small bowl, combine sour cream, lime juice and chopped cilantro (I just did this to taste-no recipe, although I do have a recipe for this on the blog under Cilantro Lime Crema) to make a cilantro lime crema.  Heat up the tortillas.  Layer the sour cream mixture, chicken and chopped cabbage on each taco.  Serve and enjoy!  


Sunday, July 30, 2023

Quick and Easy Naan Bread


 Tonight we had curry for dinner, and with about 15 minutes left before it was done, I decided I should make some naan bread to go with it.  Luckily for me, I found a super quick and easy recipe that took about 15 minutes to make, from start to finish.  There are a lot of recipes out there for naan, most of which have yeast and require a rise, but this one didn't call for yeast and we thought it was still really tasty and added a lot to our meal!  So, if you are in a hurry and forget to plan ahead, this naan will work in a pinch!


Quick and Easy Naan Bread
adapted slightly from www.veggiedesserts.com

1 1/2 c. flour
1 c. sour cream (it called for plain yogurt but I didn't have any)
2 tsp. baking powder
1/4 tsp. salt

Mix all the ingredients together in a medium bowl.  You may need to use your hands to get it to mix well.  I ended up kneading mine just a bit to get it to incorporate all together.  Divide the dough into 6 equal pieces.  On a floured surface, roll each piece into a 6 inch circle.  Fry it on an ungreased griddle or frying pan for a couple of minutes on each side, until it begins to get golden bubbles.  When it is cooked through, spread melted butter and garlic on each side and serve it warm.

Sunday, February 5, 2023

Easy Lettuce Wraps


I got this recipe for lettuce wraps from my friend, Camille.  We used it for a Young Women activity on easy meals that our girls could make when they go away to college.  And this one is easy!  We love lettuce wraps at my house, and this is such a delicious, fast recipe, that it is now something that I feel like I can make more often (my other recipe takes a lot longer to prepare).  We also used ground beef as the meat, which I am more likely to have on hand than ground chicken or ground turkey (which is what other recipes use).  But feel free to substitute other ground meats in place of the ground beef.  You can also get creative with the chopped veggies you add.  It calls for water chestnuts, but last time I made it I also diced up carrots and added those, as well, and the original recipe called for a package of cole slaw to be added.


Easy Lettuce Wraps
from: Camille Bell

1 lb. lean ground beef (or turkey or chicken)
1/4 tsp. garlic powder
1/2 c. teriyaki sauce
1 can water chestnuts, diced
ground pepper to taste
1 head of lettuce

In a frying pan, over medium high heat, brown your ground beef.  Drain the grease.  Add the garlic powder, teriyaki sauce, diced water chestnuts and pepper.  Reduce heat to medium and let it simmer for a few minutes.  Serve it on your lettuce, rolling the lettuce leaf around the meat like a taco.

Sunday, March 20, 2022

Overnight Oatmeal


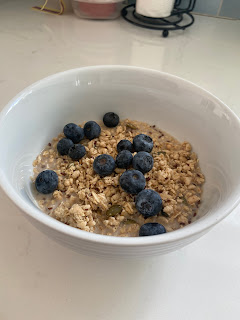
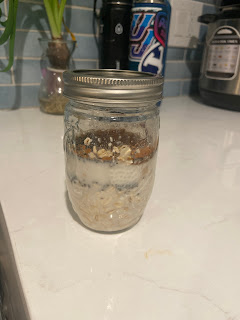
I guess it is time to jump on the Overnight Oats bandwagon.  I saw a recipe for this one day, and the next day, the Internet was feeding me recipe after recipe of overnight oatmeal.  I've read many of the recipes, and they are all very similar, so I'm putting this on here as the base that I have been using, but you can change it up and add any fruit/nuts/nut butter/flavoring/yogurt that you think would be delicious, and it probably will be!  I eat mine cold, with granola and fruit on it, and it has been a delicious, hearty, quick meal in the morning for me.


Overnight Oatmeal
by: www.abountifulkitchen.com

1/2 c. plus 2 Tbsp. almond milk
1/3 c. old fashioned oats
1 1/2 tsp. chia seeds
1 1/2 tsp. brown sugar
1/4 tsp. cinnamon
1/4 tsp. vanilla

Pour all the ingredients into a jar, shake it up really well, and place it in your fridge overnight or for 8 hours.  The next morning, give it another shake to stir it up again and then pour it into a bowl.  Top with granola, fresh fruit or coconut.


Sunday, September 26, 2021

Acorn Squash in the Instant Pot


This has been a great year for squash in my garden!  I cooked my acorn squash up tonight, and it turned out delicious and was so easy.  I didn't even peel it first!  So fast on the prep!

Acorn Squash in the Instant Pot

1 Acorn Squash, washed and cut into 2 inch pieces, with seeds removed
2 Tbsp butter
kosher salt
fresh ground pepper
1 c. water
fresh rosemary

Place your cut squash in your Instant Pot, sitting on the trivet.  Add 1 cup of water.  Sprinkle the squash with the salt and pepper.  Rub the rosemary between your fingers and sprinkle it over the squash.  Cook it on high pressure for 8 minutes and do a quick release.  And enjoy!


Sunday, May 23, 2021

Korean Rice Bowl


I made this the other day for something easy and different, and my family loved it!  It really was so quick and easy and used ingredients that I always have on hand.

Korean Rice Bowls
by: therecipecritic.com

1 lb. ground beef
3 cloves garlic, minced
1/4 c. brown sugar
1/4 c. soy sauce
2 tsp. sesame oil
1/4 tsp. ground ginger
1/4 tsp. crushed red pepper flakes
1/4 tsp. pepper
cooked rice
sliced green onions for garnish

In a large skillet, cook the ground beef and minced garlic until the beef is cooked through (no pink).  Drain any grease.  In a small bowl, whisk together the brown sugar, soy sauce, sesame oil, ground ginger, crushed red pepper flakes and pepper.  Pour it over the ground beef and let it simmer for one minute.  Serve it over the rice and garnish it with the green onions.


Sunday, November 8, 2020

Our Favorite Quinoa and Ground Beef Sloppy Joes


This is our family's favorite sloppy joe recipe.  Full disclosure: I don't have an actual recipe.  I make it to taste every time.  But, I can never remember exactly what I add and I always end up googling "Sloppy Joe Recipe" so I can see a general idea of what to add.  So, this time I paid attention to what I added so that I can put the recipe on here and find it for next time!


Our Favorite Quinoa Sloppy Joe Recipe                                                                         
by: Carolyn

1/2 or 1 pound ground beef
1/2 c. quinoa
ketchup (if I were to guess, I would say close to a cup of ketchup)
about 1 Tbsp. Dijon mustard (or regular)
onion powder
garlic powder
salt
pepper
about 3 dashes of liquid smoke (this is to taste-add a little less than this and then add more if needed)
about 1 c. water

Cook your quinoa according to package directions (I cook mine in double the water in my rice cooker).  In a large frying pan, brown your ground beef over medium heat.  Drain the grease and add your cooked quinoa to the pan.  Add the ketchup, mustard, onion powder, garlic powder, salt, pepper and liquid smoke and stir it well.  Taste it!!  If it doesn't have enough flavor, add more garlic, onion or salt.  Taste it again!! Add more of what you feel like it might need.  Repeat as needed!  Stir it again.  Add the water and stir it well.  Simmer it over medium low heat until you are ready to eat it.  (And maybe taste it one more time to see if needs anything else!).  Serve on a hamburger bun (or hotdog bun, as you see in my picture) with sliced cheddar cheese. 


Sunday, June 7, 2020

Chicken Bacon Ranch Alfredo Bake


The name of this recipe leaves no guessing as to what it is!  Ha ha!  But, it is easy and delicious and my whole family likes it, so it is definitely worth putting on here!

Chicken Bacon Ranch Alfredo Bake
adapted from: pillsbury.com

1 lb. cooked pasta
2 c. cooked shredded chicken
1 jar alfredo sauce
3/4 c. ranch dressing
6 slices cooked chopped bacon (I actually just used some of my real bacon bits)
2 c. shredded cheese (I used a pizza blend)

Heat oven to 350 degrees.  In a large bowl, stir together the cooked pasta, chicken, alfredo sauce, ranch dressing and bacon.  Pour it into a 9X13 pan and sprinkle the cheese over the top.  Bake it for 15-20 minutes or until it is hot and bubbly.

Saturday, April 18, 2020

Easy 100% Whole Wheat Bread (Small Batch-2 Loaves)

I have never been super successful on homemade bread.  Which is shameful because I come from a long line of amazing bread makers.  I've tried a few times, and if my mom was standing right next to me through the process, it seemed to work out pretty good, but as soon as I was by myself, I ended up with bread that looks like this:
Why?  I have no idea.  But, now that we are in a Corona Virus Quarantine, I am taking this opportunity (and this necessity) to learn to make yummy, normal looking homemade bread!  Someone recently brought me a delicious, beautiful loaf of bread, so as soon as the Quarantine started, I called her and asked her for her recipe.  It turns out I was making it much harder than I needed to.  This recipe kneads it using my Kitchenaid mixer and only rises once.  It kind of makes me feel guilty because it is so easy, but it looks like I worked really hard!

Easy Whole Wheat Bread
adapted from: melskitchencafe.com

5-6+ c. whole wheat flour
1 1/2 Tbsp. active yeast
1/4 c. vital wheat gluten
2 3/4 c. warm water
1 Tbsp. lemon juice
1/3 c. oil
1/3 c. honey
1/2-3/4 Tbsp. salt

In the bowl of your stand alone mixer (mine is a Kitchenaid), stir together your yeast, 3/4 cup of the warm water and a pinch of sugar.  Cover it with a towel and let it sit for 5 minutes to activate the yeast.  After 5 minutes your yeast should look nice and foamy.  Add 3 cups of flour, gluten and 2 more cups of warm water to your yeast mixture and stir it using a wooden spoon.  Cover it with the towel again and let it rest for 10-12 minutes.  Add the lemon juice, oil, honey and salt and mix it on low speed, using your dough hook.  

With the mixture running on low speed, continue adding flour 1/2 cup at a time until the dough pulls away from the sides of the bowl and it isn't too sticky.  I have found that I need a little more than 6 cups total flour to get mine to the right consistency.  I also have to occasionally use my wooden spoon to scrape the flour off the bottom of the bowl.  From Mel's recipe, she says "A little stickiness is ok, as long as the dough forms a ball and doesn't leave a lot of residue on your fingers."  And that is pretty much exactly how mine turns out.  Let the mixer knead the dough for 5-6 minutes on low speed.  (Once mine is done kneading, I find that it is a little stickier than it was when I started kneading, but the bread is coming out nice and soft, so I think that is ok).   


Turn the dough onto your greased counter (I spray mine with cooking spray) and divide it in half.  Shape each half into a smooth loaf and place it in a lightly greased loaf pan.  The pan size that I have found to be the most successful is the one that is 8 1/2 X 4 1/2 X 2 1/2.  Cover your pans lightly with a towel and let them rise for about an hour, or until they are 1-2 inches above the pans.  Here is another tip that I have had to figure out: my kitchen is never super warm, and my bread wasn't rising very well.  Now, I heat my oven to 200 degrees, and then turn it off and open the oven door.  My bread is rising on top of my oven and this little added heat seems to make all the difference for how well it rises.  Yay!  When your bread has risen, preheat the oven to 350 degrees and bake the bread for 28-32 minutes, or until it is golden brown on top and baked through.  When you take it out, turn it onto a wire rack and brush the top with butter.  And, please eat a slice warm, with butter and honey, and think of me!  

Sunday, February 9, 2020

BBQ Chicken Tacos with Coleslaw

One day, in the midst of being so tired of my regular dinner foods, Nicole shared a new recipe with me, that I happened to have the ingredients for.  I made it for dinner that night, and my family couldn't get enough of it!  It was so delicious!  The coleslaw with the barbecue chicken was so great together.  It was a nice twist on a typical weeknight meal.  I highly recommend these tacos!

BBQ Chicken Tacos
adapted from: eatingwell.com

1/3 c. sour cream (or Greek yogurt)
1 Tbsp. sugar
1 Tbsp. lemon juice
1 Tbsp. cider vinegar
3/4 tsp. kosher salt
1/4 tsp. pepper
dash of hot sauce (I'm pretty sure I used sriracha sauce)
2 c. shredded cabbage
2 c. shredded cooked chicken breast
1/3 c. of your favorite bbq sauce
corn tortillas
cilantro

In a small bowl, stir together the sour cream, sugar, lemon juice, cider vinegar, kosher salt, pepper and hot sauce.  Add the shredded cabbage and stir it until it is coated with the sauce.  In a sauce pan over medium heat, stir together the shredded chicken and the barbecue sauce until it is hot.  Fill the tortillas with barbecue chicken, top it with the coleslaw and cilantro, and enjoy!


Sunday, November 10, 2019

Asian Dipping Sauce

This is a great dipping sauce that we have used for wontons, potstickers and dumplings!

Asian Dipping Sauce
by: Bettycrocker.com

2 Tbsp. sugar
2 Tbsp. soy sauce
2 Tbsp. rice vinegar
2 Tbsp. water
1/2 tsp. sesame oil
dash of red pepper flakes

Whisk all the ingredients together in a small bowl until the sugar is dissolved, and then dip to your heart's content! :)

Sunday, November 25, 2018

Amazing Banana Cream Pie with Salted Caramel Sauce

We made a lot of really delicious pies for Thanksgiving this year.  This was one that my girls and I found and decided that we really needed this on Thanksgiving.  It was super easy, very creamy and delicious, and probably my favorite of all that I tasted.

Banana Cream Pie with Salted Caramel Sauce
adapted from: thisgalcooks.com

1 baked pie crust
1 c. chopped vanilla wafers
2 small bananas
1 8 oz. tub of whipped topping, divided
1 1/2 c. milk
1 5.1 oz box of instant banana cream pudding
dash of lemon juice
salted caramel sauce

In a large bowl, stir together the banana pudding and the milk until thick and creamy.  Fold in 1/2 of the tub of whipped topping.  Slice your bananas and sprinkle them with a dash of lemon juice to prevent them from browning.  Stir the banana slices in to your pudding mixture.  Pour it all in your cooled pie crust.  Refrigerate the pie until the pudding is set (I made mine before the Thanksgiving meal started, and then added the rest of the ingredients just before we ate pie).  Spread the remaining whipped topping over the top of the pudding mixture.  Sprinkle the chopped vanilla wafers on top, and then drizzle the salted caramel sauce over the top of the wafers.  Serve it immediately and enjoy!

Sunday, July 29, 2018

Shredded Chicken in the Instant Pot (From Frozen or Fresh Chicken Breasts)

I love my Instant Pot.  There are so many reasons that I love it, but this is one of my top reasons: shredded chicken.  It is so incredibly fast and easy to throw in some chicken breasts from the freezer, shred them when they are done, and bag them in 1 cup increments to be used later in all sorts of yummy recipes.  It really makes my meal time prep so much faster on a busy weeknight!

Shredded Chicken in the Instant Pot
by: Carolyn (after reading many, many blogs on this subject)

5 chicken breasts (really, do as many as you want, but I usually don't fill the Instant Pot up more than about halfway full)
1 c. chicken broth
generous sprinklings of onion powder, garlic powder, kosher salt and fresh ground pepper

Place the chicken in the Instant Pot.  Pour the chicken broth over the top.  Sprinkle all of the seasonings on top of the chicken.  Set your Instant Pot for High Pressure, for 14 minutes if the chicken is fresh, 26 minutes if the chicken is frozen.  When the chicken is done cooking, I let it do a natural release until I am ready to shred it.  Then I put it all in my Kitchen Aid mixer and turn it on to the lowest speed until it is shredded.  Put the shredded chicken in freezer bags in 1 cup increments, label them with a sharpie and freeze them for later.  I use it in my soups, enchiladas, tacos, taquitos and whatever else I am making that calls for chicken!  It is such a time saver!

Monday, April 30, 2018

Harry Potter Butter Beer Recipe

This little wizard wanted a Harry Potter birthday party this year.  We had gone to Universal Studios Harry Potter World in September, and the delicious butter beer was on our brains, so we found a copy cat recipe and made it for his birthday party.  There are many recipes out there, but this one was the easiest, and for a bunch of 9 year olds that didn't know any better, this was perfect!  This recipe calls for cream soda as the drink, and the real 
delicious-ness is in the frothy, creamy, buttery topping.  To make it a little more authentic, you can add butter extract and caramel extract to the cream soda.  But it is still really yummy if you don't!

Harry Potter's Butter Beer
by: favfamilyrecipes.com

For the drink:
2 liter bottle of cream soda, chilled
1/4 tsp. caramel extract
1/4 tsp. butter extract

For the cream topping:
1 c. heavy whipping cream
1/2 c. butterscotch topping
1/4 c. powdered sugar

In a large mixing bowl, whip the whipping cream on high speed until it forms stiff peaks.  Add the butterscotch topping and powdered sugar and stir it together.  If you are going to add the butter and caramel extract to the cream soda, now is the time.  Then pour the cream soda into a glass and add a generous spoonful of the butterscotch whipped cream topping to it.   

Sunday, July 30, 2017

BBQ Pulled Pork, in the Instant Pot

This is a very similar recipe to the BBQ Pork Ribs, but I make it often enough, that I thought I would record it for my future self-1 month from now, when I'm trying to remember what I did for this recipe.  Once again, I love my Instant Pot in moments like I had tonight.  I had people coming over for dinner at 5:00, and I wasn't going to the store, because it is Sunday.  I had to find something I could make with what I already had, and I found a pork roast in the freezer.  I defrosted it for a couple of minutes in the microwave, long enough to be able to cut it in 4 pieces.  Then, I cooked it in my Instant Pot for 35 minutes, and it was perfectly shred-able when it was done.  Start to finish it took an hour!  And, it tasted wonderful!

BBQ Pulled Pork in the Instant Pot
by: Carolyn (after looking at many different food websites)

1  2-3 pound pork roast, frozen or thawed
1 c. beef broth
kosher salt
fresh ground pepper
onion powder
garlic powder
1 Tbsp. oil
Your favorite BBQ sauce

Set your Instant Pot to Saute, add the oil, and let it get hot.  Sprinkle the kosher salt, fresh ground pepper, onion powder and garlic powder generously on to your roast and rub it in.  Cut the roast into fourths and when the Instant Pot is hot, brown each side of the roast pieces (I just did all four pieces at the same time, in the bottom of the IP).  Pour the beef broth over the top of the roast.  Lock your lid into place, and set your Instant Pot on high pressure, for 35 minutes if the roast is frozen, 20-25 minutes if it is thawed.  When it is done, do a quick release, drain most of the liquid, and shred your pork.  Pour your favorite BBQ sauce over the top and stir.

Sunday, June 18, 2017

Moist, Flavorful Pot Roast in the Instant Pot


In 16 years of marriage, I can probably count on one hand the number of times I have made pot roast.  It is just not my favorite.  I grew up in a home where we ate roast and potatoes almost every Sunday, but my own children really only know roast from when we are at Grandma's house on a Sunday.  However, that all may change with the Instant Pot that Dustin gave me for Christmas.  I seriously love this kitchen tool!  I have made beef pot roast three times in the last couple of months, which is like a super record for me.  And each time, the roast has come out so moist, so tender, so flavorful.  It is delicious!  My children may end up with memories of pot roast, after all!

Moist, Flavorful Pot Roast (in the Instant Pot)
adapted from: pressurecookerecipes.com

Pot Roast, cut 2 inches thick
kosher salt
fresh ground pepper
1 Tbsp. oil
1 onion, sliced (or, I used dehydrated onions, re-hydrated)
2 tsp minced garlic
2 Tbsp. balsamic vinegar
1 c. chicken broth
1 Tbsp. soy sauce
1 Tbsp. oyster sauce
fresh rosemary-rub in between fingers before adding
ground sage

Heat up your Instant Pot, using the Saute button.  Add the oil and heat until very hot.  Season the pot roast with kosher salt and fresh ground pepper on both sides.  Place the meat in the Instant Pot, and brown it for 5 minutes on each side.  Remove it from the Pot and set it aside.  Add the onions and cook them until they are soft.  Add the garlic and cook it for 30 seconds.  Pour the balsamic vinegar into the Instant Pot, and deglaze the bottom of the pot with a wooden spoon.  Stir in the chicken broth, soy sauce, oyster sauce, rosemary and sage.  You may add a little more salt and pepper, to taste.  Place the meat back into the Pot, close the lid, and set the Instant Pot to high pressure, for 45 minutes.  When it is done, do a natural pressure release for 25 minutes (although, I didn't have time to do that today, and it still turned out perfect).  I have made this with potatoes and carrots in the pressure cooker, and I have made it without any added vegetables.  If you add veggies, they end up so flavorful, and it becomes a one pot meal!

Sunday, December 11, 2016

Chili Lime Taquitos


I found this recipe on my friend, Michele's, food blog the other day.  I gave it a try, and my family loved it!  In fact, we made it again a few days later because they liked it so much.  And it is so quick and easy if you prepare the chicken in advance, shred it and freeze it in one cup amounts, like I did.  Doing it that way, it probably only took 5-10 minutes to prepare.  Love an easy meal!

Chili Lime Taquitos
by: sweetluvininthekitchen.blogspot.com

2 c. cooked, shredded chicken
1 Tbsp. chili powder
1 1/2 Tbsp. lime juice (or the juice of one lime)
1/4 c. chopped cilantro
1 c. shredded monterey jack cheese
6-8 tortillas

In a skillet, stir together the shredded chicken, chili powder and lime juice.  Add the cilantro and cheese and stir it all together.  Remove it from the heat, and put 3-4 tablespoons of the mixture on one end of a tortilla.  Roll it tightly, starting from that end, and then place it seam side down on a baking sheet.  Repeat with all of the tortillas and chicken mixture.  Leave a little space between each taquito on the baking sheet, so that they will cook all around.  Using a pastry brush, lightly brush a little oil over the top and sides of each taquito.  Bake at 425 degrees, for 15 minutes, or until lightly browned.  Serve with sour cream, salsa and guacamole.


Sunday, November 6, 2016

Creamy Ranch Chicken Bake


The other day I needed something new that I could prepare and bake while I worked on other things.  I thought that something creamy and ranchy and chicken-y sounded good, so I googled those three words and found all sorts of recipes titled "Creamy Ranch Chicken".  I guess there are many other people that also thought that sounded good.  I looked at a couple of the recipes, and they were all about the same as what was going on in my head, except for being cooked in a crockpot instead of baked.  So, my guess is that in the future, if I want to make this same recipe in the crockpot, it would work out just fine.

Creamy Ranch Chicken Bake
by: Carolyn

1/2 c. sour cream
1 can cream of chicken soup
1 ranch packet
bacon bits
salt and pepper
chicken breasts

Preheat your oven to 450 degrees.  Spray a 9X13 dish with cooking spray.  In a small bowl, stir together the sour cream, cream of chicken soup, ranch packet and bacon bits.  Lightly sprinkle salt and pepper on your chicken breasts and place them in the pan (the ranch and bacon make this a salty recipe already, so you could omit this if you wanted).  Spread the creamy mixture over the top of your chicken.  Cover it with tinfoil and bake it for 20 minutes.  Remove the tinfoil and bake it another 5 minutes, or until it is no longer pink in the center.  I served it with baked potatoes and steamed carrots.

Sunday, October 9, 2016

Easy Homemade Chicken Noodle Soup


Now that we are in the full swing of Fall, I am really loving things like soup, for dinner.  I have made this recipe a couple of times now, and we loved it both times.  I use the egg noodles from Costco, and cook it in my slow cooker, so that makes it especially easy.  One of the times I made it I got ambitious and also made my easy rolls to go with it.  It was a super delicious, cozy Fall meal!

Easy Homemade Chicken Noodle Soup
by: Carolyn

2 tsp. minced garlic
1 onion, sliced
4 c. chicken broth
4 c. water
1 c. chopped celery
1 c. chopped carrots
3 potatoes, cut into bite sized pieces
2 tsp. salt
1 tsp. fresh ground pepper
1/2 tsp. garlic powder
1 chicken breast
3-4 handfuls of uncooked, wide egg noodles (or as many as you want-just be aware that they will swell as they soak up the water, and if it doesn't seem like you have enough in there, you probably really do)

In your slow cooker, combine all of the ingredients, except the egg noodles.  Cook it on high for 4-6 hours, or on low for 8 hours.  Remove the chicken breast, shred it, and put it back in the crock pot.  Add the egg noodles, recover the crock pot, and cook for 15-20 minutes more, or until the noodles are tender.  

Sunday, August 28, 2016

Fish Tacos with Lime Cilantro Crema

Ahh, fish tacos.  This is a new food choice for me, and I really love them!  I have made this recipe a couple of times, and both times I was so happy with how they turned out.  The fish is delicious, but the lime crema adds so much to them!  The only thing I wish I had been able to add was some cabbage to the taco.  We didn't have any, so lettuce had to do.  

Fish Tacos
adapted from: Cooking Light

1 tsp. cumin
1/2 tsp. smoked paprika
1/4 tsp. red pepper flakes
1/8 tsp. salt
1/8 tsp. garlic powder
2 tilapia fillets

Lime Cilantro Crema
1/4 c. chopped fresh cilantro
3 Tbsp. mayonnaise
3 Tbsp. sour cream
1 tsp. grated lime rind
1 1/2 tsp. lime juice
1/4 tsp. salt
1/2 tsp. minced garlic

In a small dish, combine the cumin, smoked paprika, red pepper flakes, salt and garlic powder.  Sprinkle the spices evenly over both sides of the fish.  Bake the fish at 425 degrees for 9 minutes, or until the fish flakes easily.  I think that the second time I made this, I actually fried the fish in a small amount of oil on the stove.  I say, try it either way!  While the fish is cooking, combine all the ingredients for the crema in a small bowl.  Chill it in the fridge until you are ready for it.  When the fish is cooked, break it into small pieces and then serve it on a soft taco shell (we used corn tortillas) with the lime cilantro crema and cabbage.