Advanced vector editing techniques in Figma allow designers to create detailed and professional-quality designs. Vector editing in Figma involves manipulating shapes, paths, and lines to create intricate and precise graphics. Figma provides a range of powerful tools and features that make vector editing both accessible and highly effective. In this article, we will delve into advanced techniques that will help you refine your vector designs and achieve more complex results. Whether you are looking to enhance your skills or learn new tips and tricks, these techniques will elevate your design work in Figma.
Table of Content
What are Vectors?
Vectors are different layers of shapes made up of multiple anchor points or nodes. These points can be manipulated to alter the shape, direction, and curvature of lines and paths. Vectors are essential for creating precise and scalable graphics, as they allow designers to adjust elements without losing quality.
Here are a few key aspects to understand before diving into advanced vector editing techniques:
- Anchor Points: These are the points that define the shape of a vector. By moving these points, you can change the shape's form and direction.
- Paths: The lines that connect anchor points. Paths can be straight or curved and are crucial for defining the outline of your shape.
- Handles: These are attached to anchor points and control the curvature of the path. Adjusting handles allows for smooth and precise curves.
- Strokes and Fills: Vectors can have different strokes (outlines) and fills (interior colors or patterns). Editing these properties can change the appearance of the shape.
- Scalability: One of the main advantages of vectors is that they can be scaled up or down without losing quality, making them ideal for various design applications.
Understanding these basic elements is essential for mastering advanced vector editing techniques, which will help you create more intricate and refined designs.
How to Create Vectors?
Vectors, as the name suggests specifies different directions, Vector helps unlock different points on a shape, reframing through which we can achieve an altogether different shape. For eg. A star can be changed into a hexagon and vice versa by simply handling the dots on those vectors.
Any single shape/text is a vector and can be converted into custom shapes/texts.
Here's how you can create a custom shape/vector:
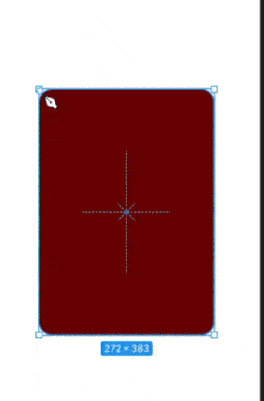
Step 1: Select a frame of choice.
.png)
Step 2: Add a rectangle in the centre of the frame & a desired color fill to it.
.png)
Step 3: Vector editing
Double click on the shape and you'll receive the following options in the toolbar at the top.
.png)
Step 4: Change colors as per preference
You can accordingly change the colors. Also look for the dots in the shape and traverse through them to create any custom shape.
.png)
Changes to the shape would result in something like this:
.png)
How to Create a Vector Network?
A vector network is a net of different vectors that enable us to create and access paths of different vectors to create an overall new image. It allows usage of multiple paths in the same set of vectors.
Step 1: Create a rectangle in the middle of the frame.
Step 2: Add a section of different rectangle of different color using the pen tool.
Step 3: Individually change the vectors
Double click on both the sections individually to change the vectors, thus, in turn creating a vector network. Follow the given set of screenshots to achieve the same.
.png)
Steps to achieve a design:
1. Change the background rectangle to any shape of your choice.
.png)
2. Change the rectangle in front too.
.png)
3. Edit both the shapes according to your choice.
.png)
4. Make the final touchups.
.png)
Creating beautiful text edits
Texts can also be transformed into beautiful custom sizes. It is helpful at those places where we want to change the font shape and style of a particular letter.
Step 1. Add a text in the centre of the frame, say, GeeksForGeeks.
-9.png)
Step 2. Select the option of Outline Stroke to transform every letter into a vector.
.png)
Step 3. The text will now be displayed in the left side toolbar in this format.
.png)
Step 4. Make changes to the vector of the required text.
.png)
Step 5. Final text design.
.png)
Advanced Vector Editing Techniques
1. Pen Tool
The pen tool lies in the top toolbar & looks like this: (Just beside the cursor)
It is helpful in creating vectors manually like this:
2. Bend Tool
The Bend tool lies in the top toolbar & looks like this: (Just beside the pen tool, or next to next of cursor)
It is helpful in creating logos of websites since it involves rotation and curves.
.gif)
3. Vector Edit Mode
The Vector Edit Mode is basically the top toolbar that provides all possible options to edit a vector. It consists of the pen tool, the bend tool, the color fill tool & the cursor to place vectors too. Each one of them has their separate use. Above are the usages of pen tool & bend tool & the color fill allows us to differentiate the colors of vectors(more than one in a vector network).
Conclusion
Mastering vector editing in Figma lets you create detailed and precise designs. By learning how to use anchor points, paths, handles, strokes, and fills, you can make your graphics look professional and scalable. Advanced vector editing techniques help you be more creative and make your designs more versatile. As you practice these skills, Figma will become an even more powerful tool for your projects.