Jira is a popular project management and issue-tracking tool widely used in software development and testing. It helps teams manage tasks, monitor project progress, and streamline workflows efficiently.
- Used for bug tracking and issue management.
- Supports Agile methodologies such as Scrum and Kanban.
- Improves collaboration among developers, testers, and project managers.
Uses of Jira
JIRA is a popular project management and issue-tracking tool used by software development teams. It helps teams organize tasks, track bugs, manage agile workflows, and improve collaboration.
- Project Management: Manage multiple projects and workflows in one platform.
- Task Tracking: Helps teams create, assign, prioritize, and monitor project work efficiently.
- Agile Planning: Supports Scrum and Kanban for sprint and backlog management.
- Reports & Dashboards: Provides real-time reports and visual insights.
- Team Collaboration: Enables communication through comments, notifications, and alerts.
Steps to use Jira
Let’s see how to use Jira, from the very beginning(creating an Atlassian account).
Step 1: Creating an Atlassian Account
Go to the Atlassian signup page, enter the required user credentials, and click the Sign Up button.
To complete the setup and login, click the verification link in the email box. Set up your Atlassian account.
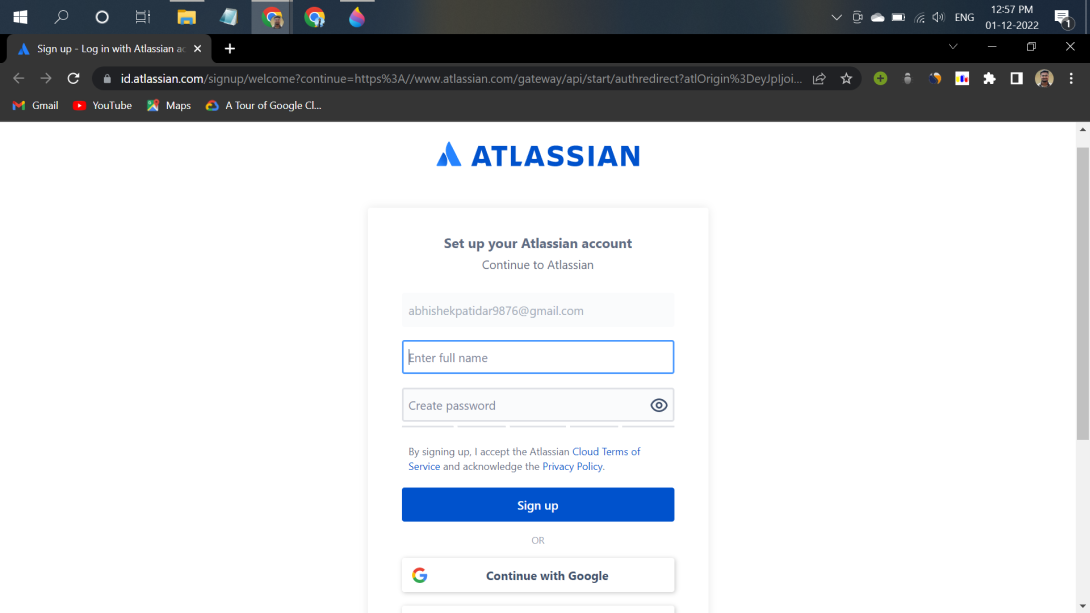
Click on signup after filling details. The account has been created. The user is automatically redirected to the home page.
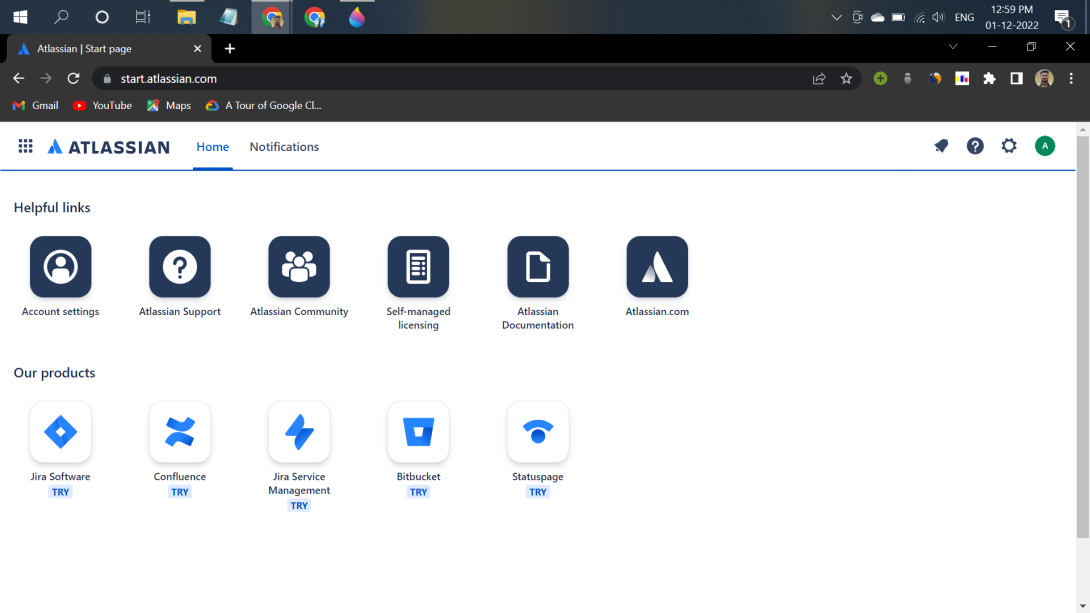
Step 2: Creating a new Project
- Log in to your Atlassian account.
- On the home page click on the Jira software and fill required details.
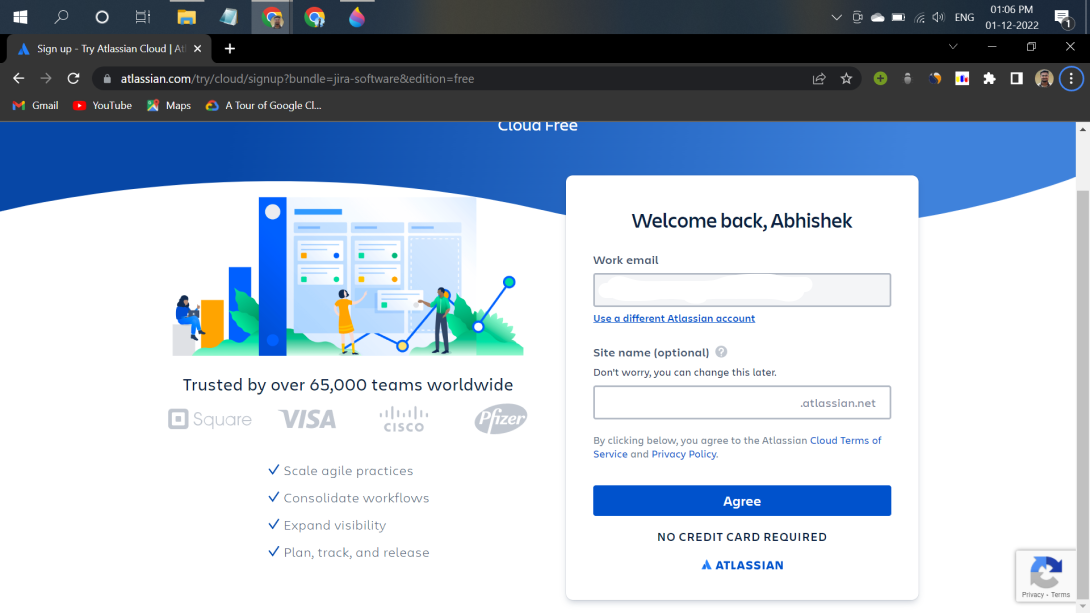
Answer some basic questions asked there to set up Jira personally for your team. Select your project name and template framework like Scrum or Kanban, etc. for your project.
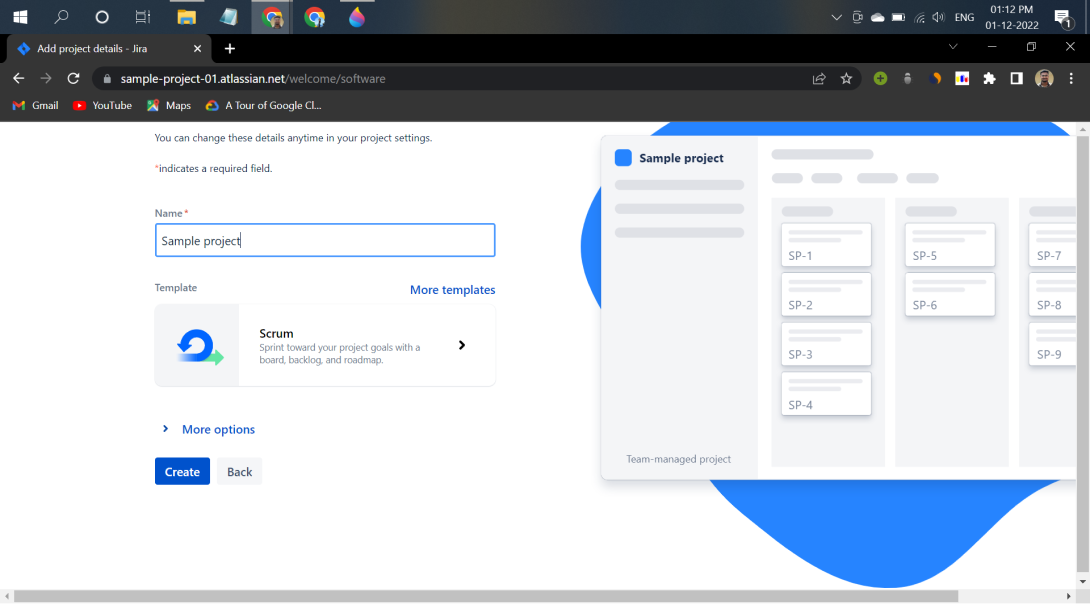
After completing the above steps, the following screen will be displayed:
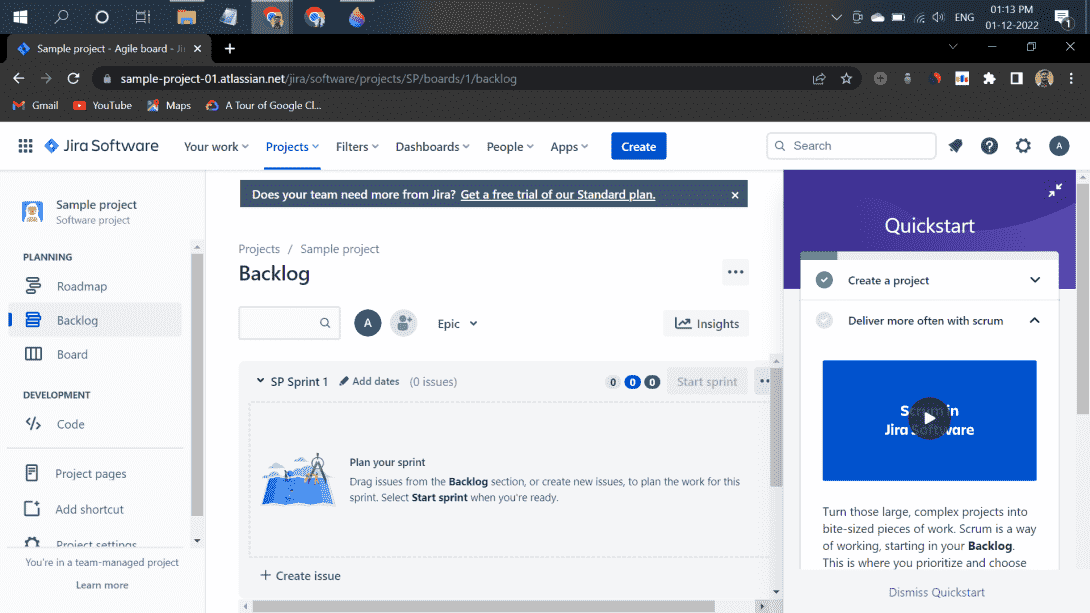
There are four main sections in Jira
- Roadmap: It is an action plan for how our project will evolve.
- Backlog: It is usually a list of issues describing what your team will be doing on the project.
- Board: It shows work to be done, work in progress, and work done.
- Code: In this, we can create an automated DevOps workflow and minimize context switching between Jira Software and Bitbucket, GitHub, GitLab, and other source code management tools.
Jira Project Structure
- Epic: An Epic is a large body of work that can contain multiple user stories.
- User Story: A User Story represents a feature or requirement from the user's perspective.
- Task: A Task is a specific unit of work assigned to team members.
- Sub-task: Sub-tasks divide larger tasks into smaller manageable units.
Agile Project Planning in Jira
- Create an Epic first by clicking the Create button, selecting Epic as the issue type, filling in the required details (such as Epic Name and Summary), and saving it.
- Next, create a User Story to capture specific functionality - for example, “As a user, I want to register on the platform so that I can access my account.”
- Assign the User Story to the relevant Epic using the Epic Link field.
- Move the User Story into an active or planned Sprint from the Backlog.
- Once issues are added to the sprint, start the sprint to begin the development cycle.
- You can link multiple User Stories (or other issue types) to a single Epic for better tracking and reporting.
Steps to Create an Issue Security Scheme:
Issue Security Schemes help control which users can view or access specific issues.
Create Issue Security Scheme
- Go to Settings -> Issues.
- Under Issue Attributes, select Issue Security Schemes.
- Click Add Issue Security Scheme.
- Enter the required details.
- Click Add.
Add Security Levels to Issue Security Scheme:
- Select settings -> Issues.
- Under Issue Attributes, select Issue Security Scheme.
- Click the scheme name or the Security Level link in the Actions column.
- Enter the requested details and click Add Security Level.
Jira Issues and Issue Types
In Jira, an Issue represents a unit of work such as a bug, task, feature request, or requirement. Common Issue Types
- Bug: A problem with the software that needs to be fixed.
- New Feature: A request for a new feature or enhancement to be added to the software.
- Task: A specific piece of work that needs to be completed, such as a software development task or a project management task.
- Epic: A large body of work that can be broken down into smaller tasks and stories.
- Story: A small piece of work that represents a user's need or requirement.
- Incident: A problem or disruption to a service that needs to be resolved.
Issue types, workflows, and fields can be configured based on organizational requirements.
Jira Issue Attributes
JIRA Issues have several attributes that help to describe and track them. Some of the most common attributes include:
- Summary: A short, descriptive title for the issue.
- Description: A more detailed explanation of the issue and its requirements or specifications.
- Status: The current state of the issue, such as "Open", "In Progress", "Resolved", or "Closed".
- Assignee: The person responsible for working on the issue.
- Reporter: The person who reported the issue.
- Priority: The priority level assigned to the issue, such as "High", "Medium", or "Low".
- Labels: A way to categorize and label issues, making it easier to filter and search for related issues.
- Components: A way to break down a larger issue into smaller components.
- Fix Version: The version of the software that the issue will be fixed in.
- Due Date: The date by which the issue needs to be completed.
Issue attributes and fields can be configured based on project and workflow requirements.
Jira Software Statuses
Jira software uses statuses to track the progress of issues and tasks. Some common statuses include:
- Open: The issue is new and has not yet been assigned to anyone.
- In Progress: Work has begun on the issue, and it is being actively worked on.
- Resolved: The issue has been fixed, but it may still need to be tested or verified.
- Closed: The issue has been resolved and is no longer a concern.
- Reopened: The issue has been reopened after being previously resolved.
- Pending: The issue is waiting for something else to happen, such as input from another team member.
- On Hold: The issue has been temporarily paused and will be resumed later.
- Deferred: The issue has been postponed and will be addressed at a later date.
- Done: The issue has been completed and is ready for closure.
Statuses and workflows can be modified to match specific project requirements and processes.
Jira Service Management Statuses
If you're using Jira Service Management, you also get the following statuses by default, depending on the projects you've created on your site.
- Escalated.
- Waiting for approval.
- Planning.
- Awaiting implementation.
- Implementing.
- Peer review/change manager approval.
- Work in progress.
- Completed.
- Under investigation.
Issue Priorities
An issue's priority indicates its relative importance. Administrators can customize priorities and their importance to their organization. The default priorities are:
- Highest: This problem is blocking progress.
- High: Serious problem impeding progress.
- Medium: May affect progression.
- Low: Minor issue or easy workaround.
- Lowest: Minor issue with little or no impact on progress.
Issue Resolutions
Problems can be closed or resolved in several ways. Normally when the status changes, the resolution is set. Your administrator may have customized these for your organization. The following Issue Resolutions are shipped with Jira products by default.
- Done: Work on this issue has been completed.
- Won't do: This issue will not be resolved.
- Duplicate: A problem is a duplicate of an existing problem.
Steps to Create an Issue in Jira
Step 1. Select the blue colored Create button located on the top of each page.
.png)
Step 2. Enter a brief description of the problem in the Summary.
.png)
Step 3. Complete all required fields and all other required fields and When finished, select Create.
.png)
Jira Components
A component is a subsection of a project in Jira used to organize issues into smaller modules. It helps teams manage tasks related to specific services, APIs, plugins, or features within a project.
- Components help group related issues together.
- Each component can have its own lead and default assignee.
- Users can add, edit, or delete components from the Components page.
Jira Screen
A screen in Jira controls the fields displayed while creating, editing, or transitioning issues. It helps organize issue information in the user interface.
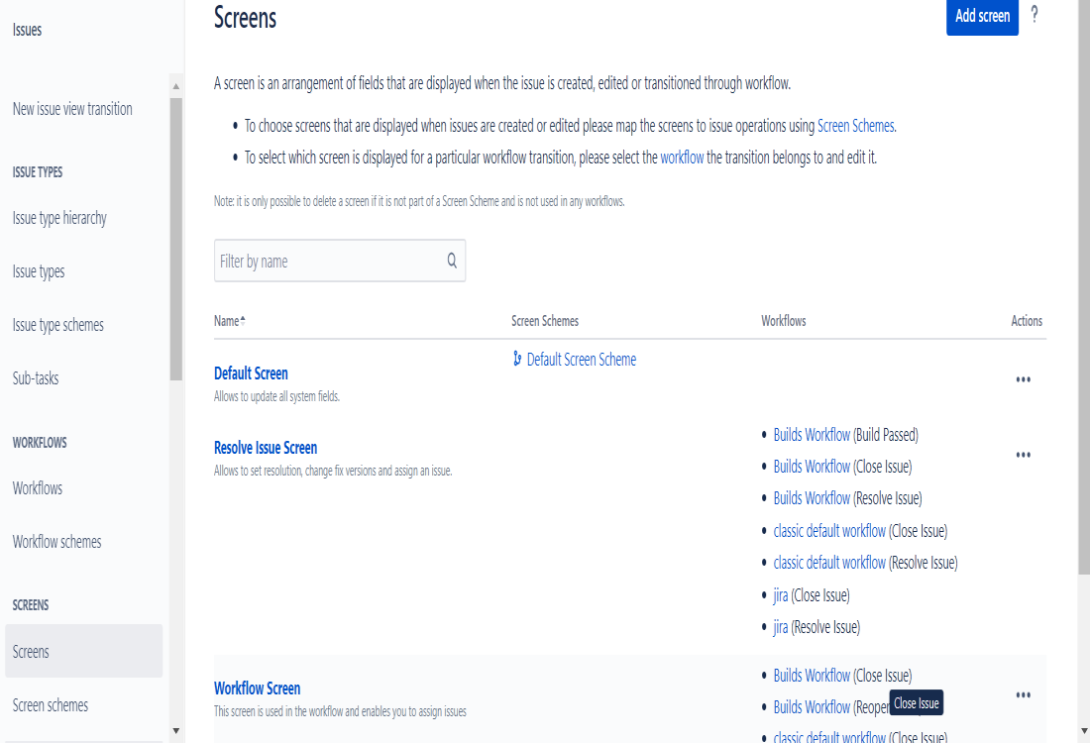
- Screens display fields like Summary, Description, and Priority.
- Different screens can be used for Create, Edit, and Resolve operations.
- Users can manage screens from Settings -> Issues -> Screens.
Sub-Task
- Jira administrators can create subtask issue types to divide larger units of work into tasks that teams can assign and track individually.
- Subtasks are commonly enabled by default in many Jira projects. However, availability may vary depending on project configuration and Jira settings.
- Sub-task issue types are different from regular issue types. By default, team-managed projects have the sub-task issue type enabled. If your project doesn't have a subtask issue type, you'll need to add it:
Step 1. Go to your team-management software project.
.png)
Step 2. Go to Project Settings -> Issue Types.
.png)
Step 3. Select Add Issue Type.
.png)
Step 4. Select subtask.
Stages of Jira Workflow
The following stages represent the complete lifecycle of an issue in Jira from creation to closure.
.jpg)
- Waiting for Support: The issue is waiting for action from the support team. The support staff reviews the problem and begins analysis before assigning or resolving it.
- Waiting for Customer: The issue is waiting for additional information or confirmation from the customer. Work may pause until the customer responds.
- Escalated: The issue is forwarded to a higher-level team or specialist for further investigation. Escalation usually occurs when the issue is critical or complex.
- In Progress: The issue is actively being worked on by the assigned team member. Development, testing, or troubleshooting activities are performed in this stage.
- Pending: The issue is temporarily on hold due to missing information, dependencies, or approvals. Work resumes once the required updates are received.
- Resolved: The issue has been fixed or completed successfully. The solution is provided, and the issue waits for final verification or closure.
- Closed: The issue is fully completed and verified. No further action is required after the issue reaches this stage.
- Canceled: The issue is canceled because it is invalid, duplicate, or no longer required. The workflow ends without completing the task.
Plug-ins in Jira
Jira plug-ins are additional applications used to extend the functionality of Jira. These plug-ins help in automation, test management, reporting, workflow customization, and project tracking. Atlassian Marketplace provides thousands of plug-ins for different business and testing needs.
Popular Jira Plug-ins:
- ScriptRunner: Used for advanced automation and workflow customization.
- Tempo Timesheets: Helps in time tracking and resource management.
- Xray: Used for manual and automated test management.
- Structure: Organizes issues in hierarchical structure.
- BigPicture: Provides Gantt charts and roadmap planning.
- JMWE: Adds workflow automation without coding.
- eazyBI: Creates dashboards and advanced reports.
- Checklists for Jira: Adds checklists inside Jira issues.
- Zephyr Scale : Manages test cases and executions.
- Automation for Jira : Automates repetitive tasks and notifications.
Reports in Jira
In Jira, we can see different reports of our project by enabling report features inside project settings. It shows different reports like burnup reports, burndown reports, velocity reports, etc. Here is a short description of some of them.
1. Burnup Report
Visualize the sprint's completed work and compare it to the overall scope. Use these insights to track progress toward sprint completion.
-overlay.png)
2. Burndown Chart
Track and manage the total remaining work within a sprint. Summarize both team and individual performance after the sprint.
-overlay.png)
3. Velocity Report
Predict how much work your team can deliver in future sprints by reviewing and confirming the value delivered in previous sprints. An example is given below.
-overlay.png)
4. Cumulative Flow Diagram
A cumulative flowchart shows how stable the flow is. It shows weaknesses and offers actionable suggestions for improvement. An example is given below.
-overlay.png)