An ImageButton in Android is a specialized Button that displays an image instead of text while functioning like a regular button. When clicked, it triggers an action just like a standard button. Android provides various button types, including ImageButton, ToggleButton, and more. To set an image on an ImageButton, you can use the android:src attribute in the XML layout file or the setImageResource() method in the Kotlin code.
You can create an ImageButton in Android using two approaches:
- XML Layout: Define it in the activity's XML file.
- Programmatically: Create and configure it in the Kotlin file.
In this article, we will create an ImageButton programmatically using Kotlin.
Step by Step Implementation
Step 1: Create a new project
To create a new project in Android Studio please refer to How to Create/Start a New Project in Android Studio.
Step 2: Use LinearLayout in activity_main.xml file
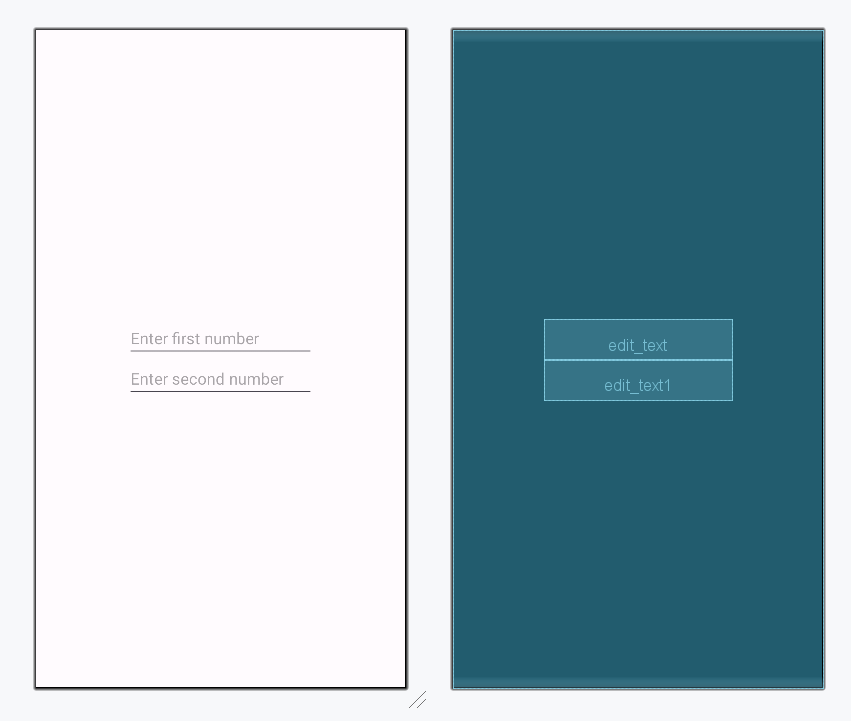
In this file, we will add only the EditText and set attributes for both of them to access into the Kotlin file.
activity_main.xml:
<?xml version="1.0" encoding="utf-8"?>
<LinearLayout
    xmlns:android="http://schemas.android.com/apk/res/android"
    xmlns:tools="http://schemas.android.com/tools"
    android:layout_width="match_parent"
    android:layout_height="match_parent"
    android:id="@+id/main"
    android:gravity="center"
    android:orientation="vertical"
    tools:context=".MainActivity">

    <EditText
        android:id="@+id/edit_text"
        android:layout_width="wrap_content"
        android:layout_height="wrap_content"
        android:ems="10"
        android:hint= "Enter first number"/>

    <EditText
        android:id="@+id/edit_text1"
        android:layout_width="wrap_content"
        android:layout_height="wrap_content"
        android:ems="10"
        android:hint= "Enter second number"/>
</LinearLayout>
Design UI:
Step 3: Create Image Button in MainActivity.kt file
We will declare a variable imageButton to create ImageButton.
val imageButton = ImageButton(this)
imageButton.layoutParams = LinearLayout.LayoutParams(
    ViewGroup.LayoutParams.WRAP_CONTENT,
    ViewGroup.LayoutParams.WRAP_CONTENT
)
then, set the image resource for the button using
imageButton.setImageResource(android.R.drawable.ic_menu_close_clear_cancel)In the end, add the button into LinearLayout using
val linearLayout: LinearLayout = findViewById(R.id.main)
linearLayout.addView(imageButton)
Other process similar to manually adding the Image Button in the layout.
MainActivity.kt
package org.geeksforgeeks.demo

import android.os.Bundle
import android.view.ViewGroup
import android.widget.EditText
import android.widget.ImageButton
import android.widget.LinearLayout
import android.widget.Toast
import androidx.appcompat.app.AppCompatActivity

class MainActivity : AppCompatActivity()
{
    override fun onCreate(savedInstanceState: Bundle?)
    {
        super.onCreate(savedInstanceState)
        setContentView(R.layout.activity_main)

        val editText: EditText = findViewById(R.id.edit_text)
        val editText1: EditText = findViewById(R.id.edit_text1)
        val imageButton = ImageButton(this)

        imageButton.layoutParams = LinearLayout.LayoutParams(
            ViewGroup.LayoutParams.WRAP_CONTENT,
            ViewGroup.LayoutParams.WRAP_CONTENT)

        imageButton.setImageResource(android.R.drawable.ic_menu_close_clear_cancel)

        val linearLayout: LinearLayout = findViewById(R.id.main)

        // Adding ImageButton in LinearLayout
        linearLayout.addView(imageButton)

        imageButton.setOnClickListener {
            val first = editText.text.toString().trim()
            val second = editText1.text.toString().trim()

            if (first.isEmpty() || second.isEmpty()) {
                Toast.makeText(this, "Enter both numbers", Toast.LENGTH_SHORT).show()
            }
            else {
                Toast.makeText(
                    this,
                    "Result: " + (Integer.parseInt(first) * Integer.parseInt(second)),
                    Toast.LENGTH_SHORT
                ).show()
            }
        }
    }
}