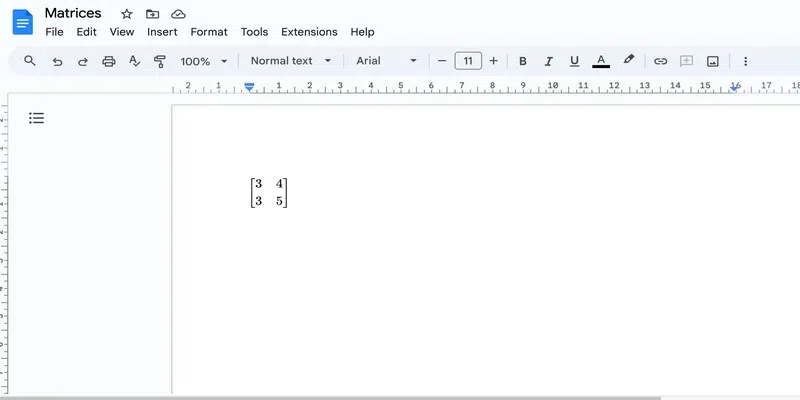
Creating matrices in Google Docs can be essential for presenting mathematical data, equations, or scientific information clearly and professionally. You can insert them using equations for simple two-row matrices, tables for customizable layouts, or add-ons like Hypatia for advanced formatting. Each method keeps your data organized and visually neat.
How to Make a Matrix in Google Docs by Using Equations
You must use this method to insert a matrix in Google Docs only when your matrix contains two rows. Follow the steps to learn how to insert a matrix in Google Docs.
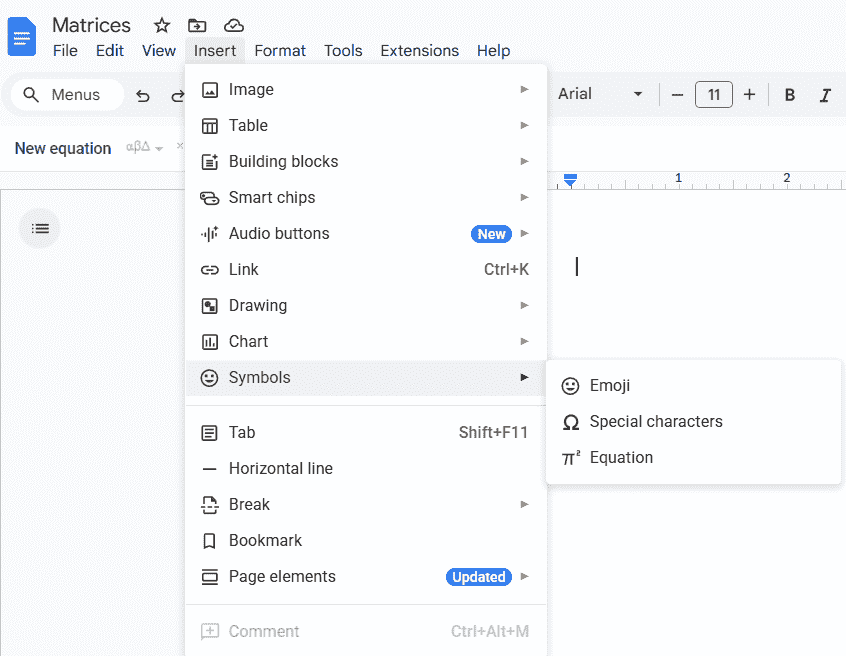
Step 1: Go to Insert and Select Equations
Go to the "Insert" tab and click on the Equation option.
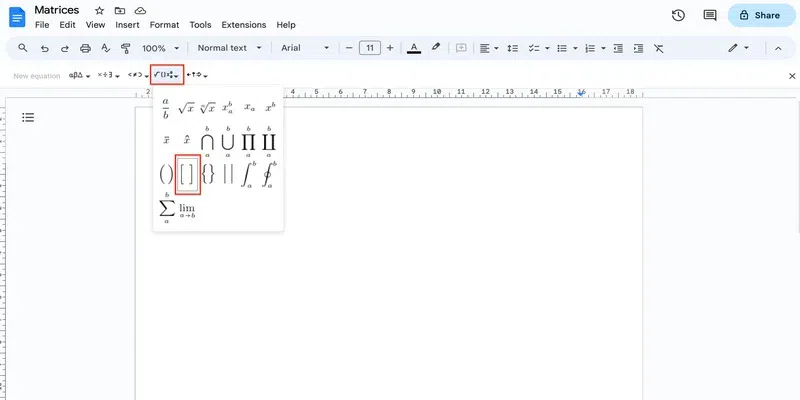
Step 2: Click on “Mathematical operators” and select “Square brackets”
In the equation ribbon that opens, go to the Maths operation drop-down and click on the square brackets to insert them.
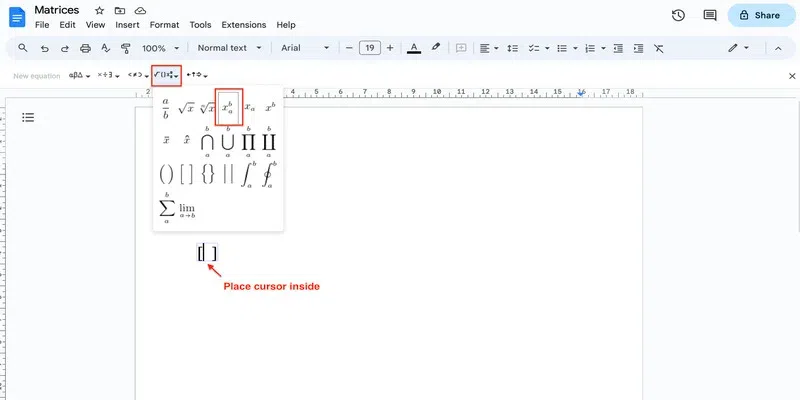
Step 3: Go to “Mathematical operators” and Select “xba”
If the matrix contains only 1 row, you can simply type the values with spaces:

But for getting two rows, you must place the cursor inside the matrix and then select the xba equation from the Maths operation drop-down.
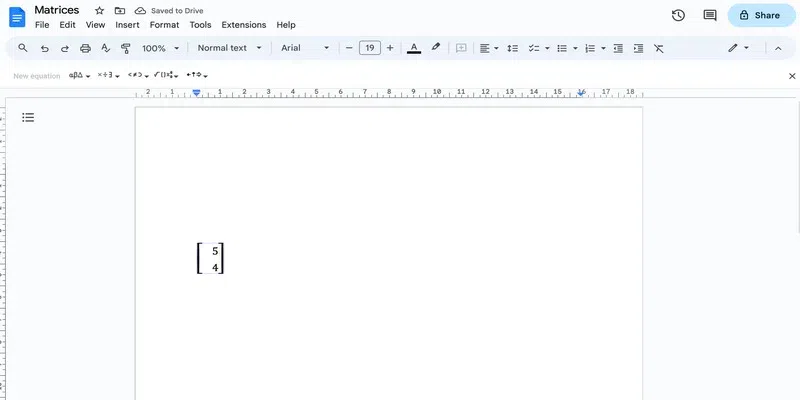
Step 4: Enter the numbers
To add the first column, click on the right arrow on your keyboard so that the cursor moves to the subscript. Type the first value. Then insert the second Value
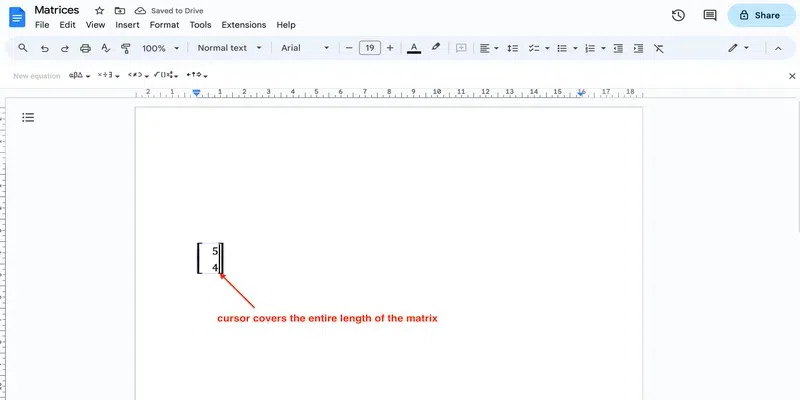
Once that's done, press Enter. You will see that the cursor changes to cover the entire length of the matrix:
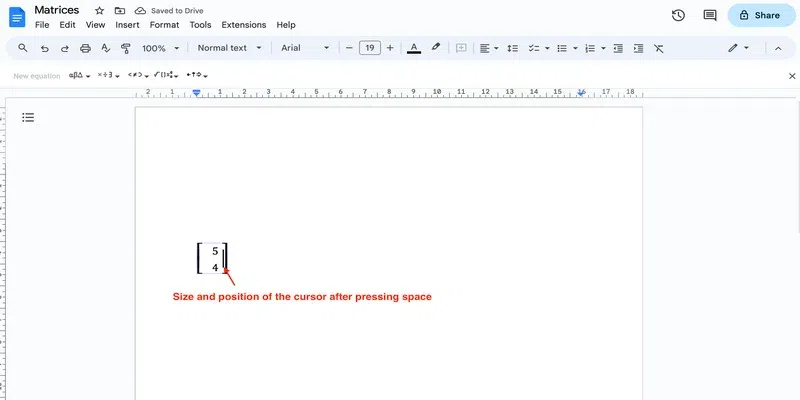
Step 5: Press the Spacebar
First press space so that the cursor looks like this:
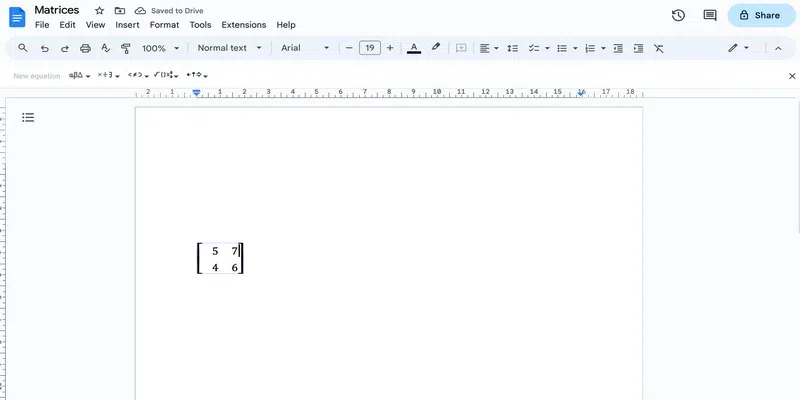
Now, you can repeat the step 4 to add more columns in the matrix:
How to Make a Matrix in Google Docs Using Tables
Using equations to insert a matrix in Google Docs is quite easy. However, they are quite limited in the way that they only allow us to add 2 columns to the matrix. Thus, in order to add as many columns and rows as you desire, you can use tables to insert matrix in Google Docs.
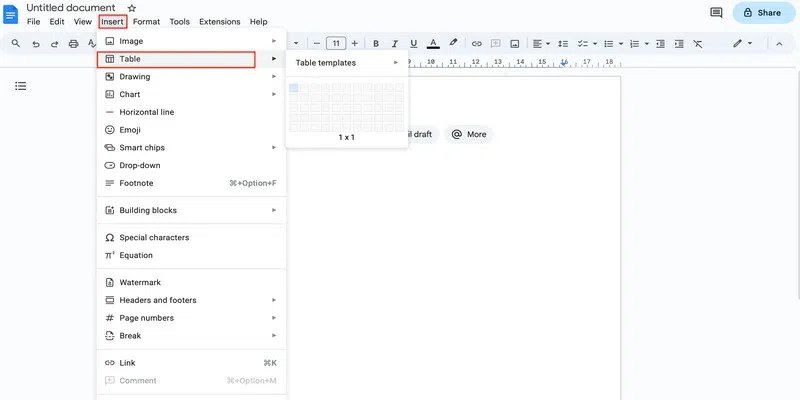
Step 1: Go to Insert and Select Table
Go to the "Insert" tab and insert a table.
Tip: Insert only one row and keep the number of columns two extra than the number of columns you want in the matrix.
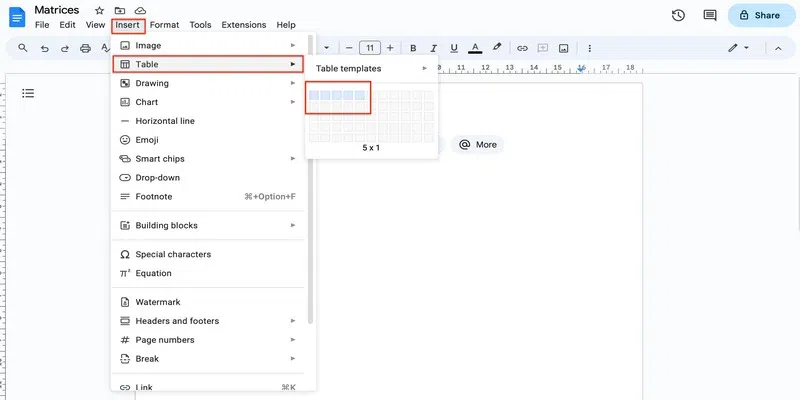
Step 2: Select the table size
Since we are creating a 4 x 3 matrix here, we need 3 columns plus 2 more. So, we will insert a 5 by 1 table.
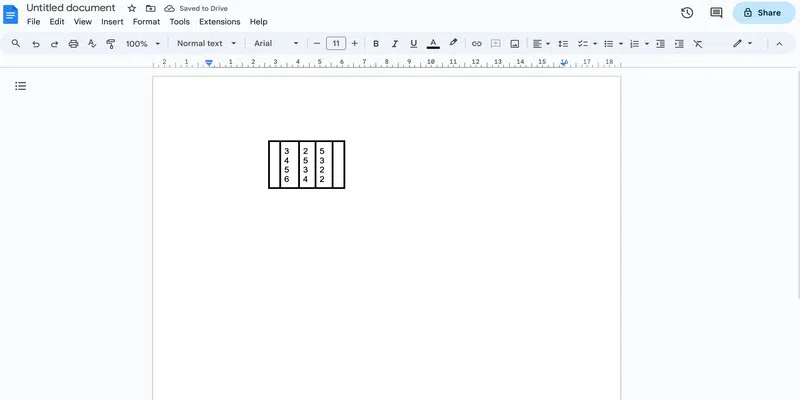
Step 3: Add the numbers
Insert the values in the table using the enter key in this manner:

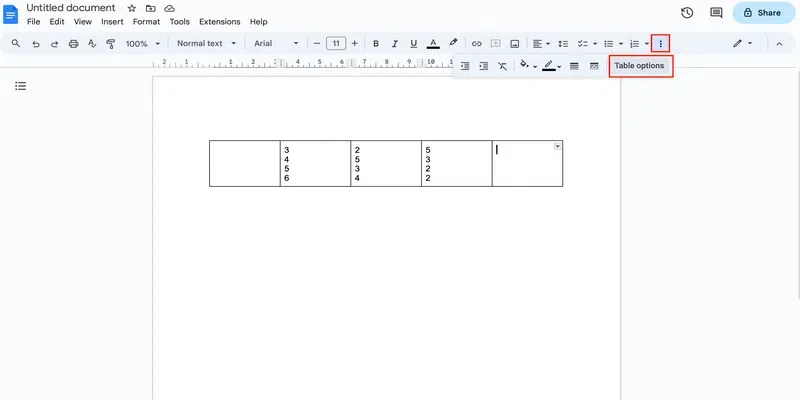
Step 4: Increase the width of the table border
Click anywhere inside the table and go to Table options by clicking on the three dots in the top-right corner.
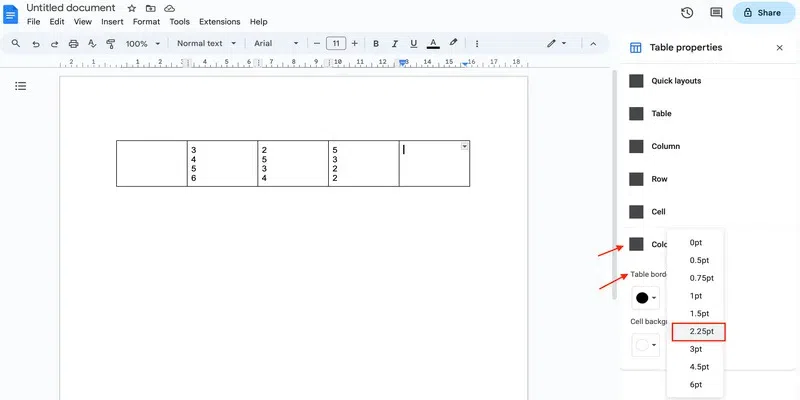
In the side pane that opens, click on the Color drop-down and select thickness from the Table border drop-down
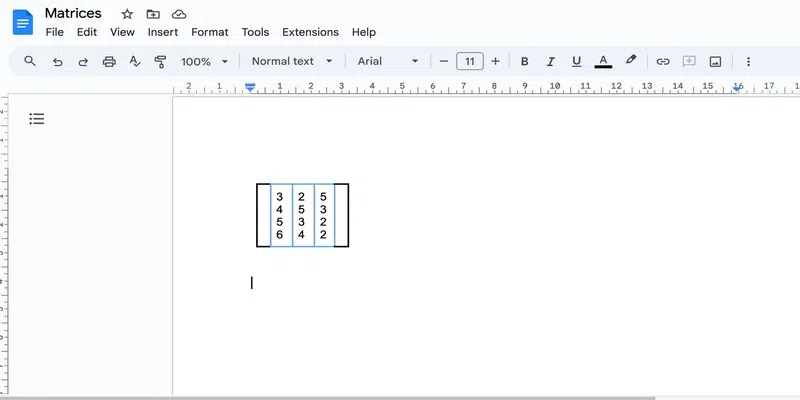
Step 5: Compress the columns
Hover over each column border and once it changes to an arrowhead, drag the border to bring the matrix close together.
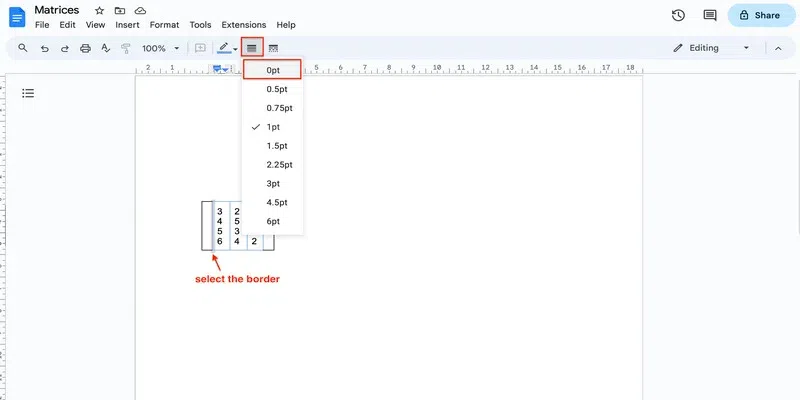
Step 6: Remove the inner borders
To get a matrix structure, you must now remove the column borders highlighted below:
To remove a border, simply click on it, and choose 0pt from the Column Border menu in the ribbon.
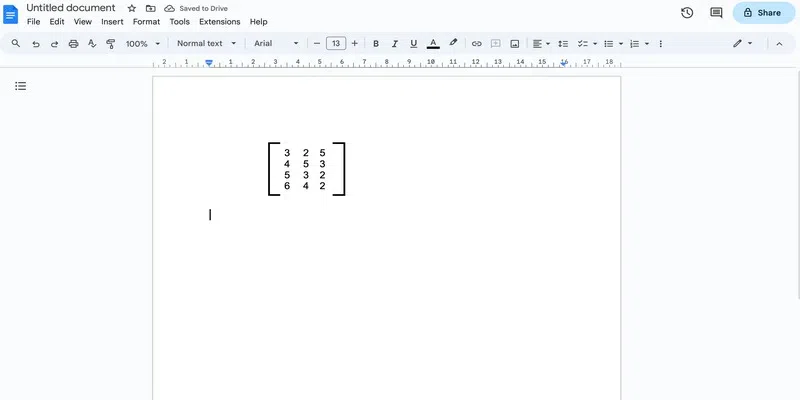
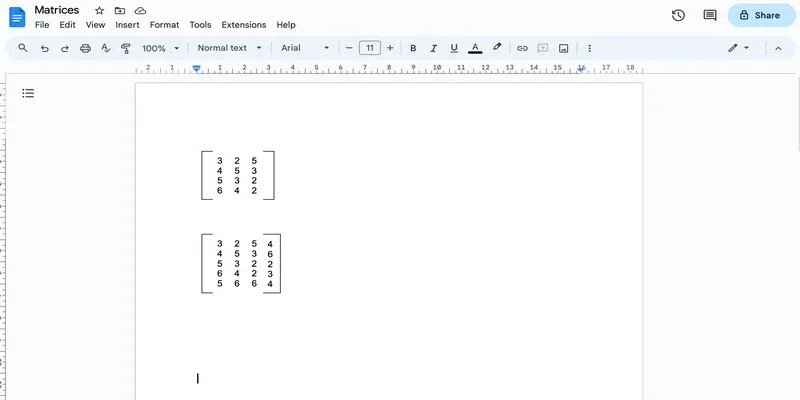
And there you have your matrix:
Note: Although this might appear a time consuming method, you only have to do it once. For inserting more matrices, simply copy paste the matrix and change values. You can even enter more rows and columns in the matrix after copy pasting it.
How to Make a Matrix in Google Docs by Using a Free Add-on
Now here are steps to make a make a matrix in Google Docs:
Step 1: Go to the Google Workspace marketplace
Follow this link to go to the Google Workspace Marketplace.

Step 2: Search for the Hypatia and create an extension
Search for Hypatia create (an extension) and click on the first extension that shows up.

Step 3: Install the extension
Click on the "Install" option to start the installation. Sign in and give permission to allow the download like you normally do.

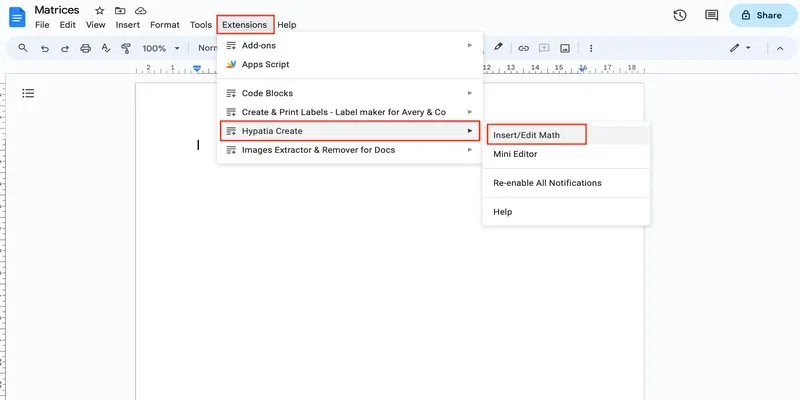
Step 4: Go to the Insert option
Go to the Google Docs file and open the Hypatia create extension drop-down from the Extension tab. Choose the Insert/Edit Math option from the drop-down.
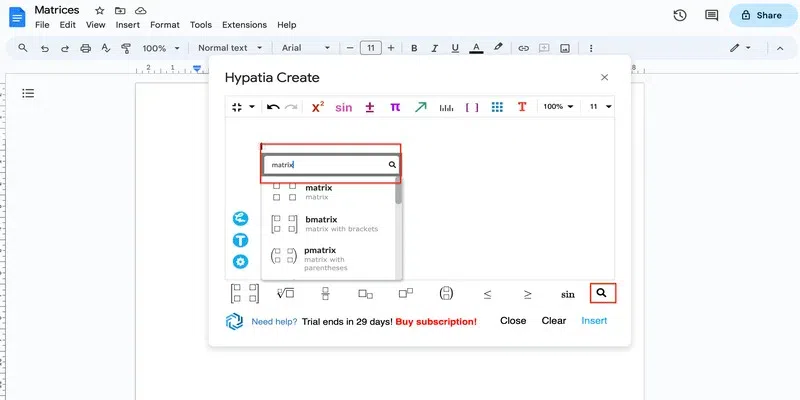
Step 5: Search for the matrix
In the dialog box that opens, click on the search icon present at the bottom right corner and search for matrix.
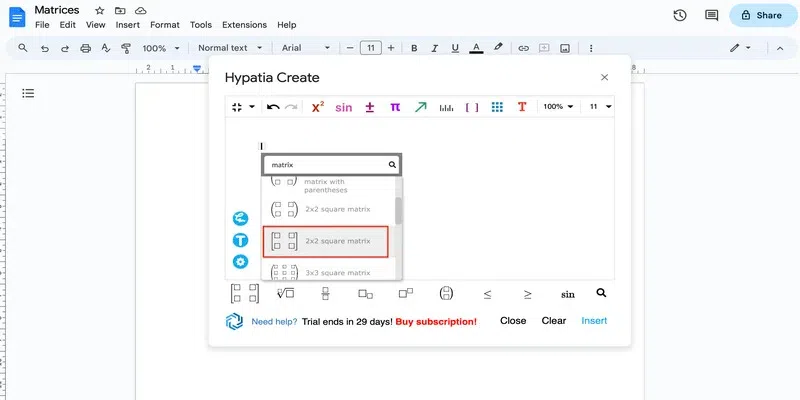
Step 6: Insert the matrix
Scroll to see the available matrices and click on the one you wish to insert and click "Insert".
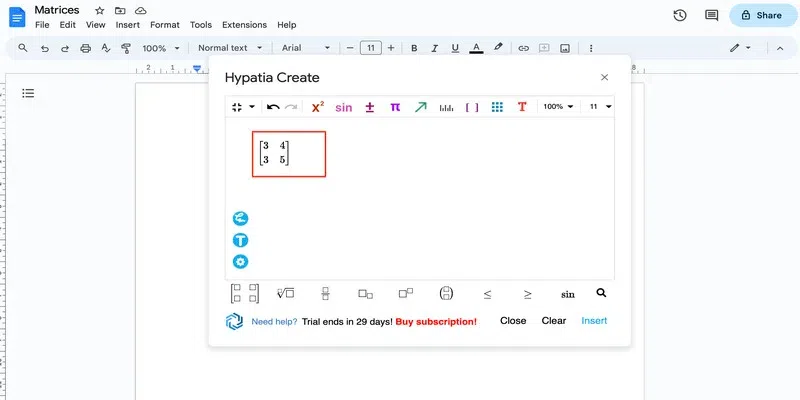
Step 7: Add values
In the dialog box itself, you can add the values of the matrix. Use the arrow keys to move between the different indices.
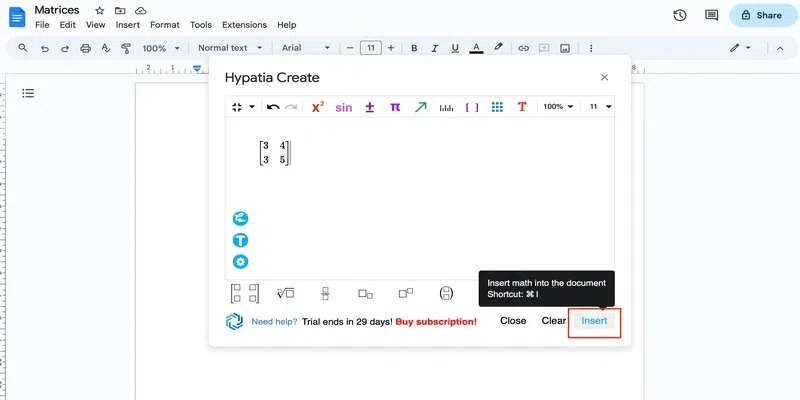
Step 8: Click Insert
Once you are satisfied with the matrix, insert it in the Google Docs using the Insert option present at the bottom right corner.
And here you have your matrix: