Page and section breaks in Google Docs are essential tools for organizing and structuring documents. They allow you to control where content begins on a new page or in a new section, making your document more professional and easier to navigate.
Steps to Insert Page Breaks in Google Docs
Step 1: Launch Google Docs
To begin with, adding page breaks in Google Docs, Launch Google Docs on your web browser.
Step 2: Open the Document
Access the document where the inclusion of page breaks is required. Additionally, there's the option to generate a new document or alternatively, open an already existing one.
Step 3: Choose the Region for Applying Page Breaks
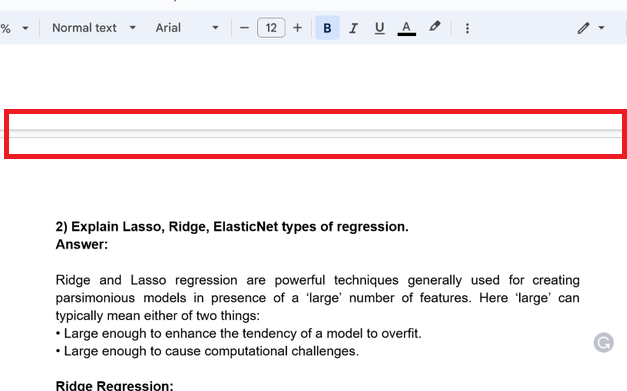
Once the document is opened, proceed to select the specific location within the document where the Page Break needs to be inserted. In the screenshot below, the designated area has been highlighted, indicating that the Page Break will be implemented at this point.
Step 4: Click on Insert
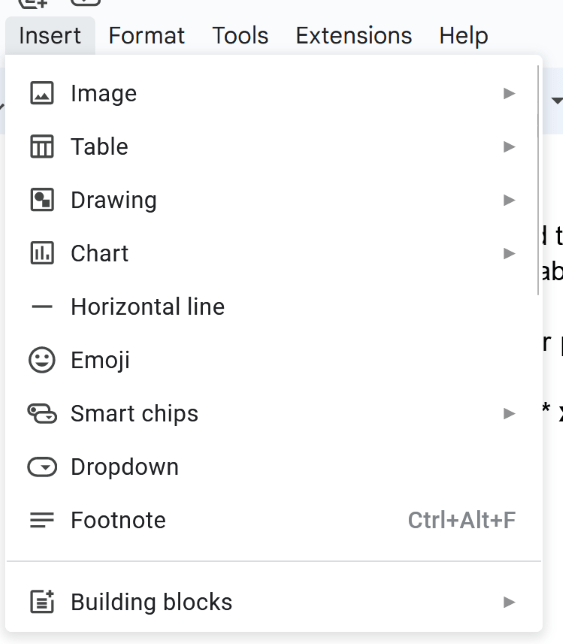
To incorporate page breaks within the content, it's necessary to either click on or access the "Insert" tab located in the upper toolbar of the main interface or on the Google Docs website.
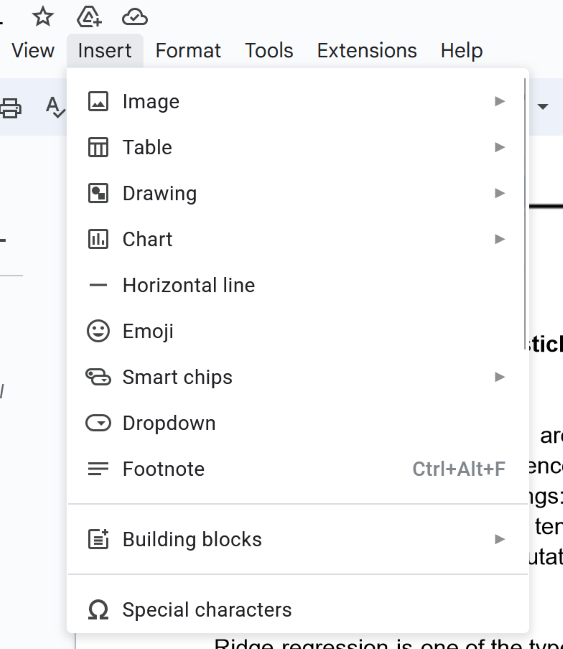
Step 5: Select Break and Choose Page Break
Now you will encounter a dropdown menu containing a range of different options. Scroll through the options and locate the "Break" option, then proceed to click on it. Once clicked, a subsequent dropdown menu will appear, presenting various alternatives. One of these options is the "Page Break." Make your selection accordingly.
Shortcut Key
- You can also insert a page break by pressing "Ctrl + Enter"

Step 6: Preview Page Break
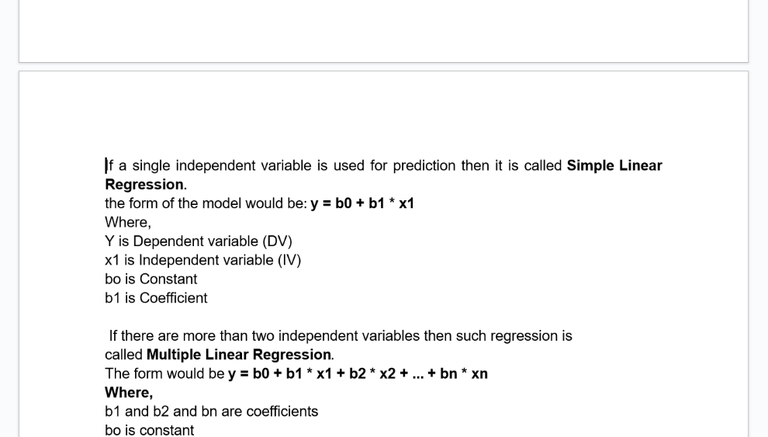
Upon selecting the option, the Page Break will be seamlessly incorporated. Preview the designated content area, which will now appear on a fresh page, resulting in an alteration to the overall structure and layout.
Steps to Insert a Section Break in Google Docs
Section break in Google Docs is one of the features that provides the functionality, which is quite similar to a page break. The section break, helps us to divide a particular page in our document into multiple sections or subparts. The steps for inserting a section break in Google Docs are stated below:
Step 1: Open the Google Document
Begin by accessing the document where a Section Break is required. You also have the option to either create a new document or open an existing one. Next, identify the specific region from which you intend to insert the Section Break.
Step 2: Click on Insert
Once you've opened the necessary document, proceed to select the "Insert" Tab located in the upper menu of the Google Docs interface.
Step 3: Select Break and Choose Section Break Next Page or Continuous
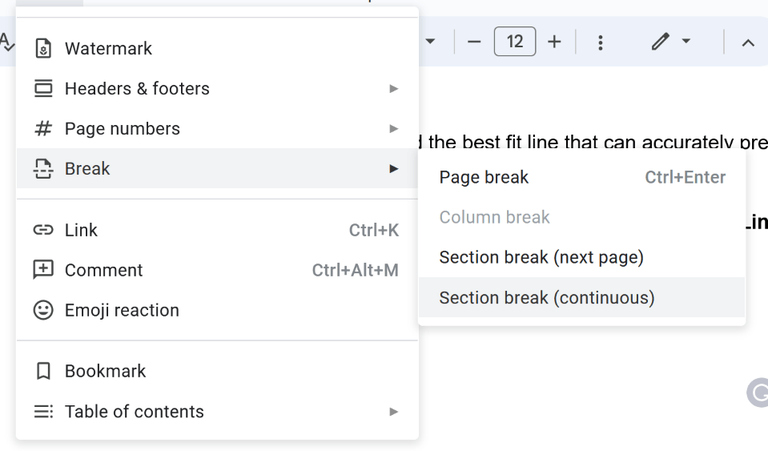
Upon clicking the "Insert" tab, a variety of options will appear in the drop-down menu. From the options, choose "Break." Within the "Break" option, select the sub-option labeled "Section Break." It's important to note that there are two distinct types of section breaks available.
What is Section Break Next page
The next section will start on the following page of our document.
What is Section Break Continuous
The section break will be inserted within the same working page.
Step 4: Preview Section Break is added successfully
Now, take a moment to preview and confirm that the aforementioned steps have been successfully implemented in your document.
Steps to Show Page Breaks in Google Docs
Step 1: Click on the View Tab
To make the Page Breaks visible in our Google Docs. Navigate to the top menu bar of Google Docs and click on "View".
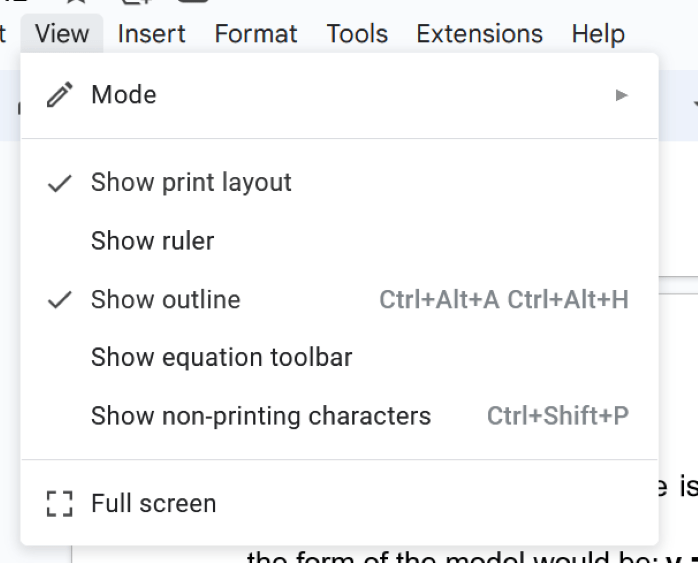
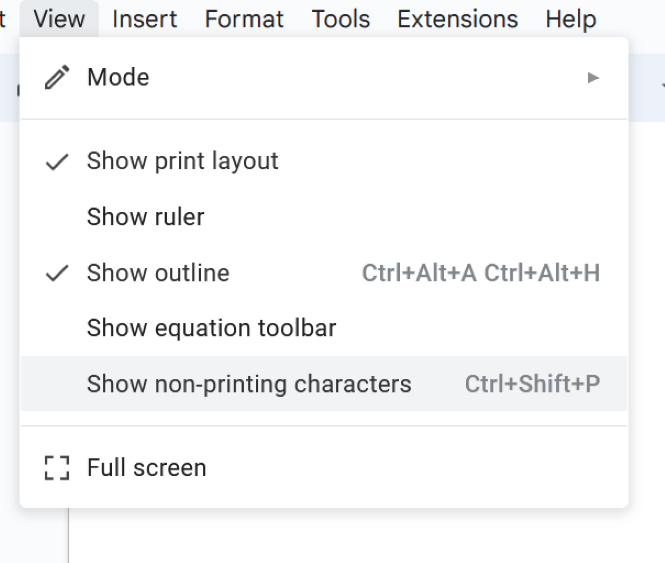
Step 2: Select Show Non-Printing Characters
After selecting the "View" tab within the sub-options, proceed to choose and enable the "Show Nonprinting Characters" option.
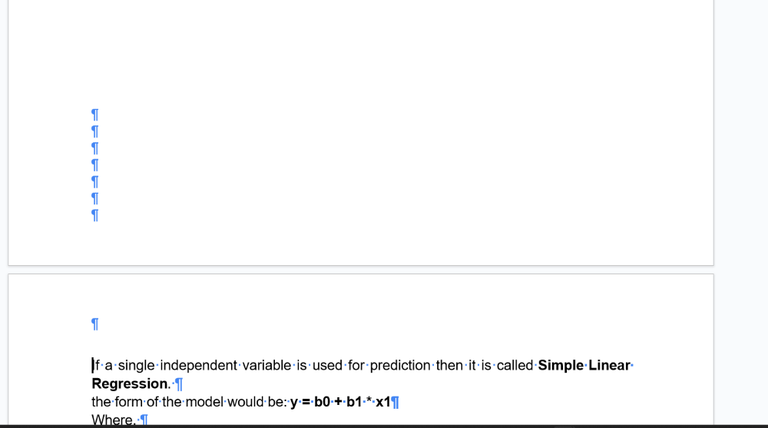
Step 3: View the Breaks
After clicking on this option, we can easily view the page breaks, which are added to our document in Google Docs.
Steps to Remove Page Breaks and Section Breaks in Google Docs
Step 1: Open the Document
We need to open the document in which we need we need to delete the page and section break. We can open the existing document present on our Google Account, or we can also upload it from our local device.

Step 2: Navigate to the Break Section and Place the Cursor
Once you've opened the document, navigate to the section where you've added a break. Then, position your cursor immediately after the page or section break.
Step 3: Use the Backspace Key on Windows
After repositioning the cursor correctly, proceed to press the backspace key located on your keyboard. Keep pressing this key until the page break or section break is entirely removed from your document.
Shortcut key for Mac: Use "Fn+ Delete” to Delete Page and Section Breaks
-768.png)