Adding drawings in Google Docs makes documents more interactive, visually appealing, and easier to understand. You can create and insert drawings directly in your document or from Google Drive.
How to Draw in Google Docs
Drawing in Google Docs can be incredibly useful for enhancing communication and adding creative touches to your document. We can draw in Google Docs in 2 easy and simple methods.
- Method 1: Create a Drawing in Google Docs
- Method 2: Insert a Google Drawing from Google Drive in Google Docs
Method 1: Create a Drawing in Google Docs
To draw in Google Docs, follow the steps given below:
Step 1: Open Google Docs and Create a New Document
Open Google Docs and create a new document.
.jpg)
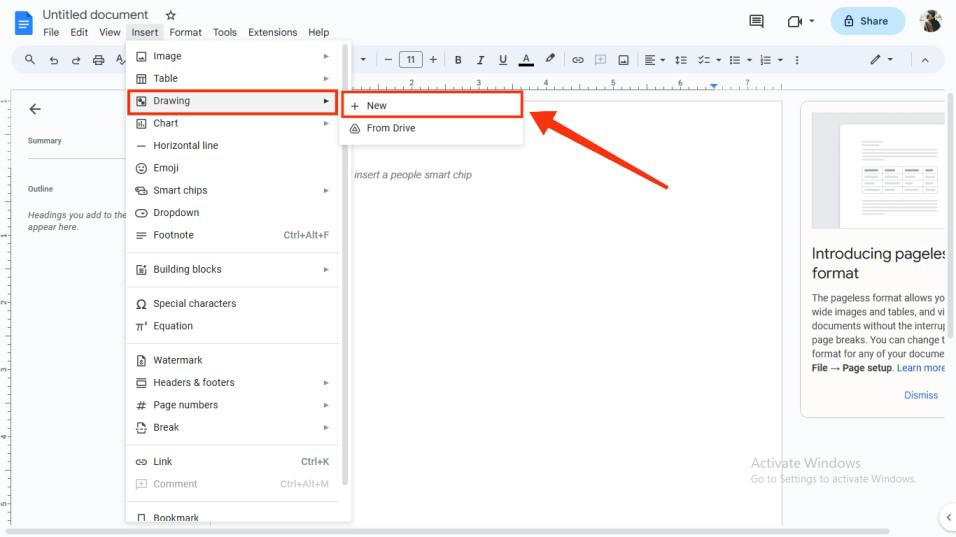
Step 2: Click on Insert and Select Drawing
To integrate the drawing section into your Google Doc, Navigate to the top menu, Click on "Insert" then Choose "Drawing" from the dropdown menu. Select "New" to generate a fresh drawing within Google Docs. This process enables you to seamlessly incorporate and apply your drawings to your Google Doc.
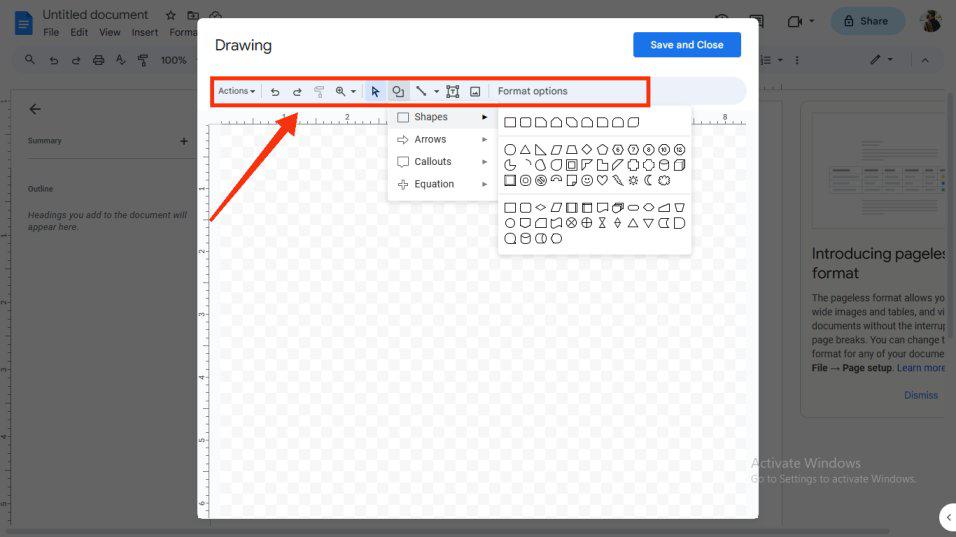
Step 3: Draw your Drawing
- After accessing the drawing section, you will notice a small window containing various drawing tools that appear.
- With the assistance of these tools, you can create your desired drawings.
- Additionally, you have the option to utilize different shapes located in the toolbar by clicking on the shapes icon.
- Moreover, you can execute various drawing actions like Word Art and more from the "Actions" tab, conveniently situated in the toolbar.
Step 4: Click "Save and Close"
After completing your drawing, locate the "Save and Close" button positioned at the top and click on it. You have now inserted shapes in Google Docs and this action will preserve your entire drawing and seamlessly integrate it into your Google Doc.

Step 5: Drawing Completed
Clicking the "Save and Close" button will display your drawing in your Google Doc and ensure automatic saving to your Google Drive.
.jpg)
Method 2: Insert a Drawing in Google Docs
In this process, we would begin by creating a Google drawing and then saving it to Google Drive and later inserting the Google drawing image in Google Docs.
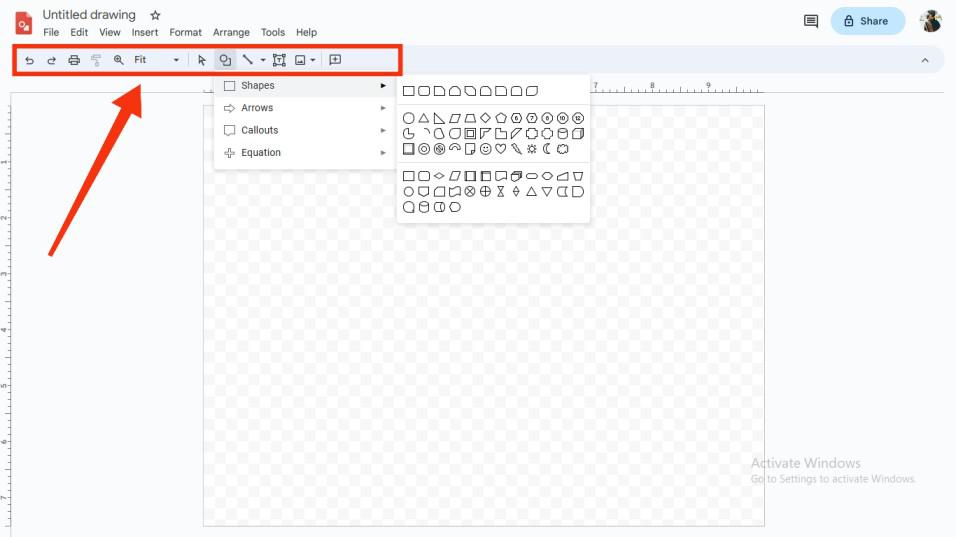
Step 1: Open Google Drawing
Open Google Docs and create a new document. Now, repeat the previously mentioned steps by navigating to the top menu bar, clicking on "Insert," and then selecting "Drawing." Choose "New" to initiate the drawing process.
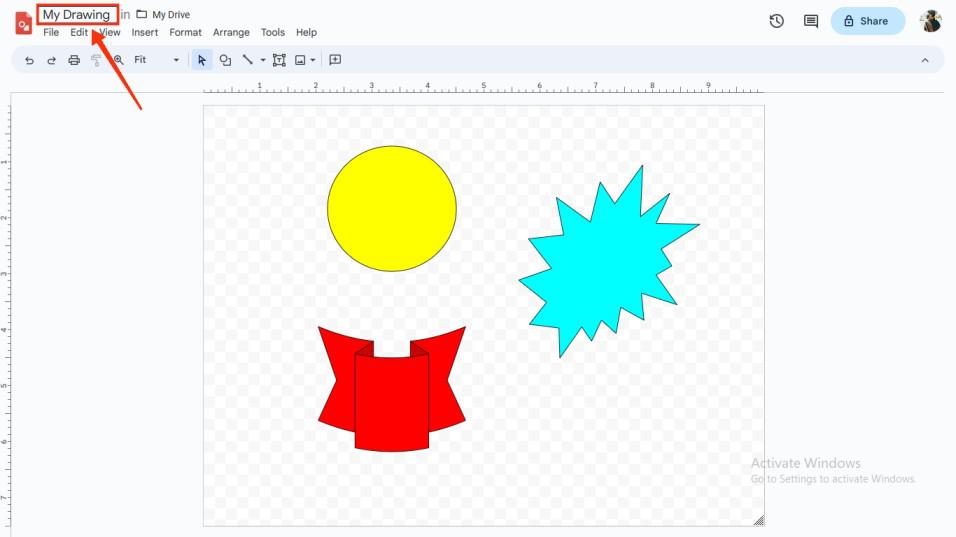
Step 2: Name your Drawing
After finishing your drawing, give a Name to your drawing at the top-left corner of the interface. Your drawing will be automatically saved in Google Drive. By this you can also know how to add shapes in Google Docs.
Note: When all the process in Google Drawings has been completed go back to the Google Docs to perform the rest of the process.
Step 3: Click on Insert and Select Drawing from Google Drive
- Once you've completed your drawing, proceed to open Google Docs. Now, you need to insert the drawing you previously created in Google Drawings.
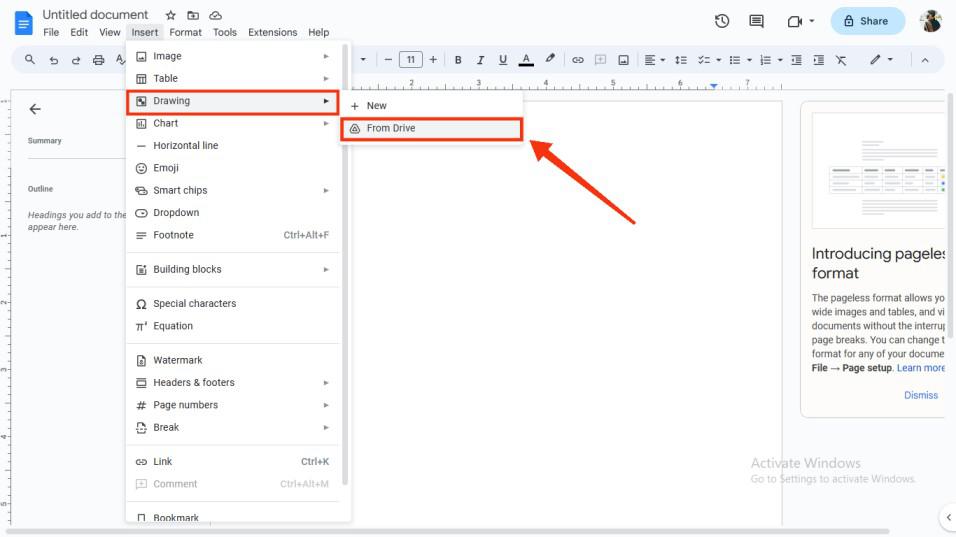
- To insert the drawing, click on the "Insert" button situated on the toolbar from which a dropdown menu will appear then Select "Drawings" followed by "From Drive."
- This action will redirect you to your collection of saved drawings on Google Drive.
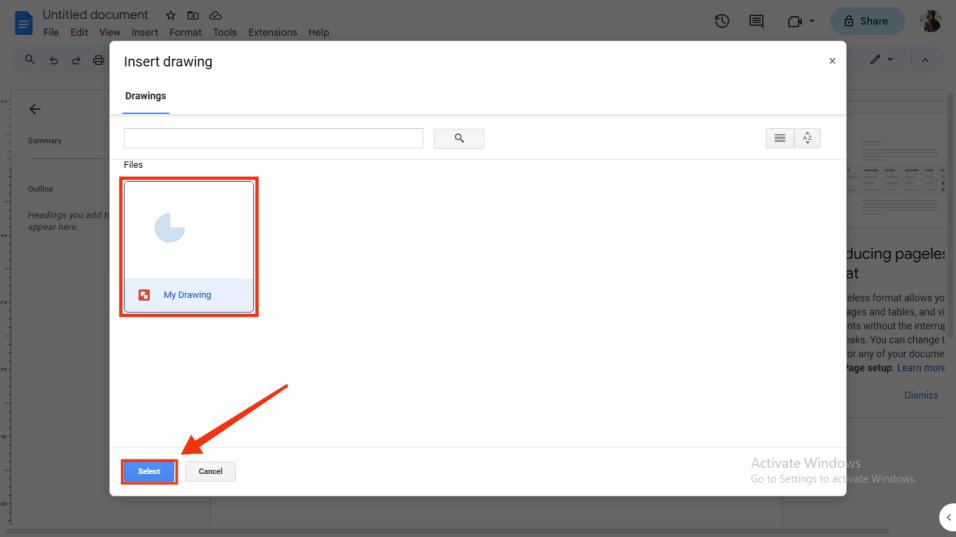
Step 4: Select your Drawing and Click on Select
At this point, a collection of your saved drawings in Google Drive will be displayed. From among them, choose the specific drawing you wish to insert into your Google Docs. Once you've made your selection, click on the "Select" button.
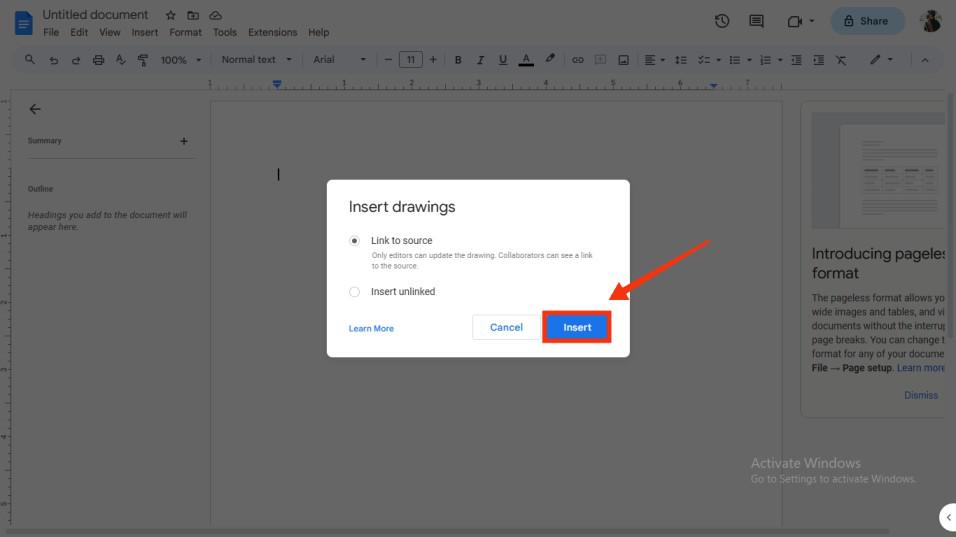
Step 5: Click Insert
Now after selecting the drawing from Google Drive, you will be asked to choose from two options to insert drawings either by "Link to source" or "Insert Unlinked", select the option and click on Insert. In this article, we have chosen "Link to source".
Step 6: Preview Inserted Drawing on Google Docs
Upon clicking the "Insert" button, your drawing will seamlessly become a part of your Google Doc.
.jpg)